Pin It
Hey y'all. I hope you're having a good day! Our rain moved out overnight (thankfully, the slushy white stuff left with it) however, you know what pushed it out of the way? A lot of cold windy air! :-( Yep, it's about 20 degrees colder today, had to get out the down knee length jacket again. Thank goodness it's teal, because if it was white I'd either look like the abominable snowman or a huge marshmallow on legs! Hopefully you're warm and dry and gearing up for the weekend.
First things first though... I just wanted to say a Big Thanks to everyone who has taken time out of their busy day to stop by here and spend a few minutes. I went over 1,000 page visits yesterday which is Amazing to me. When I started this mid-August of this year I had NO expectations of hitting 1000 in less than 4 months. In fact, I couldn't imagine hitting that in the first 6 months or year, but am so thankful to you all for helping me to reach this point so quickly! Hopefully, you'll continue to come back and we'll hit the next milestone soon too!
I don't have anything original of my own today to show you, but I wanted to tell you how Stampin' Up helped make my Birthday extra special this year.
First off- You've heard me talk about my friend and teammate, April, here before. I first met her at a monthly "Stampin at the Firehouse" event my upline Robin holds. She's so sweet! Then she became one of our team members and now she's a friend and I couldn't be happier. We're friends and stamping buddies as well as "Scaredy Cats", but we're working on the Scaredy Cat part together. She is an Amazing Stamper and I love not only stamping with her but swapping cards with her. How excited was I when I got a Birthday Card from her in the mail? "So Excited!" would be the answer! Here's what she made just for me-
I love the style! I've never had one like this before, I'm definitely going to CASE this style! Here's how it opens up-
How sweet is she? This made my day!!!!! I keep trying to convince her to do a blog & start out like I did with just a post or two a week because she does such Amazing work. Don't you think that would be a good idea?
Another thing that S.U. did was introduce me to lots of new people and not only do I have a great first upline (Robin Merriman ,who I love more than Rainbows and Glitter & you know that's a LOT!!!), but my uplines above that are pretty amazing too! I am a downline in Remarkable Stampers (Jan Wakeland Rocks!) and Proverbial Stampers (Connie Heisey) too. Last month there were two events on one day, one here in my backyard and one over 2 1/2 hours away. I went to the one here locally and had a blast! The other had a "long-distance" option which I sent a request for, but I didn't hear anything back regarding payments or anything so, truthfully I just figured I must have been too late or she must have been too busy getting ready to respond. I saw the team e-mail showing all the neat stuff they got to make and do, and the neat gifts Connie had made for everyone. It looked like they had a blast, but truthfully I had forgotten about the whole "long-distance" thing since I had never done anything like that before.
Well, I came home last Friday night after the second job tired but needing to get ready for Saturday's stampcamp and saw that Mr. UPS had been by with my supplies. Surprisingly, Mr. Postman had also made a delivery and had left a box on my doorstop. As it was two days before my birthday, I'm thinking "Awwww, someone sent me a birthday present!" Well, they did and it was Connie! It was my "long-distance" package that I had forgotten about. I couldn't believe all the Cool Stuff! Lookie what I got!
How pretty is this? She made them for everyone that came. They're Simply Adorned Charms with our initials and a little flower and a pearl. It has the Victorian Lace Ribbon on it and a lobster claw clasp which I used to attach it to my own necklace. It was packaged with a little blue ribbon. I wore it Saturday for my stampcamp. So Sweet!
Next up- This Advent Calendar made with the new stamp set and Peekaboo punch-
Next- Three pretty cards-
Next- Look at this Christmas Album-
And here's the inside-
And lastly look at this cool little Post-It Note Holder-
How Cute is this? Here's the inside-
This is such a cute and do-able idea. I Love It!
Can you believe all this cool stuff just showed up on my doorstep for being part of a team and just living more than 2 1/2 hours away? WOW! They did even more and got even more at the actual event and went to dinner in a limo! See how S.U. helped make my Birthday even better? None of this would have happened without S.U. Cool, Huh? If you'd like to join and meet great new friends and get to go to fun events, or have fun events arrive at your doorstep, let me know. I'll be glad to help you out!
Well, that's all I have for today. I hope you enjoyed my pictures and maybe something here will inspire you during your creative time.
Not sure if I'll be here tomorrow. I have the day off but it's kinda packed. How does that happen? You take a day off from work and it ends up busier than a work day! Actually I'm gonna start out by sleeping in, but then it's mostly a Shan day. Gonna finalize everything for Saturday's stampcamp then lunch with my sis, followed by a haircut and style, a mani/pedi and then getting ready for a Holiday party for a group of some of my all-time favorite people. It's gonna be a good day.
If I don't see you back here tomorrow, I hope you have an Amazing weekend filled with friends, family, fun and of course plenty of time for designing and crafting.
I hope to see you back here soon,
Till then,
Be Safe,
Shan
Pin It
Where even Design Scaredy Cats can have fun creating and learning new design techniques. Come look around, leave a comment and let me know what you think. I'm an Independent Stampin' Up Demonstrator and I love what I do. If you like to have fun, create or want to learn new techniques, stop in and have a look or drop me a comment. I'd love to hear from you!
Thursday, December 8, 2011
Wednesday, December 7, 2011
End of the Week Technique #11 Using Decor Elements
Pin It
Hey Y'all! Well, we are back to rainy and gloomy here in the DMV and the cold and yes even some of that awful white stuff is enroute! YUCK! At least it is warm for now but we are expecting about a 20 degree drop in temperatures by the end of the day. I'm thinking that means I'm going to be pretty miserable coming home from class tonight. I sure hope you are somewhere warm and dry. :-)
I guess with it being December and the weather turning cold and yes, I guess even with the coming of the dreaded 4-letter stuff I have to admit winter is finally here. I guess I should make the most of it. With that in mind, I did a little planning ahead and while I was getting ready for last weekend's stampcamp I tried something new, Decor Elements.
Have you tried them yet? I have to admit I got 2 when I joined over a year ago, and had the best intentions of doing something with them and just haven't found the time. We have these in so many different styles and for different occasions. Some even coordinate with our stamp sets. You can apply them to all sorts of different surfaces, to personalize your projects or even just your personal space. They can be temporary or permanent, you decide. I've seen lots of different projects and thought "Wow, I like that" or "I could do that" but somehow time slipped by and it just never happened.
However, when we were at our Remarkables team meeting a few weeks ago, Jan had decorated some glass bricks, and coffee mugs with them and they were sooo cute, I decided I just had to break down and finally give it a try! After all what was the worst that could happen right?
So I went to my local big box store, you know the one where you get a 40% off or 50% off coupon just about every week and then they reward you with another one just for shopping with them, just to lure you back in, sneaky how they do that! You can find the glass blocks in 2 different sizes lg for about $11.99 and small for about $6.99 (before coupons) and they have a little plastic piece in the bottom that pops out and you can fill them with what ever you would like to. For the Holidays, jingle bells, little ornaments, wrapped holiday candies would be pretty too. I thought sparkling lights would be pretty.
Well, sure enough, I was able to get one of the large ones for 50% off so I figured that would make it worth giving this a shot. I drove over to the big box store with the big dot and got a box of 100 white lights on a white cord for under $3.00 and went home to wait for Mr. UPS to bring my big brown box of goodies.
When I got home last Friday night from my second job, I was tired but excited because Mr. UPS had indeed been by my house. Lets see, I had to finish getting the house straightened up, get the finishing touches done for Saturday's stampcamp and I wanted to get my glass block made so I could show it to my campers.
*TIP* When doing something for the first time, read all the directions thoroughly. A couple of times is probably a good idea, especially if you're tired.
*TIP* If it says you should mark the alignment with tape, it's probably stated for a reason. I'm just saying. Ask me how I know!
*TIP* This is probably not the project to do best when you are tired.
So I get my block all cleaned off, get the sticky label off and get it all shiny and then look at the directions. I have to tell you it was about midnight, maybe closer to 1 at this point. I'm thinking this is going to be like rub-on tattoos from my childhood. Kinda-sorta, but not exactly.
I used the Jingle All The Way Large Decor Element Sheet for this project. I have to say once I got the transfer onto the transfer sheet, it transferred onto the glass so smoothly. I was really impressed, although I'm not sure why I would have expected anything less from a Stampin' Up product. And, Oh-By-The-Way this stuff is really sticky! You get exactly one chance to make sure you get it lined up just right so I highly recommend you use tape and line up where you want your placement. I didn't do this and my letters are very slightly slanted. I doubt anyone but me would ever notice it, but you know me...Just use the tape for the best results. Enough said.
Make sure when you order your Decor Element that you order an applicator, they don't automatically come with your elements. They are essential to application and if you should ever decide to remove your design you can use them for that as well.
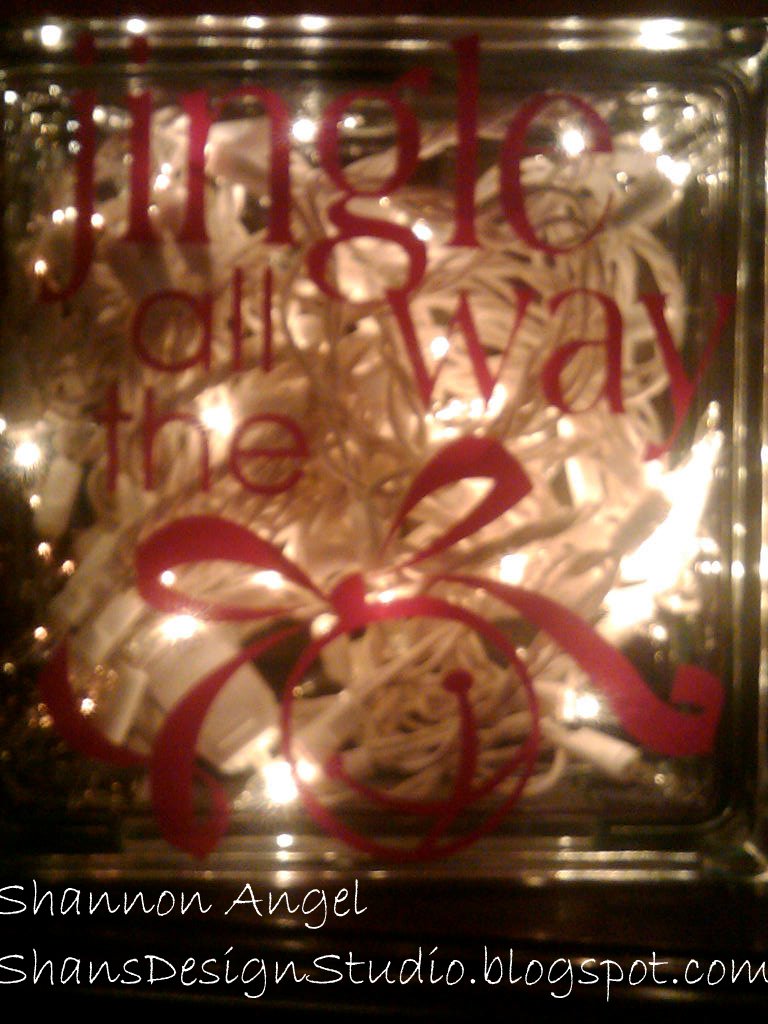
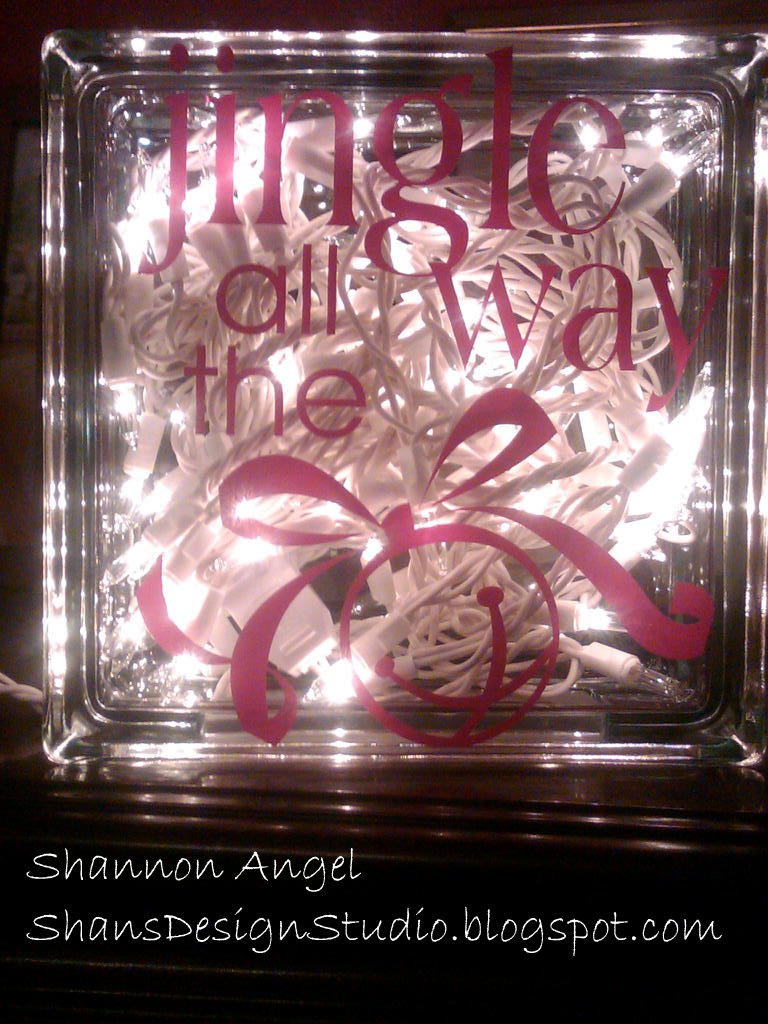
After applying my design I put my lights in and plugged them in and the effect was so pretty! Of course my Studio Assistants really like the flashing lights so I don't leave it on when I'm not around. My campers loved it too. I really wish this had come out better in my pictures but I tried. I may try and take a video tonight and see if I can post it because it's just so pretty, but at least here's a little something.
Isn't it pretty? (See I think the "e" might be just a smidge lower than the other letters.... use the tape, I beg you, use the tape!!!!!)
Here's another picture where the lights were flickering. Sorry, BB's are great for lots of things but not for quick picture taking!
And one more-
I will try to get the video up for you. I'm afraid these pictures don't do it justice.
****** Hey Y'all! I got home tonight after class and filmed this quick little clip for you. Wish I had the time to figure out how to put the music to it, but you'll get the idea!******
At any rate I hope you will try this project or one like it with the Decor Elements. I know I will use them again. For under $18.00 I got a Holiday decoration I will use for many years not only for my business for my home. Would you believe I put it on my sofa table with all my family photos and then sat on the floor and just looked at it and thought WOW!!!!! I did that!!! TOO COOL!!!!
Let me tell you it WOW'ed my campers and I know it will WOW my guests as well. I'm pretty sure you could do the same with your friends and family. Who know's you might just Amaze yourself, and isn't that part of this whole Scaredy Cat Journey?
That's all I have for today. I hope you liked it, but more than that I hope it inspires you to try something new. As always, I would love to see what you try. Send me a pic. If you liked it, I would love it if you left me a comment. It's great when I get to hear from you! Also, if you liked today's card, please feel free to +1 or Pin it. I've added the buttons to my side-bar for your convenience. Friends and Followers are also welcome. :)
If you need to order supplies to make this project or others like it you can get them at my ONLINE STORE 24/7.
Today's supplies-
Jingle All The Way Lg Decor Element
I hope to see you back here soon,
Till then,
Be Safe,
Shan
Pin It
Hey Y'all! Well, we are back to rainy and gloomy here in the DMV and the cold and yes even some of that awful white stuff is enroute! YUCK! At least it is warm for now but we are expecting about a 20 degree drop in temperatures by the end of the day. I'm thinking that means I'm going to be pretty miserable coming home from class tonight. I sure hope you are somewhere warm and dry. :-)
I guess with it being December and the weather turning cold and yes, I guess even with the coming of the dreaded 4-letter stuff I have to admit winter is finally here. I guess I should make the most of it. With that in mind, I did a little planning ahead and while I was getting ready for last weekend's stampcamp I tried something new, Decor Elements.
Have you tried them yet? I have to admit I got 2 when I joined over a year ago, and had the best intentions of doing something with them and just haven't found the time. We have these in so many different styles and for different occasions. Some even coordinate with our stamp sets. You can apply them to all sorts of different surfaces, to personalize your projects or even just your personal space. They can be temporary or permanent, you decide. I've seen lots of different projects and thought "Wow, I like that" or "I could do that" but somehow time slipped by and it just never happened.
However, when we were at our Remarkables team meeting a few weeks ago, Jan had decorated some glass bricks, and coffee mugs with them and they were sooo cute, I decided I just had to break down and finally give it a try! After all what was the worst that could happen right?
So I went to my local big box store, you know the one where you get a 40% off or 50% off coupon just about every week and then they reward you with another one just for shopping with them, just to lure you back in, sneaky how they do that! You can find the glass blocks in 2 different sizes lg for about $11.99 and small for about $6.99 (before coupons) and they have a little plastic piece in the bottom that pops out and you can fill them with what ever you would like to. For the Holidays, jingle bells, little ornaments, wrapped holiday candies would be pretty too. I thought sparkling lights would be pretty.
Well, sure enough, I was able to get one of the large ones for 50% off so I figured that would make it worth giving this a shot. I drove over to the big box store with the big dot and got a box of 100 white lights on a white cord for under $3.00 and went home to wait for Mr. UPS to bring my big brown box of goodies.
When I got home last Friday night from my second job, I was tired but excited because Mr. UPS had indeed been by my house. Lets see, I had to finish getting the house straightened up, get the finishing touches done for Saturday's stampcamp and I wanted to get my glass block made so I could show it to my campers.
*TIP* When doing something for the first time, read all the directions thoroughly. A couple of times is probably a good idea, especially if you're tired.
*TIP* If it says you should mark the alignment with tape, it's probably stated for a reason. I'm just saying. Ask me how I know!
*TIP* This is probably not the project to do best when you are tired.
So I get my block all cleaned off, get the sticky label off and get it all shiny and then look at the directions. I have to tell you it was about midnight, maybe closer to 1 at this point. I'm thinking this is going to be like rub-on tattoos from my childhood. Kinda-sorta, but not exactly.
I used the Jingle All The Way Large Decor Element Sheet for this project. I have to say once I got the transfer onto the transfer sheet, it transferred onto the glass so smoothly. I was really impressed, although I'm not sure why I would have expected anything less from a Stampin' Up product. And, Oh-By-The-Way this stuff is really sticky! You get exactly one chance to make sure you get it lined up just right so I highly recommend you use tape and line up where you want your placement. I didn't do this and my letters are very slightly slanted. I doubt anyone but me would ever notice it, but you know me...Just use the tape for the best results. Enough said.
Make sure when you order your Decor Element that you order an applicator, they don't automatically come with your elements. They are essential to application and if you should ever decide to remove your design you can use them for that as well.
After applying my design I put my lights in and plugged them in and the effect was so pretty! Of course my Studio Assistants really like the flashing lights so I don't leave it on when I'm not around. My campers loved it too. I really wish this had come out better in my pictures but I tried. I may try and take a video tonight and see if I can post it because it's just so pretty, but at least here's a little something.
Isn't it pretty? (See I think the "e" might be just a smidge lower than the other letters.... use the tape, I beg you, use the tape!!!!!)
Here's another picture where the lights were flickering. Sorry, BB's are great for lots of things but not for quick picture taking!
And one more-
I will try to get the video up for you. I'm afraid these pictures don't do it justice.
****** Hey Y'all! I got home tonight after class and filmed this quick little clip for you. Wish I had the time to figure out how to put the music to it, but you'll get the idea!******
At any rate I hope you will try this project or one like it with the Decor Elements. I know I will use them again. For under $18.00 I got a Holiday decoration I will use for many years not only for my business for my home. Would you believe I put it on my sofa table with all my family photos and then sat on the floor and just looked at it and thought WOW!!!!! I did that!!! TOO COOL!!!!
Let me tell you it WOW'ed my campers and I know it will WOW my guests as well. I'm pretty sure you could do the same with your friends and family. Who know's you might just Amaze yourself, and isn't that part of this whole Scaredy Cat Journey?
That's all I have for today. I hope you liked it, but more than that I hope it inspires you to try something new. As always, I would love to see what you try. Send me a pic. If you liked it, I would love it if you left me a comment. It's great when I get to hear from you! Also, if you liked today's card, please feel free to +1 or Pin it. I've added the buttons to my side-bar for your convenience. Friends and Followers are also welcome. :)
If you need to order supplies to make this project or others like it you can get them at my ONLINE STORE 24/7.
Today's supplies-
Jingle All The Way Lg Decor Element
I hope to see you back here soon,
Till then,
Be Safe,
Shan
Pin It
Tuesday, December 6, 2011
A Delightful Q&E Holiday Card and Pictures From This Weekend
Pin It
Hey y'all! Well we survived another Monday and Tuesday is starting unseasonably warm here in the DMV ahead of a cold front and the threat of the white stuff tomorrow night. :-( I am not happy about that at all! You know what I am happy about? Today's card, and pictures!
We had so much fun on Saturday! Can I just tell you what a joy it was to see those ladies so excited about stamping and creating! WOW!!!!! They were AMAZING! Here's D with her cards at the end of the afternoon.
Didn't she do a Great job?!?
Here's J's cards. (She didn't have her "face on" so she wouldn't get in the pic.)
She did a Great job too!
They both picked it right up and were so creative, adding their own touches to their cards, not at all Scaredy Cats, like yours truly. I was soooo proud! They were sooo cute! My friend and team-member April was over helping me out Saturday and we had mentioned CASE'ing and at one point one of the ladies saw something someone else did that they liked and they said "I'm gonna CASE that" We were like proud little momma hens!
Today's card is another one we did on Saturday. It's a CASE from my team member Stephanie Finch from last year. It's a super quick & easy card and it was the first one we did this weekend and the girls knew they were going to be able to handle everything after this.
I love the non-traditional colors, and paper. I started with a base of Poppy Parade. I L-O-V-E this color! So sad it's only around for another 6 months. I hope it will make it into the regular color rotation, it's so beautiful! I used the striped layer from Just Add Cake because it reminded me of the DSP from Candy Cane Christmas last year, which I absolutely loved!
Since you shouldn't punch through two layers of cardstock with our punches this is where my OCD comes in handy. You knew there had to be a use to it besides a reason to laugh at me right? Well here it is. (At least one reason, anyway) I used my Ornament punch to punch out a piece from the DSP, and then laid my DSP down on my base piece and using a pencil lightly traced the outline of the cutout. Now I knew exactly where to place my punch to cut out my base piece. OOOOHHHHH..... AAAAHHHHHHH. Worth the price of admission right there, huh?
Next, take one of the small background stamps from Delightful Decorations and randomly stamp (I know, I said random) with Poppy Parade. I used the snow flake pattern. Then adhere your DSP to your card base, I used Tombow for mine, they will line up just right for you, so nice. Now, once again lightly trace inside the punched out area, you'll need this later.
Next, I chose a stamp from the Delightful Decorations set and inked it up in Poppy Parade and stamped it on Whisper White cardstock and then punched it out using my Ornament Punch. I decorated it with my Two-Way Glue Pen and Dazzling Diamonds and adhered it to my outlined area on the inside of my card with Tombow.
A simple sentiment from Four for the Holidays in Basic Black and this card was done. My ladies this weekend did their sentiments on a Whisper White cardstock as a banner and it looked great like that too. Like I said, Quick and Easy aided by my OCD, who woulda thunk it?
Here's a few more pics of my studio assistants helping out this weekend. Yesterday I showed you Bitty trying to help out. Here's some pics of Deucey. Sunday night I was trying to take pictures of all the cards so I could upload them and I put my "Light Box" down on the table, the key work there being "box". Well, Bitty is not the only one that likes a box. The problem is Deucey forgets he is a 16+ lb Maine Coon who is over 3 ft tall....
Somehow he just doesn't quite fit! He just doesn't get it though. My poor sweet boy....
He's my sweet Guard Kitty. He thinks he's a Dog! I kid you not! And, he can open all the doors in the house. My sweet boy!
Well, that's all I have for you today. Come back tomorrow, I'll have more to show you.
Today's Supplies-
Cardstock- Poppy Parade, Whisper White Just Add Cake DSP
Ink- Basic Black Classic Ink, Poppy Parade
Stamps- Delightful Decorations, Four For The Holidays
Ornament Punch
Accesories- Two-Way Glue Pen, Dazzling Diamonds,
If you need supplies to make todays card or cards like it you can shop in my ONLINE STORE 24/7.
I hope you liked today's card. If you liked it, I would love it if you left me a comment. It's great when I get to hear from you! Also, if you liked today's card, please feel free to +1 or Pin it. I've added the buttons to my side-bar for your convenience. Friends and Followers are also welcome. :) Thanks for stopping by today and I hope to see you again soon!
Till then,
Be Safe,
Shan Pin It
Hey y'all! Well we survived another Monday and Tuesday is starting unseasonably warm here in the DMV ahead of a cold front and the threat of the white stuff tomorrow night. :-( I am not happy about that at all! You know what I am happy about? Today's card, and pictures!
We had so much fun on Saturday! Can I just tell you what a joy it was to see those ladies so excited about stamping and creating! WOW!!!!! They were AMAZING! Here's D with her cards at the end of the afternoon.
Didn't she do a Great job?!?
Here's J's cards. (She didn't have her "face on" so she wouldn't get in the pic.)
She did a Great job too!
They both picked it right up and were so creative, adding their own touches to their cards, not at all Scaredy Cats, like yours truly. I was soooo proud! They were sooo cute! My friend and team-member April was over helping me out Saturday and we had mentioned CASE'ing and at one point one of the ladies saw something someone else did that they liked and they said "I'm gonna CASE that" We were like proud little momma hens!
Today's card is another one we did on Saturday. It's a CASE from my team member Stephanie Finch from last year. It's a super quick & easy card and it was the first one we did this weekend and the girls knew they were going to be able to handle everything after this.
I love the non-traditional colors, and paper. I started with a base of Poppy Parade. I L-O-V-E this color! So sad it's only around for another 6 months. I hope it will make it into the regular color rotation, it's so beautiful! I used the striped layer from Just Add Cake because it reminded me of the DSP from Candy Cane Christmas last year, which I absolutely loved!
Since you shouldn't punch through two layers of cardstock with our punches this is where my OCD comes in handy. You knew there had to be a use to it besides a reason to laugh at me right? Well here it is. (At least one reason, anyway) I used my Ornament punch to punch out a piece from the DSP, and then laid my DSP down on my base piece and using a pencil lightly traced the outline of the cutout. Now I knew exactly where to place my punch to cut out my base piece. OOOOHHHHH..... AAAAHHHHHHH. Worth the price of admission right there, huh?
Next, take one of the small background stamps from Delightful Decorations and randomly stamp (I know, I said random) with Poppy Parade. I used the snow flake pattern. Then adhere your DSP to your card base, I used Tombow for mine, they will line up just right for you, so nice. Now, once again lightly trace inside the punched out area, you'll need this later.
Next, I chose a stamp from the Delightful Decorations set and inked it up in Poppy Parade and stamped it on Whisper White cardstock and then punched it out using my Ornament Punch. I decorated it with my Two-Way Glue Pen and Dazzling Diamonds and adhered it to my outlined area on the inside of my card with Tombow.
A simple sentiment from Four for the Holidays in Basic Black and this card was done. My ladies this weekend did their sentiments on a Whisper White cardstock as a banner and it looked great like that too. Like I said, Quick and Easy aided by my OCD, who woulda thunk it?
Here's a few more pics of my studio assistants helping out this weekend. Yesterday I showed you Bitty trying to help out. Here's some pics of Deucey. Sunday night I was trying to take pictures of all the cards so I could upload them and I put my "Light Box" down on the table, the key work there being "box". Well, Bitty is not the only one that likes a box. The problem is Deucey forgets he is a 16+ lb Maine Coon who is over 3 ft tall....
![]() |
| I'll just curl up here in the box |
Somehow he just doesn't quite fit! He just doesn't get it though. My poor sweet boy....
![]() |
| Hey Ma'am, I'm in the box. See me.... :) |
Well, that's all I have for you today. Come back tomorrow, I'll have more to show you.
Today's Supplies-
Cardstock- Poppy Parade, Whisper White Just Add Cake DSP
Ink- Basic Black Classic Ink, Poppy Parade
Stamps- Delightful Decorations, Four For The Holidays
Ornament Punch
Accesories- Two-Way Glue Pen, Dazzling Diamonds,
If you need supplies to make todays card or cards like it you can shop in my ONLINE STORE 24/7.
I hope you liked today's card. If you liked it, I would love it if you left me a comment. It's great when I get to hear from you! Also, if you liked today's card, please feel free to +1 or Pin it. I've added the buttons to my side-bar for your convenience. Friends and Followers are also welcome. :) Thanks for stopping by today and I hope to see you again soon!
Till then,
Be Safe,
Shan Pin It
Monday, December 5, 2011
A Wintry Holiday card
Pin It
Hey y'all! Hope your Monday is is a good one. Sorry I'm a little late getting started today, but here we go.
I hope you had a great weekend and got to spend some quality time with friends and family and of course in your design space. More to come later this week about my stampcamp. Let me just tell you though, I am still laughing about the bow fight, yes I thought the cousins were just about going to come to blows over bows. Try saying three times fast! Oh my goodness. And, if you think I'm a perfectionist, and let's face it I am and I know it and since I've told you all I can't remember how many times how OCD I am wait till I tell you I have a new protege who may outshine even me. Yes indeed.
Well, it is Monday, so you know what time it is, that's right weekend football recap. I am currently mourning the imminent demise of the collegiate football season. Bowl Season is upon us, and then in only a months time no more college ball, and only 1 short month after that no more NFL! Now I know many of you will rejoice that you will not have to skip over a paragraph of game scores but I will have to go through withdraw. Not a pretty sight, I assure you of this! Sympathy card will be accepted.
At any rate here they are- #1 LSU stomped #13 Ga's hiney! (Yes I wrote hiney, I never know who might stumble upon this) Really! Who came up with this pairing? Did anyone really anticipate a different outcome? The good news is that now LSU and ALA will compete against each other for the Bowl Championship. That game should at least be watchable.
NFL wise- The Dolphins won huge over the Raiders. They are really doing good lately. I have to say I'm kinda proud of them this year. That being said they will probably go back to sucking, however I hope they prove me wrong. Timmy Tebow led the Broncos to a win over the Vikings. Go Timmy! Pats over the Colts. Cowboys lose in overtime to the Cardinals and The Jets (ThankYouVeryMuch!)beat the Redskins.
Ok, so on to stamping. this is one of the cards I made for this weekend's stampcamp. I saw one similar to it on Stampin' Connection and thought it would be a quick and easy way to use the Stitched Stocking stamp set and Stocking Builder Punch.
I started with a base of Concord Crush. Such a pretty color! I can't believe it's going to be gone soon. :-( I then used Whisper White c/s and ran it through my Big Shot using my Northern Flurries Embossing Folder, and then I put it aside for a few minutes.
The stocking was stamped with Concord Crush on Whisper White c/s and punched out with the Stocking Builder Punch. I then punched out the heel, toe and cuff using Silver Glimmer Paper and adhered it using Tombow, and attached a pretty little Rhinestone in the middle.
I then took the embossed piece and the Whisper White piece for the inside liner and went to my Smooch/Spritzer box to experiment. I really wish you could see the results! I mixed some Frost White paint with Rubbing Alcohol in a little $1 pump spray bottle I got at a Big Box store and sprayed the c/s a couple of times from the edge of the box and it looks just like the White Shimmer Paper I used at one of my really nice Holiday Card Classes earlier this season. Unbelievably pretty!
*TIP* Remember when you do this not to spray too close, the alcohol will make your c/s curl because it will make your c/s damp.
*TIP* Don't stamp with regular ink and then spray, your ink will run. Ask me how I know! At least I had the foresight to try this out first om a scrap piece instead of on my good piece!
*TIP* Try not to touch anywhere except the outside edge of your card until it is dry because the oil on your fingers will leave marks on the cardstock while it is damp.
I then adhered my 4 Rhinestones to my embossed snowflakes and attached a piece of our beautiful 5/8in Organza ribbon to the front of my card. I just applied a little SNAIL to the edges and tucked them around behind the back of the card. I adhered the stocking next with 2 dimensionals. 1 just below the cuff and one near the bottom and the cuff sits just on the ribbon. Next came the bow.
Ahhh the bow. The sweet little bow that almost caused blood to flow in my stampcamp this weekend. 9in. of Organza tied with the little bunny ears technique and then adhered with a Mini Glue Dot, to the other ribbon and the front of your card is done. So simple and pretty, but in person it packs such a presence!
So, let me just tell you about "The Bow". (BTW- I have their permission to tell the story here) I'm demonstrating how to tie the "Bow" and J tells D she knows how and will help her out because D seems to be struggling. Now J and D are family. So D decides she's going to keep that bow, and takes it back, but doesn't have it just right (now mind you D is the one that will rival me for my Need for Perfection) and is fussing with it (we finally got it just right). So I tell J, she can have the one I am making. Nope, It's got to be the other one, the one she actually took from D which was D's to start with. I tell you what they were threatening each other over that sweet little bow! I was afraid that Concord Crush card was going to have some Real Red on it! My friend April was there and we just looked at each other! It was soooo funny! J sent me a text later about it, how they were still laughing and how she was already telling the story to other friends!
Here's the inside of the card-
I used the sentiment from Four for the Holidays and I stamped it in Basic Black Classic Ink. I embossed the lower corner with the same Embossing Folder as the front, but I ate the folder up doing it, so I don't recommend trying this. (You know me I had to try and make the inside pretty too! Although the inside is really pretty because it's soooo shimmery!)
The good news is- No Bows were injured in the making of this card and no friendships either! In fact, just beautiful cards and a new found love for card making for 2 friends of mine. J and D had sooo much fun and are so excited to be making cards again soon. I can't wait to do this again with them!
So , while my friend April and I were waiting for J and D to arrive Saturday, we looked over at the Smooching table and wanna know what we saw? Take a look-
Yep, My studio assistant Bitty can be counted on to find any box at all, anywhere in the studio, and she found this one Saturday! Doesn't she look sweet?
Well, that's all for today. Come back tomorrow, I'll have more to show you from this weekend's camp.
Supplies for today's card-
Cardstock- Concord Crush, Whisper White, Silver Glimmer Paper
Ink- Basic Black, Concord Crush
Big Shot, Northern Flurries Embossing Folder
Stamp Set- Stitched Stocking, Four for the Holidays
Punches- Stocking Builder
Ribbon- 5/8 in Organza
Accesories- Frost White Paint, Rhinestones, Stampin Dimensionals, Tombow, SNAIL
If you need supplies to make this card or cards like it you can purchase them 24/7 in my ONLINE STORE.
If you liked today's card, I would love it if you left me a comment. It's great when I get to hear from you! Also, if you liked today's card, please feel free to +1 or Pin it. I've added the buttons to my side-bar for your convenience. Friends and Followers are also welcome. :)
I hope to see you soon.
Till next time.
Be Safe,
Shan Pin It
Hey y'all! Hope your Monday is is a good one. Sorry I'm a little late getting started today, but here we go.
I hope you had a great weekend and got to spend some quality time with friends and family and of course in your design space. More to come later this week about my stampcamp. Let me just tell you though, I am still laughing about the bow fight, yes I thought the cousins were just about going to come to blows over bows. Try saying three times fast! Oh my goodness. And, if you think I'm a perfectionist, and let's face it I am and I know it and since I've told you all I can't remember how many times how OCD I am wait till I tell you I have a new protege who may outshine even me. Yes indeed.
Well, it is Monday, so you know what time it is, that's right weekend football recap. I am currently mourning the imminent demise of the collegiate football season. Bowl Season is upon us, and then in only a months time no more college ball, and only 1 short month after that no more NFL! Now I know many of you will rejoice that you will not have to skip over a paragraph of game scores but I will have to go through withdraw. Not a pretty sight, I assure you of this! Sympathy card will be accepted.
At any rate here they are- #1 LSU stomped #13 Ga's hiney! (Yes I wrote hiney, I never know who might stumble upon this) Really! Who came up with this pairing? Did anyone really anticipate a different outcome? The good news is that now LSU and ALA will compete against each other for the Bowl Championship. That game should at least be watchable.
NFL wise- The Dolphins won huge over the Raiders. They are really doing good lately. I have to say I'm kinda proud of them this year. That being said they will probably go back to sucking, however I hope they prove me wrong. Timmy Tebow led the Broncos to a win over the Vikings. Go Timmy! Pats over the Colts. Cowboys lose in overtime to the Cardinals and The Jets (ThankYouVeryMuch!)beat the Redskins.
Ok, so on to stamping. this is one of the cards I made for this weekend's stampcamp. I saw one similar to it on Stampin' Connection and thought it would be a quick and easy way to use the Stitched Stocking stamp set and Stocking Builder Punch.
I started with a base of Concord Crush. Such a pretty color! I can't believe it's going to be gone soon. :-( I then used Whisper White c/s and ran it through my Big Shot using my Northern Flurries Embossing Folder, and then I put it aside for a few minutes.
The stocking was stamped with Concord Crush on Whisper White c/s and punched out with the Stocking Builder Punch. I then punched out the heel, toe and cuff using Silver Glimmer Paper and adhered it using Tombow, and attached a pretty little Rhinestone in the middle.
I then took the embossed piece and the Whisper White piece for the inside liner and went to my Smooch/Spritzer box to experiment. I really wish you could see the results! I mixed some Frost White paint with Rubbing Alcohol in a little $1 pump spray bottle I got at a Big Box store and sprayed the c/s a couple of times from the edge of the box and it looks just like the White Shimmer Paper I used at one of my really nice Holiday Card Classes earlier this season. Unbelievably pretty!
*TIP* Remember when you do this not to spray too close, the alcohol will make your c/s curl because it will make your c/s damp.
*TIP* Don't stamp with regular ink and then spray, your ink will run. Ask me how I know! At least I had the foresight to try this out first om a scrap piece instead of on my good piece!
*TIP* Try not to touch anywhere except the outside edge of your card until it is dry because the oil on your fingers will leave marks on the cardstock while it is damp.
I then adhered my 4 Rhinestones to my embossed snowflakes and attached a piece of our beautiful 5/8in Organza ribbon to the front of my card. I just applied a little SNAIL to the edges and tucked them around behind the back of the card. I adhered the stocking next with 2 dimensionals. 1 just below the cuff and one near the bottom and the cuff sits just on the ribbon. Next came the bow.
Ahhh the bow. The sweet little bow that almost caused blood to flow in my stampcamp this weekend. 9in. of Organza tied with the little bunny ears technique and then adhered with a Mini Glue Dot, to the other ribbon and the front of your card is done. So simple and pretty, but in person it packs such a presence!
So, let me just tell you about "The Bow". (BTW- I have their permission to tell the story here) I'm demonstrating how to tie the "Bow" and J tells D she knows how and will help her out because D seems to be struggling. Now J and D are family. So D decides she's going to keep that bow, and takes it back, but doesn't have it just right (now mind you D is the one that will rival me for my Need for Perfection) and is fussing with it (we finally got it just right). So I tell J, she can have the one I am making. Nope, It's got to be the other one, the one she actually took from D which was D's to start with. I tell you what they were threatening each other over that sweet little bow! I was afraid that Concord Crush card was going to have some Real Red on it! My friend April was there and we just looked at each other! It was soooo funny! J sent me a text later about it, how they were still laughing and how she was already telling the story to other friends!
Here's the inside of the card-
I used the sentiment from Four for the Holidays and I stamped it in Basic Black Classic Ink. I embossed the lower corner with the same Embossing Folder as the front, but I ate the folder up doing it, so I don't recommend trying this. (You know me I had to try and make the inside pretty too! Although the inside is really pretty because it's soooo shimmery!)
The good news is- No Bows were injured in the making of this card and no friendships either! In fact, just beautiful cards and a new found love for card making for 2 friends of mine. J and D had sooo much fun and are so excited to be making cards again soon. I can't wait to do this again with them!
So , while my friend April and I were waiting for J and D to arrive Saturday, we looked over at the Smooching table and wanna know what we saw? Take a look-
![]() |
| Bitty Smooches too! |
Yep, My studio assistant Bitty can be counted on to find any box at all, anywhere in the studio, and she found this one Saturday! Doesn't she look sweet?
Well, that's all for today. Come back tomorrow, I'll have more to show you from this weekend's camp.
Supplies for today's card-
Cardstock- Concord Crush, Whisper White, Silver Glimmer Paper
Ink- Basic Black, Concord Crush
Big Shot, Northern Flurries Embossing Folder
Stamp Set- Stitched Stocking, Four for the Holidays
Punches- Stocking Builder
Ribbon- 5/8 in Organza
Accesories- Frost White Paint, Rhinestones, Stampin Dimensionals, Tombow, SNAIL
If you need supplies to make this card or cards like it you can purchase them 24/7 in my ONLINE STORE.
If you liked today's card, I would love it if you left me a comment. It's great when I get to hear from you! Also, if you liked today's card, please feel free to +1 or Pin it. I've added the buttons to my side-bar for your convenience. Friends and Followers are also welcome. :)
I hope to see you soon.
Till next time.
Be Safe,
Shan Pin It
Sunday, December 4, 2011
Happy 29th Birthday To Me!
Pin It
Hey y'all! Hope you're having an Amazing day!
I am. It's my birthday. Yep 29! I think that's pretty Amazing, especially when you consider my kids are almost 20! LOL!
It started at midnight with a call my from my precious girl telling me how much she loved me. Doesn't get much better than that does it. My mom called me this morning. Still waiting for my son to call, but I think he's working today and I saw him last night, so I'm sure it's coming. I got to sleep in this morning. (Score) I've heard from lots of friends today and had a late carb filled pancake breakfast at IHOP. (YUM) BTW, I highly recommend the EggNog & the Pumpkin Praline pancakes. I got My Digital Studio as one of my presents, and I'm getting ready to go to the invitation only party at VS's for a little shopping with my mom's card and my birthday gift certificate from VS's and will get to see some friends too. Like I said its been a pretty good day.
I just wanted to do a quick little post here today. This is not my birthday card, but I think it's sooo pretty. I made it for one of the girls I work with. Although I do a lot of Bling, and a lot of shimmer and glimmer, I don't think my cards are usually all that "girly", but boy this one was all soft and girly and I have to say I really liked it.
Here it is-
I used Blushing Bride cardstock for the base and then used some Gold cardstock that I ran through the BigShot with my Tulip Frames Embossing Folder. I layered Blushing Bride inside the framed area as a background for my scrumptious little cupcakes.
This was the first card I had made with the Create a Cupcake Stamp Set and Cupcake Builder Punch. Love It! I used Very Vanilla and Blushing Bride for the frosting with a ring of Dazzling Diamonds around the edge for a Sugared appearance. Some Real Red Cherries and a candle to top things off, made things so easy. I put them together with Tombow and adhered them with dimensionals. The sentiment is part of the same set.
Here's the inside-
The sentiment is from the same set. I just love the cute little font!
For my sweet little cupcake I inked the stamps by coloring them in with my Stampin Write Markers and then Stamped off once so the image would be lighter and then stamped onto the cardstock. I then let Tink do her thing and she made it shine! Don't you just want to take a bite out of it?
Well that's all for today, like I said a quick little post. I'm off for some quick retail therapy, see some friends and then get back for a webinar on MDS before another 29th has come and gone.
If you liked today's card, I would love it if you left me a comment. It's great when I get to hear from you! Also, if you liked today's card, please feel free to +1 or Pin it. I've added the buttons to my side-bar for your convenience. Friends and Followers are also welcome. :)
I hope you are having a Great weekend and the rest of it is Amazing too. Come back tomorrow to see what I have for you. We had stamp camp yesterday and OH THE STORIES!!!!
See you soon!
Till then,
Be Safe,
Shan Pin It
Hey y'all! Hope you're having an Amazing day!
I am. It's my birthday. Yep 29! I think that's pretty Amazing, especially when you consider my kids are almost 20! LOL!
It started at midnight with a call my from my precious girl telling me how much she loved me. Doesn't get much better than that does it. My mom called me this morning. Still waiting for my son to call, but I think he's working today and I saw him last night, so I'm sure it's coming. I got to sleep in this morning. (Score) I've heard from lots of friends today and had a late carb filled pancake breakfast at IHOP. (YUM) BTW, I highly recommend the EggNog & the Pumpkin Praline pancakes. I got My Digital Studio as one of my presents, and I'm getting ready to go to the invitation only party at VS's for a little shopping with my mom's card and my birthday gift certificate from VS's and will get to see some friends too. Like I said its been a pretty good day.
I just wanted to do a quick little post here today. This is not my birthday card, but I think it's sooo pretty. I made it for one of the girls I work with. Although I do a lot of Bling, and a lot of shimmer and glimmer, I don't think my cards are usually all that "girly", but boy this one was all soft and girly and I have to say I really liked it.
Here it is-
I used Blushing Bride cardstock for the base and then used some Gold cardstock that I ran through the BigShot with my Tulip Frames Embossing Folder. I layered Blushing Bride inside the framed area as a background for my scrumptious little cupcakes.
This was the first card I had made with the Create a Cupcake Stamp Set and Cupcake Builder Punch. Love It! I used Very Vanilla and Blushing Bride for the frosting with a ring of Dazzling Diamonds around the edge for a Sugared appearance. Some Real Red Cherries and a candle to top things off, made things so easy. I put them together with Tombow and adhered them with dimensionals. The sentiment is part of the same set.
Here's the inside-
The sentiment is from the same set. I just love the cute little font!
For my sweet little cupcake I inked the stamps by coloring them in with my Stampin Write Markers and then Stamped off once so the image would be lighter and then stamped onto the cardstock. I then let Tink do her thing and she made it shine! Don't you just want to take a bite out of it?
Well that's all for today, like I said a quick little post. I'm off for some quick retail therapy, see some friends and then get back for a webinar on MDS before another 29th has come and gone.
If you liked today's card, I would love it if you left me a comment. It's great when I get to hear from you! Also, if you liked today's card, please feel free to +1 or Pin it. I've added the buttons to my side-bar for your convenience. Friends and Followers are also welcome. :)
I hope you are having a Great weekend and the rest of it is Amazing too. Come back tomorrow to see what I have for you. We had stamp camp yesterday and OH THE STORIES!!!!
See you soon!
Till then,
Be Safe,
Shan Pin It
Friday, December 2, 2011
You Know Why They Call It Distressing Right?
Pin It
Hey y'all. Well TGIF!
Another week has come and gone, or at least almost gone. I hope you are getting ready to enjoy your weekend. I've got work this weekend and a little stampcamp scheduled for tomorrow, so no rest for the wicked. :-)
So, if you've followed me at all on here you've heard me talk about my absolutelove LOVE of ALL THINGS to do with distressing right? You know, ripping, tearing, crumpling, scoring the edges, sponging the edges and spritzing especially the color spritzing....Everything!
Oh, Wait! Snap! So Glad I just crossed back over from that parallel universe! NOT!!!!!!!!
Let me just ask you one question-
You know why they call it distressing right?
Because it Distresses me so! >:-(
In fact I think it's a pretty apt term because it has the word Stress in it which is exactly what it causes me!
I can not tell you how long I sit there with the paper in my hand before I can actually make my self tear it. Heaven forbid I tear too much! Then I've just wasted the paper and failed at the project. Double Fail! Today's card was the first time that I ever willingly crumpled cardstock on my own, and I can't tell you how hard it was! Even though I knew what I wanted, and could see it in my mind's eye, no lie, I must have sat there with that piece of River Rock cardstock in my hand for a good 3 minutes.... waiting.... willing my hand to close around it. It was just so hard.
Even those techniques like the Faux Torn paper, where it looks like torn paper on your card but its not. It's just where you sponged over the edge of a piece of torn paper. Well, guess what? You still had to tear a piece of paper to start with!
You know that color spritzer tool? I stay away from it when it has browns or blacks in it. You have to be careful with it. I'm always afraid instead of looking antiqued my projects are just going to look moldy and mildewed. EEEWWWW!
Why do we want to tear our cardstock? It's beautiful! It makes beautiful cards. It makes me happy!
Ok. So, I know on some deep level, ok, so maybe it's not really such a deep level, that the distressing makes for pretty cards too. And I'm even willing to admit that I like some of them. OK! A lot of them! I like a lot of them. In fact I really like the one I'm showing you today. I just don't like making them.
They STRESS ME OUT!
What if I do one of those techniques and they don't turn out? Then not only has it not turned out, but I've ruined perfectly good cardstock. Fail, Fail, Fail, Fail..... See where I'm going with this....Oh the stress...
You know if I could only channel this OCD into other aspects of my life... oh the things I could accomplish!
But..... I did have a momentary lapse and I created this card a few months back and have just been waiting for the right time to post it.
I remember the day I made it, I sent a picture to my upline Robin to show her what I had done. I was so excited that I had crumpled this stupid little piece of cardstock! I swear, You would have thought I had just discovered Nuclear Fission, or won the Nobel Peace Prize. And, God Bless her! She, the Goddess that she is, acted suitably impressed and Oohhed and Aahhed and told me how proud of me she was. I am so blessed to have her!
So, are you ready for today's card? Here it is-
I started with a base of Island Indigo. This is one of my all time favorite colors! It takes me to the ocean every time! (My favorite place in the world!) Next, is a layer of River Rock. Such an unassuming color and not really all that pretty on it's own, but really a work-horse! It just seems to change and adapt to so many colors. I love seeing what all I can pair it with. I stamped that piece multiple times with the manifest stamp, from the Open Seas Stamp set, in Crumb Cake Classic Ink. I'm so glad they kept that stamp set around. I really hope they put it in next year's catalog! Next I sponged the edges. Then came the hard part. I sat there and stared at the cardstock while it sat in my hand.
I'm not sure why it didn't magically just crumple up into a little ball when I said "Poof." Trust me I tried saying it a couple of times. No joy! Finally I had to face the cold hard facts. I was going to have to close my fingers around the paper myself....and I did... and I found no joy in that either. Unfortunately, after I un-crumpled it I realized it wasn't crumpled enough and I was going to have to do it more! OH NOES!!!!! As if the first time was not bad enough. I was already in the mindset though so I just powered on through and got it done. Luckily for me, it turned out ok, and I was able to breathe a sigh of relief! I smoothed it out, kind of an oxymoronic moment to me, crumple it up to smooth it out....just saying... but anyways...I smoothed it out and lightly sponged over it with some Crumb Cake ink to make the wrinkles show up, touched up the edges a bit too and then I put it aside for a few minutes.
I stamped the anchor image in Island Indigo on a scrap of Very Vanilla and cut it out and then punched the hole at the top using my Crop-a-Dile. I took some Linen Thread and wrapped around the River Rock layer, criss-crossing across the front and then tied through the hole at the top of the anchor, leaving the ends a little long and a little frayed to hang from the top. I then mounted this whole piece to the base with Tombow.
For the focal point I used a piece of Very Vanilla cardstock. I inked up the globe image from the same stamp set in Crumb Cake and stamped it first. I then inked up the image of the Schooner in Island Indigo and stamped it over the Globe. A little sponging around the edges with Crumb Cake and I adhered this with dimensionals to all 4 corners.
The sentiment in the lower right hand corner is from Petite Pairs. Such a great set. Definitely a Must-Have! I used Basic Black here.
For the inside I kept it simple, I know hard to believe...
I stamped the compass from the same set in the bottom right corner here, I stamped off once so it would be faint, I think I used every stamp in the set. (LOL)
And then, of all the things, Do you see what I see?
Ok, is it just me or is the Little Drummer Boy now playing in your head too?
Yep! The greeting's not straight! I didn't use the Stamp-A-Ma-Jig to stamp the second half of the sentiment! Oh Dear Lord! Do you know how much I wanted to trash the whole card at that very moment! I mean I wouldn't even have been able to just put a piece of Very Vanilla over it as a liner because the compass is so far over. No!!!!!! And because the front layer was glued down and not dimensionalled, I would have had to crumple up more paper. Well let me tell you what! It was a battle of the OCD and the "crumple" beat out the "a little not straight" so I decided I would just have to live with it looking like that, for the recipient and you and all the world to see.
Oh, I feel so exposed, so nekkid (Yes, that's a real word!) and not in a good way! Oh well, the recipient was my W.H. my work husband (that's what I called him, even to his wife *tee-hee-hee*, heck I called her my sister-wife) and he really liked it and didn't say anything about the sentiment being crooked. And you guys are my friends and probably don't care that the sentiments crooked.
Heck, I'm probably the only one who cares the sentiment is crooked! In fact, if I hadn't said anything, chances are none of y'all would have said, "Hey Shan, what's up with the way crooked sentiment?" But you know me!
So that's my deal with Distressing and the stress it causes me. I'm sure it's not likely to change anytime soon. Hopefully, I will learn to manage it a little, because I know I will learn to make some really pretty cards if I can just conquer this. But like most people with any form of OCD, I realize that it is irrational. It's just the matter of overcoming the irrational that takes some time. That's a part of the whole Scaredy Cat Adventure I'm on, and I guess you're on it too if you're putting up with me! Awww you're my support! And as such, you get to smile and chuckle and outright laugh along with me every step of the way. See comic relief for your day! That's just the kind of friend I am! Aren't you Lucky!
If you liked today's card, I would love it if you left me a comment. It's great when I get to hear from you! Also, if you liked today's card, please feel free to +1 or Pin it. I've added the buttons to my side-bar for your convenience. Friends and Followers are also welcome. :)
Well, that's all for today and for this week. I hope you have an Amazing weekend filled with friends and Family and of course time to spend Stamping and Crafting.
Till next time....
Be Safe,
Shan
Pin It
Hey y'all. Well TGIF!
Another week has come and gone, or at least almost gone. I hope you are getting ready to enjoy your weekend. I've got work this weekend and a little stampcamp scheduled for tomorrow, so no rest for the wicked. :-)
So, if you've followed me at all on here you've heard me talk about my absolute
Oh, Wait! Snap! So Glad I just crossed back over from that parallel universe! NOT!!!!!!!!
Let me just ask you one question-
You know why they call it distressing right?
Because it Distresses me so! >:-(
In fact I think it's a pretty apt term because it has the word Stress in it which is exactly what it causes me!
I can not tell you how long I sit there with the paper in my hand before I can actually make my self tear it. Heaven forbid I tear too much! Then I've just wasted the paper and failed at the project. Double Fail! Today's card was the first time that I ever willingly crumpled cardstock on my own, and I can't tell you how hard it was! Even though I knew what I wanted, and could see it in my mind's eye, no lie, I must have sat there with that piece of River Rock cardstock in my hand for a good 3 minutes.... waiting.... willing my hand to close around it. It was just so hard.
Even those techniques like the Faux Torn paper, where it looks like torn paper on your card but its not. It's just where you sponged over the edge of a piece of torn paper. Well, guess what? You still had to tear a piece of paper to start with!
You know that color spritzer tool? I stay away from it when it has browns or blacks in it. You have to be careful with it. I'm always afraid instead of looking antiqued my projects are just going to look moldy and mildewed. EEEWWWW!
Why do we want to tear our cardstock? It's beautiful! It makes beautiful cards. It makes me happy!
Ok. So, I know on some deep level, ok, so maybe it's not really such a deep level, that the distressing makes for pretty cards too. And I'm even willing to admit that I like some of them. OK! A lot of them! I like a lot of them. In fact I really like the one I'm showing you today. I just don't like making them.
They STRESS ME OUT!
What if I do one of those techniques and they don't turn out? Then not only has it not turned out, but I've ruined perfectly good cardstock. Fail, Fail, Fail, Fail..... See where I'm going with this....Oh the stress...
You know if I could only channel this OCD into other aspects of my life... oh the things I could accomplish!
But..... I did have a momentary lapse and I created this card a few months back and have just been waiting for the right time to post it.
I remember the day I made it, I sent a picture to my upline Robin to show her what I had done. I was so excited that I had crumpled this stupid little piece of cardstock! I swear, You would have thought I had just discovered Nuclear Fission, or won the Nobel Peace Prize. And, God Bless her! She, the Goddess that she is, acted suitably impressed and Oohhed and Aahhed and told me how proud of me she was. I am so blessed to have her!
So, are you ready for today's card? Here it is-
I started with a base of Island Indigo. This is one of my all time favorite colors! It takes me to the ocean every time! (My favorite place in the world!) Next, is a layer of River Rock. Such an unassuming color and not really all that pretty on it's own, but really a work-horse! It just seems to change and adapt to so many colors. I love seeing what all I can pair it with. I stamped that piece multiple times with the manifest stamp, from the Open Seas Stamp set, in Crumb Cake Classic Ink. I'm so glad they kept that stamp set around. I really hope they put it in next year's catalog! Next I sponged the edges. Then came the hard part. I sat there and stared at the cardstock while it sat in my hand.
I'm not sure why it didn't magically just crumple up into a little ball when I said "Poof." Trust me I tried saying it a couple of times. No joy! Finally I had to face the cold hard facts. I was going to have to close my fingers around the paper myself....and I did... and I found no joy in that either. Unfortunately, after I un-crumpled it I realized it wasn't crumpled enough and I was going to have to do it more! OH NOES!!!!! As if the first time was not bad enough. I was already in the mindset though so I just powered on through and got it done. Luckily for me, it turned out ok, and I was able to breathe a sigh of relief! I smoothed it out, kind of an oxymoronic moment to me, crumple it up to smooth it out....just saying... but anyways...I smoothed it out and lightly sponged over it with some Crumb Cake ink to make the wrinkles show up, touched up the edges a bit too and then I put it aside for a few minutes.
I stamped the anchor image in Island Indigo on a scrap of Very Vanilla and cut it out and then punched the hole at the top using my Crop-a-Dile. I took some Linen Thread and wrapped around the River Rock layer, criss-crossing across the front and then tied through the hole at the top of the anchor, leaving the ends a little long and a little frayed to hang from the top. I then mounted this whole piece to the base with Tombow.
For the focal point I used a piece of Very Vanilla cardstock. I inked up the globe image from the same stamp set in Crumb Cake and stamped it first. I then inked up the image of the Schooner in Island Indigo and stamped it over the Globe. A little sponging around the edges with Crumb Cake and I adhered this with dimensionals to all 4 corners.
The sentiment in the lower right hand corner is from Petite Pairs. Such a great set. Definitely a Must-Have! I used Basic Black here.
For the inside I kept it simple, I know hard to believe...
I stamped the compass from the same set in the bottom right corner here, I stamped off once so it would be faint, I think I used every stamp in the set. (LOL)
And then, of all the things, Do you see what I see?
Ok, is it just me or is the Little Drummer Boy now playing in your head too?
Yep! The greeting's not straight! I didn't use the Stamp-A-Ma-Jig to stamp the second half of the sentiment! Oh Dear Lord! Do you know how much I wanted to trash the whole card at that very moment! I mean I wouldn't even have been able to just put a piece of Very Vanilla over it as a liner because the compass is so far over. No!!!!!! And because the front layer was glued down and not dimensionalled, I would have had to crumple up more paper. Well let me tell you what! It was a battle of the OCD and the "crumple" beat out the "a little not straight" so I decided I would just have to live with it looking like that, for the recipient and you and all the world to see.
Oh, I feel so exposed, so nekkid (Yes, that's a real word!) and not in a good way! Oh well, the recipient was my W.H. my work husband (that's what I called him, even to his wife *tee-hee-hee*, heck I called her my sister-wife) and he really liked it and didn't say anything about the sentiment being crooked. And you guys are my friends and probably don't care that the sentiments crooked.
Heck, I'm probably the only one who cares the sentiment is crooked! In fact, if I hadn't said anything, chances are none of y'all would have said, "Hey Shan, what's up with the way crooked sentiment?" But you know me!
So that's my deal with Distressing and the stress it causes me. I'm sure it's not likely to change anytime soon. Hopefully, I will learn to manage it a little, because I know I will learn to make some really pretty cards if I can just conquer this. But like most people with any form of OCD, I realize that it is irrational. It's just the matter of overcoming the irrational that takes some time. That's a part of the whole Scaredy Cat Adventure I'm on, and I guess you're on it too if you're putting up with me! Awww you're my support! And as such, you get to smile and chuckle and outright laugh along with me every step of the way. See comic relief for your day! That's just the kind of friend I am! Aren't you Lucky!
If you liked today's card, I would love it if you left me a comment. It's great when I get to hear from you! Also, if you liked today's card, please feel free to +1 or Pin it. I've added the buttons to my side-bar for your convenience. Friends and Followers are also welcome. :)
Well, that's all for today and for this week. I hope you have an Amazing weekend filled with friends and Family and of course time to spend Stamping and Crafting.
Till next time....
Be Safe,
Shan
Pin It
Thursday, December 1, 2011
Ever Have One Of THOSE Days? This Set ALAWAYS Makes Me Smile!
Pin It
Hey y'all.
Ever have one of THOSE days?
You know the ones.....I'm not even talking about Monday's. I'm talking about the ones where you just start off the morning and think "Be Kind, Rewind".
Well, you know my OCD, I have 3 alarms set up in the morning, just in case, because if I were to oversleep, it's a nightmare to try and get in to work. Sure enough, 2 of the 3 didn't go off. Oh Noes!
It's ok though, I'm still on time....I'm sitting down putting on my shoes getting ready to leave, one shoe on, and all of a sudden I can't find my second sock! I tell you I look everywhere! I move everything! I finally walk back upstairs with one shoe on, (very lopsided I might add) convinced I must have left the sock upstairs, you know it must have dropped or something. Nope, not there, so I get another one and go back downstairs. I sit down to put this second sock on and what do you think I find? Yep! The first sock! Guess where? You Betcha! On my foot! SMH!
I feel I can tell you this because we're friends and friends don't judge right? We just commiserate. Plus, I know you're not really laughing at me right now, you're laughing with me, right? Right! See, I knew you'd understand.
I was looking for a card to post though and came across this one. I did it about a month ago, on the fly, before class, for my professor. I couldn't believe how quickly it came together. You know me, things don't usually come together real quick, but this one did. It was a good thing too, because I was really pressed for time. In between getting home from work and heading out to class there's just over a hour for me to do whatever needs to be done. Not a lot of time for me to plan and execute a card. AUGH! STRESS!!!!
This set always makes me smile though. I know I use it a lot, but it's just so Stinking Cute and versatile and like I said it makes me smile.Why wouldn't I use it? On top of that a portion of every sale is donated to the Ronald McDonald House? Win,Win! Do you own it yet? You need to get it before it's gone, so you can smile every time you use it too.
Here's my card-
I used Wild Wasabi for the base with a strip of Just Add Cake down the side. Such a fun pattern! Then I layered Baja Breeze, Peach Parfait and Whisper White. I stamped the sweet little snail from the Turtle and Co. set onto my Whisper White c/s. I have this in the clear-mount set so I was able to see exactly where I was stamping him. Can't tell you how much I Love that ability. Then I stamped the little birthday hat on his shell. I colored both in using my Stampin Write Markers. I stamped the gifts on a scratch piece of Whisper White c/s colored them in with my Stampin Write Markers and then cut them out using my paper snips. I attached a small strip of linen thread to the underside of the gifts with a dimensional and then applied a few more dimensionals to the back to pop the gifts up. I attached the other end of the linen thread to the snail's tail with just a dab of glue applied to the thread. This whole panel was secured with 4 dimensionals.
I stamped the sentiment in Basic Black on Whisper White and used my Word Window Punch to punch it out and then secured it with 2 dimensionals. I can't say it enough, this is a must have for your punch collection.
For the inside, just a little something because you know I believe the outside shouldn't have all the fun-
Seriously! How can you not smile when you see his little face smiling at you? Every time, I see him he makes me smile. Seriously, Every time! I'm going to miss him when he's gone! We need to write in and make this a regular stamp set. The greeting is from the same set as well.
It makes me sad that there's no Glitter or Shimmer on this card but as it was for my Very Masculine, Ex- Army Professor, I resisted, but Boy. It. Was. Hard.
That's all I have for today. A quick, fun, easy to recreate card for you and a hope that your day starts and continues better than my day started out. ;o)
Here's what I used for today's card
Cardstock- Wild Wasabi, Baja Breeze, Peach Parfait, Whisper White, Just Add Cake DSP
Stamp Set- Turtle and Co.
Ink- Basic Black Classic Ink Pad, Stampin Write Markers- Wild Wasabi, So Saffron, Baja Breeze, Tempting Turquoise, Pretty in Pink, Tangerine Tango, Melon Mambo
Accesories- Clear Block C, Linen Thread, Dimensionals, Tombow
If you liked today's card, I would love it if you left me a comment. It's great when I get to hear from you! Also, if you liked today's card, please feel free to +1 or Pin it. I've added the buttons to my side-bar for your convenience. Friends and Followers are also welcome. :)
If you need supplies to recreate this card or others, you can visit my ONLINE STORE, 24/7.
I hope you have a Great day!
Till next time,
Be Safe,
Shan
Pin It
Hey y'all.
Ever have one of THOSE days?
You know the ones.....I'm not even talking about Monday's. I'm talking about the ones where you just start off the morning and think "Be Kind, Rewind".
Well, you know my OCD, I have 3 alarms set up in the morning, just in case, because if I were to oversleep, it's a nightmare to try and get in to work. Sure enough, 2 of the 3 didn't go off. Oh Noes!
It's ok though, I'm still on time....I'm sitting down putting on my shoes getting ready to leave, one shoe on, and all of a sudden I can't find my second sock! I tell you I look everywhere! I move everything! I finally walk back upstairs with one shoe on, (very lopsided I might add) convinced I must have left the sock upstairs, you know it must have dropped or something. Nope, not there, so I get another one and go back downstairs. I sit down to put this second sock on and what do you think I find? Yep! The first sock! Guess where? You Betcha! On my foot! SMH!
I feel I can tell you this because we're friends and friends don't judge right? We just commiserate. Plus, I know you're not really laughing at me right now, you're laughing with me, right? Right! See, I knew you'd understand.
I was looking for a card to post though and came across this one. I did it about a month ago, on the fly, before class, for my professor. I couldn't believe how quickly it came together. You know me, things don't usually come together real quick, but this one did. It was a good thing too, because I was really pressed for time. In between getting home from work and heading out to class there's just over a hour for me to do whatever needs to be done. Not a lot of time for me to plan and execute a card. AUGH! STRESS!!!!
This set always makes me smile though. I know I use it a lot, but it's just so Stinking Cute and versatile and like I said it makes me smile.Why wouldn't I use it? On top of that a portion of every sale is donated to the Ronald McDonald House? Win,Win! Do you own it yet? You need to get it before it's gone, so you can smile every time you use it too.
Here's my card-
I used Wild Wasabi for the base with a strip of Just Add Cake down the side. Such a fun pattern! Then I layered Baja Breeze, Peach Parfait and Whisper White. I stamped the sweet little snail from the Turtle and Co. set onto my Whisper White c/s. I have this in the clear-mount set so I was able to see exactly where I was stamping him. Can't tell you how much I Love that ability. Then I stamped the little birthday hat on his shell. I colored both in using my Stampin Write Markers. I stamped the gifts on a scratch piece of Whisper White c/s colored them in with my Stampin Write Markers and then cut them out using my paper snips. I attached a small strip of linen thread to the underside of the gifts with a dimensional and then applied a few more dimensionals to the back to pop the gifts up. I attached the other end of the linen thread to the snail's tail with just a dab of glue applied to the thread. This whole panel was secured with 4 dimensionals.
I stamped the sentiment in Basic Black on Whisper White and used my Word Window Punch to punch it out and then secured it with 2 dimensionals. I can't say it enough, this is a must have for your punch collection.
For the inside, just a little something because you know I believe the outside shouldn't have all the fun-
Seriously! How can you not smile when you see his little face smiling at you? Every time, I see him he makes me smile. Seriously, Every time! I'm going to miss him when he's gone! We need to write in and make this a regular stamp set. The greeting is from the same set as well.
It makes me sad that there's no Glitter or Shimmer on this card but as it was for my Very Masculine, Ex- Army Professor, I resisted, but Boy. It. Was. Hard.
That's all I have for today. A quick, fun, easy to recreate card for you and a hope that your day starts and continues better than my day started out. ;o)
Here's what I used for today's card
Cardstock- Wild Wasabi, Baja Breeze, Peach Parfait, Whisper White, Just Add Cake DSP
Stamp Set- Turtle and Co.
Ink- Basic Black Classic Ink Pad, Stampin Write Markers- Wild Wasabi, So Saffron, Baja Breeze, Tempting Turquoise, Pretty in Pink, Tangerine Tango, Melon Mambo
Accesories- Clear Block C, Linen Thread, Dimensionals, Tombow
If you liked today's card, I would love it if you left me a comment. It's great when I get to hear from you! Also, if you liked today's card, please feel free to +1 or Pin it. I've added the buttons to my side-bar for your convenience. Friends and Followers are also welcome. :)
If you need supplies to recreate this card or others, you can visit my ONLINE STORE, 24/7.
I hope you have a Great day!
Till next time,
Be Safe,
Shan
Pin It
Subscribe to:
Posts (Atom)