Saturday, December 29, 2012

Not What I Planned / NAC #26 / My Challenge # 53

Pin It
Hey y'all. I've got a new challenge card for you tonight and as much trouble as it was to get it done, I'm really happy with how it turned out and I hope you will be too.

Do you ever plan on things going one way and even though you start out that way you end up with something else? Yeah, well that seems to happen to me fairly frequently, but boy did it happen in a Major way today. There's one thing I've always tried to be on this blog and that's just honest. I started this blog to make myself step out and try new things to not be a "Scaredy Cat". Because I hope that at least every once in a while I inspire someone who might be starting out or struggling with some of the same confidence and or creative issues I struggle with, I try to keep it real here. As much as I hate to show items that I feel aren't "just right" or "fabulous", I know that all my creations can't be that way. I often struggle with the fact that cards or projects I see on other blogs always seem to be that way, so why can't mine. Are you wondering where I'm going with this? I started today's card with an idea in my head. I could see just how my card was going to be and it was going to be pretty nice. I started it and I was excited by how it was going and then it went down-hill in a major way. Because I'm all about showing you that I'm just a normal stamper like many of you out there, I will show you my "horrible mess" but not at the beginning of my post. I'm afraid if someone was "hopping" through bloglandia and saw it first they might never come back. It will be at the end of this post so I hope you will hang around long enough to see it.

Today's post is from the Fabulous ladies over at Nacho Average Challenge and it's a color challenge. I really try not to dislike color challenges but they really do stump me a lot of the time. After my first idea tanked I was afraid I wasn't going to be able to come up with something acceptable. However I haven't missed one of their challenges yet, so I was determined to rise to the challenge. Here's my card-

Thank You Card featuring
Build A Blossom Stamp Set and Punch and
Blooming with Kindness Stamp Set
What do you think? It's way off from my normal style, even though I couldn't tell you what my normal style is. LOL! I'm still really happy with it though. BTW- do you know how hard it is to type when your studio assistant is on your lap and draped over your hand?


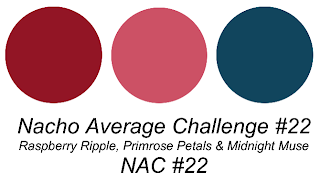
Here's the Color Challenge I was working with tonight-


I used Soft Suede as my card base and also used it to lightly sponge over my embossed frame. I used a dauber instead of a sponge to better control the placement of my color over my Tulip Border. This was created using my Tulip Frame E.F. which I haven't used in way too long. I used a Whisper White piece of c/s for the center panel. The sentiment is from Blooming with Kindness and is also stamped in S.S.

Here's a closer look at my focal point-


This is the first time I've used the Build A Blossom stamp set. It had been on my wish-list for a while and even though I try to use my new stamps as soon as I get them, this one has been sitting for a while. I stamped both of the petal images in Perfect Plum and then used the coordinating punch to punch them out.
***Tip***- When punching these petals out, stamp and punch from L-R since the "Petal" portion of the stamp is on the left hand side of the punch. This will help to minimize your wasted c/s. Although I love that most of the images can be punched with one punch it can also be a very wasteful punch. This is a great punch to use with your c/s scraps. :)

After stamping 5 of the solid petals (on the bottom) and five of the not-so-solid (sorry I didn't know what else to call them) ones I used my Paper Piercer to punch a small hole in the base of each one.  Before I put them together I used my bone-folder to curve the bottom petals down and the top petals up. This really adds a lot of dimension to the flower. I felt like it still needed something so I let Tink have some fun with the top petals before using a mini-brad to hold them all together. I hid the brad under the center piece which I also let Tink play with. This was popped up with a Dimensional. One Dimensional over the "legs" of the brad secures the flower to the center panel. My leaves were stamped in Old Olive and were secured with little pieces of Dimensionals from the sides of the packs.

Here's the inside-


I used another sentiment from the Blooming with Kindness set and because I had to have something pretty for the inside I used a flower from the Everything Eleanor set. I think it coordinates nicely with  the flower from the front. A little love from Tink and my card was done-


So what do you think? I know just who this card is going to and I really hope she likes it! I hope you and the fabulous ladies at NAC like it too.

So now for my FAIL. There's a new stamp set in our Sale-A-Bration Catalog that I just had to have. It has a Ferris Wheel on it and my idea was to water-color the background in the Old Olive for the grass and shades of Perfect Plum for an evening sky. I'm not the best at water-coloring which is why you don't see that much of it here on my blog. But I have to say I was happy with how it turned out. I inked up my Ferris Wheel in Versa-Mark and Soft Suede (I wanted to clear emboss it so it would stand out a little more since it's a softer color than say Early Espresso). Great idea, not so great results- Please be warned ahead of time that it's pretty awful-


Epic Fail! But see, the background looked nice. I tried it again with just the stamp-


I think it was the fact that I was stamping on the Water-Color Paper. because I got a much crisper image on my grid paper. Oh well, all things being what they are, at least I tried something new and you can see that we all have our cards that don't turn out right even if we rarely see them out in bloglandia.

And because I couldn't let those awful pics be the last thing you remember about my blog here's another picture of my studio assistant Duecey, being a blanket assistant too as I was working on Tooey's baby blanket-

My sweet boy!
Well, that's all I have for you today. I hope you liked it and I hope it inspires you to try something new today...even if it doesn't work out. you know the motto of this blog is to "Just Try". If you liked today's card or have questions about it I hope you'll take a moment to leave me a comet below. I love hearing from you and your comments really do make my day. If you'd like to +1 or Pin it (the good card not the fail, please) I've put those buttons on my blog for your convenience. Friends and Followers are always welcome too! :)

Thanks so much for taking time out of your busy day to stop by my little corner of the world. you are very appreciated! Till Next Time-

Remember- Life is often more about the storms than the peace they seek to overwhelm. It's not about Waiting for the storms to pass, but Learning to Dance in the Rain. 

Be Safe,
Shan
Pin It

Tuesday, December 25, 2012

Merry Christmas

Pin It
Just wanted to say I hope you all have a Merry Christmas. For those of you that don't celebrate Christmas I hope you have a safe Holiday Season!
Be Safe,
Shan Pin It

Saturday, December 22, 2012

Life is an Adventure / Happy Birthday Jas

Pin It
Hey y'all. Yep, I go for weeks barely managing to get 2 posts in a week and today I get 2 posts back-to-back. Oh well, I hope you don't mind hearing from me again so soon..

Today is my best friend's birthday and I have something to say...
Happy Birthday Jas!!!!!
Once again, I'm a slacker friend and didn't manage to get his card done and in the mail in time to get to him but at least I made him something special. If you've followed me for a while you might remember this card from last year. It had a special design just for my friend from NoLa. While this one doesn't have any special hidden designs I hope he likes it and I of course hope you do to. Here's my special card for my very special friend Jason, and because I'm a slacker he's seeing it here first with all of you so there's a few extra pics-


I started with a base of Early Espresso and layered a piece of Candlelight Christmas DSP on top. I chose this pattern because it mirrors one of my stamped images from the card. Next I layered a flap-style card on top of this. (The measurements are upstairs so I'll come back and add them to the bottom of the post later) I took a strip of E.E. c/s and scored it matchbook style and then used my Scalloped Border Punch to trim the short end. You can see this better in a later picture. I stamped the footprints from the set Daring Adventure in Crumb Cake, stamping off once so it was even more subtle. This was mounted on double Dimensionals for enough height to let the end flap slide underneath easily without bending.

Here's the flap opened up, you can see the scalloped edge here. Even though you can just barely see the scalloped edge when this part is closed, I like it because it's the small things that I think make a nice card more special-


The sentiment and image are also from the Daring Adventure stamp set. See how the stamped image mirrors the pattern on the DSP. :) Here's a close-up-


I chose this sentiment because even though we don't get to see each other nearly enough, I'm so excited to be a small part of the Daring Adventure that is my friend Jason's life. Thanks buddy for allowing me to share it all with you!

Here's a look at the inside-


I stamped the footprints a few times more and the sentiment is from the You're Amazing set, which is pretty fitting because my friend Jas is just that....Pretty Amazing. Oh I used Naturals Vanilla c/s for the inside piece and the pieces on the front flap card too.

Well, that's really all I have for you now. I hope you like it and I really hope Jason does too! Happy Birthday My Dear Friend! I love you bunches!!!!! I hope your day is as Amazing as you are and the upcoming year just as Fabulous.

If you liked today's card, or have questions about it, I hope you'll take a moment to leave me a comment below. I love hearing from you and I read them all. They really do make my day!!! If you'd like to +1 or Pin today's card I've put the buttons here on my blog for your convenience. Friends and Followers are always welcome too! :)

Thanks so much for taking time out of your busy day to stop by my little corner of the world. You are very appreciated! Till Next Time-

Be Safe,
Shan Pin It

Just Believe / NAC #25 / My Challenge # 52

Pin It
Hey y'all. I hope you've had a great week and are having a wonderful start to a long holiday weekend. Just a quick post for you now, because I've got another post coming up right after this one. :)

This is the season to believe. Believe in the seen and the unseen... Believe that there is not only a reason for the season, but even as hard as it may seem a reason for those things that we can simply not comprehend. Sometimes we just have to Believe. Believe in ourselves and those around us, that we are not alone, and that someone or something more powerful than us is watching out for us and over us. For me that's a belief in God. For you it may be something or someone else. At the end of the day, I hope you remember to also Believe in yourself.

When I started to make this card, I wanted to make one that was gender neutral and could be given for any reason. I used the Candlelight Christmas DSP and the Snowflake Soiree stamp set, so I may not be able to really give it at any time of the year, I've still got a few months till Spring that I can give it to someone to let them know that I'm with them. Here's today's card-

Snowflake Soiree and Candlelight Christmas Card
I think Masculine cards are hard to make and even though I didn't intend to make a "masculine" card, I think this could easily be given to a guy as well as a girl.

Here's the sketch I used-


It's from the Nacho Average Challenge's weekly challenge. There's even still time for you to join along in the fun and whip up a card to enter. If you haven't checked them out yet, I really hope you will. They alternate between sketch challenges and color challenges and even though I find color challenges to be really challenging (no pun intended) they really make me step out of my comfort zone and get creative. Know what else, the ladies on the DT are so stinking creative and leave the nicest comments. I really do hope you'll check them out!

I altered my card only slightly from the sketch in that I offset my scallops so they alternated instead of layering right on top of each other. And just in case you're wondering, I cut them at 6 x 2 and this gave me enough paper to overlap and still fit on the card. I simply layered the all, adhered them (with Tombow of course) and then flipped my card over and trimmed the excess off using my paper snips. I used my Scalloped Edgelet to cut the layers.

Here's a close-up of the center piece-


I used Early Espresso and Crumb Cake inks to stamp the snowflakes on a scrap of Very Vanilla c/s.and then sponged around the edge with more E.E. I couldn't help myself and let Tink have her way with the snowflakes even though it's hard to see here. This is adhered with Dimensionals to make it stand out just a little. Oh and I forgot to tell you that I used a piece of Very Vanilla Seam Binding that I wrapped around the card front and adhered with SNAIL. The ends are hidden beneath this piece.

Here's the inside-


I just love the font they used with the Snowflake Soiree set. Just a little sponging and a few more snowflakes here and my card was finished.

So what do you think? I hope you liked it and I hope the ladies over at NAC do too. I love hearing from you so if you liked today's card or have questions about it, I hope you'll leave me a comment below. I read all off them and they really do make my day! If you'd like to +1 or Pin it, I've put those buttons here on my page for your convenience. Friends and Followers are always welcome too! :)

Thanks so much for taking time out of your busy day to stop by my little corner of the world.  You are very appreciated! Till Next Time (which in this case is just a few minutes)-

Remember- Life is often more about the storms than the peace they seek to overwhelm. It's not about Waiting for the storms to pass, but Learning to Dance in the rain.

Be Safe,
Shan 
Pin It

Tuesday, December 18, 2012

End of the Week Technique #60 - Crimped Paper Treat Holder

Pin It
Hey y'all. Happy Tuesday! I hope you're having a great week so far. :) So I know it's not the end of the week yet but I had a few minutes and I wanted to share this with you while I could. This is another of my 12 Days of Christmas/Secret Santa gifts for one of my co-workers. This is the first one I made and I made it as a "Thank-You" for one of the Military Staff Members in our clinic. She always makes me smile and I wanted to give her a little something extra to say "Thanks" for always making me smile. I'm showing you hers because it was the first one I made and I took pictures as I made it.

Here's today's project-


Crimped Paper Treat Holder

Isn't it cute? I can promise you this is one package they won't be getting a sneak peek of. It's seriously sturdy and secure. I started with a piece of Raspberry Ripple c/s large enough to wrap around my treat which, in this case, was a pack of Juicy Fruit. I had seen my friend snacking on this last week and thought it was sure to be liked. :) I added a square of DSP that I cut out from one of our sheets. I think there's 16 different squares per sheet. I adhered it with Tombow and then added some Dazzling Diamonds to "Bling it Up" just a little bit. Here's a closer look-


Did you notice the ends of the package? I bet you're thinking I used the Paper Crimper to do that. Wrong. How excited am I to tell you I came up with this idea all on my own? I really do love being able to tell you I had an original idea and even more that it worked! I have a Paper Crimper that I've only used a few times, but since SU retired it earlier this year I didn't want to use it. I wanted to see if I could get the same effect without it, and I'm happy to say I was able to! Here's a closer look-


Pretty Cool, Huh!?! Yep, I was doing a little Happy Dance over this one. Oh, and I let Tink have a little fun too, just because.

Wanna know how I did it? It's so easy you're not gonna believe it...

What you need for this week's technique- Cardstock in the color of your choice, Adhesive (Sticky Strip is preferred however, I was out when I made this and used my favorite Tombow and am happy to say it held just fine) and your Simply Scored tool.

Here's how you do it-
1- Cut a piece of c/s large enough to wrap around your treat and long enough to "crimp" the edges. About 1 1/2 inches on each end should be good.
2- Center your treat and then apply adhesive down the edge so you can "seal" the edges together. This will be centered on the underside of your treat. Gently fold your c.s over and press down on the seam until it's secured. Then you can slide your treat back in.
3- Seal both ends, one at a time in the same manner.
4- Sure your treat is secured now but, let's make it look really nice. (No pictures of this next step, because I simply don't have enough hands. Sorry. I know you'll get the idea though.) Take one end and line it up against the top corner of your Simply Scored and using your stylus score down the edge. I scored in each score channel and I did 4 on each side. You have to score carefully because the c.s is double thick so it's hard to stay in the channels. Here's another look at the scoring-
Not only is this decorative, but I think it actually helped the edges to stay sealed when it was just the Tombow. Here's one last look at the finished product-


5- Smile when you see what you've created and smile even bigger when you think of the smile it will bring it's recipient- I really do just L.O.V.E. that part!

Well, that's all I have for you today. It's quick and easy and easily customizable to the size of your treat.  Oh and by quick I mean about 15 minutes start to finish. It took me far longer to write this than it did to make today's project. I really hope you liked today's project and I hope it inspires you to try something new. Oh and btw- my friend really liked her surprise. Sometimes it really is the small things in life that make us happy. If you liked today's project or have any questions about it, I hope you'll take a moment to leave me a message below. I read them all and they really do make my day! If you'd like to +1 or Pin it, I've put the buttons on my blog for your convenience. Friends and Followers are always welcome too! :)

Thanks so much for taking time out of your busy day to stop by my little corner of the world. You are very appreciated! Till Next Time-

Remember- Life is often more about the storms than the peace they seek to overwhelm. It's not about Waiting for the storms to pass, but Learning to Dance in the rain.

Be Safe,
Shan Pin It

Sunday, December 16, 2012

Snowman Tic-Tac Holders / Secret Santa Ideas End of the Week Technique # 59

Pin It
Hey y'all. Just a quick post tonight. I'm a week behind on my EWT's so I'm throwing an extra one in. These Tic-Tac Holders are all over the place but of course when I went to look up directions I saw a few different ones that I liked, with different measurements & different decorations so I just kind combined to make my own.

We're doing a 12 Days of Christmas/Secret Santa gift exchange at my work and I though this would be a nice little stocking stuffer. I'm happy to say I've also done a few other projects that I will be posting soon with  tutorials too.

Here's today's project-


Ok, so I'm a little disappointed that the picture came out so washed out, but you can get the idea and unfortunately, I'm too tired to get back up and take some more. :( Sorry.

Here's what you need for this project- Cardstock in your choice of colors. I used Bashful Blue and Whisper White, Ribbon- I used our stitched ribbon in White. Circle Punches in the following sizes- 1 1/4, 1, and 3/4. Corner Rounder Punch, Perfect Polka Dots E. F., Big Shot, Stamp Set of your choice for the background, Pumpkin Pie Stampin Write Marker, Pearls and Black Sharpie Marker. Oh and of course a pack of Tic-Tacs. :)

Here's how you make your project-
1- I Started with a base of Bashful Blue Cardstock cut to 3 x 4 7/16 and rounded the edges. I know this is an odd measurement but I took one that was from another blog and when I scored it, the front & back weren't even (so you know the OCD in me made me change it). Score this at 1 15/16 & 2 13/16.
2- Cut your Whisper White c/s at 1 3/4 x 2 13/16 and round two edges.
3- Stamp your background. I chose to use the smallest snowflake from the Snowflake Soiree set. I stamped it in Marina Mist 3 times full strength and 3 times stamping off once.
4- Adhere the ribbon to your base. I did this 2 different ways, once under my W.W. piece and once over it (simply because I had already adhered my W.W. c/s to my base. Adhering it under your W.W. piece is much easier.
5- Adhere your W.W. c/s and then using your 1 1/4 Circle punch, punch your circle near the bottom of your W.W. piece.
6- Punch a 1" circle from a scrap piece of c W.W. c/s and run it through your Big Shot in your Perfect Polka Dot E.F. Adhere this to your c/s, slightly overlapping your punched c.s base. Add 3 medium pearls to this for buttons. You can color them with a black Sharpie while they are still on the adhesive page.
7- Punch a 3/4" W.W. Circle from scrap c/s. Color the small pearls that are attached in a row for the eyes and mouth and once they are dry, attach them to this piece. Using your Pumpkin Pie Marker draw a little triangle for the carrot nose. This piece gets attached with a Dimensional.
8- Apply a line of Sticky Strip in the middle of your two score lines and use this to attach the c/s to your Tic-Tac container. and tie your ribbon in a bow or knot.
9- Smile when you see your finished product and smile even bigger when you think of the joy it will bring it's recipient. :) That part just never gets old!

That's all I have for you tonight. I hope you like it and I hope it inspires you to try something new. This is a quick and easy project that is sure to bring a smile to someone's face. It's also quick to make and you could easily make a large batch for your office friends in no time at all. If you like today's project or have questions about it, I hope you'll take a moment to leave me a comment in the space below. I love hearing from you and your comments really do make my day! If you'd like to +1 or Pin it, I've put those buttons on my b log for your convenience. Friends and Followers are always welcome too! :)

Thanks so much for taking time out of your busy day to stop by my little corner of the world. You are very appreciated! Till Next Time-

Remember- Life is often more about the Storms than the peace they seek to overwhelm. It's not about Waiting for the storms to pass, but Learning to Dance in the rain.

Be Safe,
Shan

Pin It

Saturday, December 15, 2012

Glitter Window Ornament - End of the Week Technique #58 / NAC #24 / My Challenge #51

Pin It
Hey y'all. I hope you're having a great weekend. I've got a pretty new card and a new EWT for you today. (And an "Ask me how I know") I don't know about you, but I still find one of my biggest problems with making cards is that I over-think things. Sometimes the simplest concepts seem to take me the longest to actually make happen. That's what happened with tonight's card. I had the concept and thought it would just "happen"....yeah, that happened. NOT! But at any rate, here's my card-


 I did today's card for the weekly challenge over at Nacho Average Challenge. Please make sure you go by and check them out. They have great challenges each week. This week is a color challenge. Normally, color challenges really give me grief, but this concept actually came to me pretty quick. :) Here's the color challenge for this week-


I used Silver instead of gray and combined it with a new technique. I'll tell you about that further down in the post. Here's the inside of my card-

I couldn't find my stand..sorry about the attractive bone folder in the picture
I used my Keepsake Ornaments stamp set and Holiday Ornaments Framelets to make this card along with Greeting of the Season for the sentiment. I also used the Lacey Brocade E.F. to add a little interest to the front of my card.

What do you think? I hope you like it and I hope the fabulous ladies over at NAC do too! Now for this week's End of the Week Technique, The Glitter Window. I haven't done any of these before and of course I had to make it a little more complicated than it needed to be, But I'll give you the down dirty and easier version of it. Lol.

Here's what you need- Stamp Set of your choice (I used Keepsake Ornaments), I also used the Ornaments framelets however depending on your choice of stamps and designs you could also use a favorite punch, and some Glitter Paper ( I used SU Silver), and Mini-Glue Dots.

Here's what you do-
1- Stamp your image and then cut it out with either your punch or framelet.
2- Cut out the image on the front of your card using your coordinating framelet or punch. The framelets make this really easy because you're not limited in where you want to place your image.
***TIP*** If you want to have the front of your card embossed, like mine is, don't emboss it before cutting out your shape. If you use framelets you will flattened out (un-evenly too) your embossing. Ask me how I know. Yep, I did it and since I keep it honest with you guys, here's what it looked like-

3- Now for the glitter part- Cut out some glitter paper to accent your cut out image. I used my Scalloped Ribbon Punch to cut out mine. You're actually getting 2 Tutorials because I'm going to show you how I did this. I wanted to make sure the glitter paper followed the curved outline of the stamp so here's what I did. 
3a- I stamped the image on the back of my glitter paper-

This way I could see the curve to trim it instead of just having a straight edge (You know I couldn't just keep it simple, right?)
3-b I attached this to a piece of a Post-It note so I could slide it into my punch-

3-c  I just punched it out like normal-

4- Attach your Glittered Cut out image to your stamped image with Some Mini-Glue Dots. Glue Dots are really important to make sure the Glitter Paper sticks to your stamped image.
I also cut a piece of Glitter Paper with my framelet for the "cap" for my ornament. :)
5- Take your stamped image and attach it to the inside of your card by placing it through the cut image you made in step #2 above. Here's another look at the finished product-


That's all you need to do for this week's technique. I hope you liked my card and I hope it inspires you to try something new. I love hearing from you, so if you liked today's card or have questions about it, I hope you'll take just a moment to leave me a comment in the space below. I read all of your comments and they really do make my day! If you'd like to +1 or Pin today's card, I've put those buttons on my blog for your convenience as well. Friends and Followers are always welcome too!

Thanks so much for taking time out of your busy day to stop by my little corner of the world. You are very appreciated! Till Next Time-

Remember- Life is often more about the storms than the peace they seek to overwhelm. It's not about Waiting for the storms to pass, But Learning to Dance in the rain.

Be Safe,
Shan

Pin It

Sunday, December 9, 2012

Gently Falling & Inspiration

Pin It
Hey y'all. I hope you're having a great weekend. I had a few minutes earlier so I went into my craft room and made a card I'd been wanting to make for a while. I hope you like it. :)

Where do you find inspiration? Sometimes I find it in the most unlikely places. A few weeks ago I posted a card that was inspired by the evening sky as seen from my bathroom window. Today I have a card that was inspired by a print at my friend's (and team-mate) house. The print is in her powder room on the main level and even though I had seen it many times, for some reason it suddenly just hit me that I could make something similar and so I did. Here's what I came up with-


Here's my inspiration- (sorry about the poor lighting, the flash kept bouncing of the glass)

There's a funny story that goes with this. I took the picture and then showed it to my friend Brenda. I told her it was my new inspiration piece. She said "Wow! That's really pretty." We had a pretty good laugh when I told her I hoped she liked it since it was hers. LOL!

Here's a close-up. I used Gently Falling which is still one of my favorite sets-


I started with a base of Always Artichoke. Next I stamped a piece of Naturals White with the French Script background stamp in Crumb Cake. I used a post-it note to mask a 2 x 2 area and sponged Soft Suede around that. My leaf was stamped in Soft Suede on a 2 x 2 piece of Naturals White c/s and then the edges were heavily sponged. This pieces was adhered with Dimensionals to give a little additional dimension to the card.

Here's the inside-


I left it simple to go with the overall theme of the card. The sentiment is from Teeny Tiny Wishes. I hope you like it and that it encourages you to find inspiration in the things that bring you joy in your everyday life. Sometimes I forget that it really is the small things that can bring a lot of joy. I was really happy that this turned out like I envisioned it.

I love hearing from you and read all of your comments If you liked today's card or have any questions about it, I hope you'll take a moment to leave me a comment below. If you'd like to +1 or Pin it, I've put those buttons on my blog for your convenience. Friends and Followers are always welcome too! :)

Thanks so much for taking time out of your busy day to stop by my little corner of the world. You are very appreciated! Till Next Time-

Remember- Life is often more about the storms than the peace they seek to overwhelm. It;snot about Waiting for the storms to pass, but Learning to Dance in the rain.

Be Safe,
Shan Pin It

Thursday, December 6, 2012

Artistic Etchings/ NAC #23 and My Challenge #50

Pin It
Hey y'all. I hope you're having a great week so far! I sure am missing you and hope the feeling's mutual. :) It's late so I'm gonna do a quick post and head to bed.

You know I love those fine ladies over at Nacho Average Challenge (NAC). If you haven't visited their site yet, I hope you will. Better yet, I hope you'll take a moment and join in on the fun. This week's challenge is a sketch challenge and I knew pretty quick exactly what I wanted to do with it. Dontcha just love when that happens? Here's what I came up with-


Card featuring Artistic Etchings Stamp Set

Here's the sketch from NAC-


I stuck pretty close to the sketch. I flipped it and left just a small border on the inside of my Silver strip that's not in the sketch. Hope they don't mind too much. :) I've wanted this set for a long time and just recently got it. This is the first time it's been inked up. When I saw this weeks sketch, I knew it would be perfect. :) Here's a closer look-


I used my Scalloped Square Bigz Die to create the Scalloped Rectangle. This was one of my recent End of the Week Techniques and I think it worked great here. For the scalloped border down the side, I used one of my new framelets. The black strip is about 1 1/2 inches wide before being trimmed with the edgelet. I used Mini Glue Dots to adhere the Silver Glimmer Paper to the Basic Black strip. My center panel is adhered with Dimensionals. The image is stamped in Black Staz-On. I really like how crisp it looks against the Whisper White c/s.


The sentiment and images are all from the Artistic Etchings  stamp set. The sentiment is stamped in Black Staz-On and is punched out with the Large Oval Punch and then adhered with Tombow to a scrap of Basic Black that was punched with the Scalloped Oval Punch. Normally I wouldn't layer on the inside, but I had originally intended this to be on the front of the card where you see NAC (with the sketch flipped). Instead I decided to stick more closely to the sketch, but by that time I had already punched and mounted it so that's how that happened. However, I think it brings the scalloped theme from the front to the inside, so it all worked out in the end. Here's a close-up of the stamped mages-


I stamped the images in Real Red and Black Staz-On. Once I had stamped it, I decided it needed a little something else. I quickly added Black Embossing Powder to the card and Heat Embossed it. It really stands out in person and is an unexpected surprise.

Well, that's all I have for you tonight. I hope you liked my card and I hope the fabulous ladies over at NAC like it too. If you liked it or have questions about it, I hope you'll leave me a message below. I love hearing from you and read all my messages. They really do make my day! If you'd like to +1 or Pin today's card, I've put those buttons on my blog for your convenience. Friends and Followers are always welcome too! :)

Thanks so much for taking time out of your busy day to stop by my little corner of the world. You are very appreciated! Till Next Time-

Remember- LIfe is often more about the storms than the pear they seek to overwhelm. It's not about Waiting for the storms to pass, but Learning to Dance in the rain.

Be Safe,
Shan
Pin It

Thursday, November 29, 2012

End of the Week #57 - Scribbled-Spritzed Markers / NAC # 23 / My Challenge #49

Pin It
Hey y'all. I hope you're having a great week so far. It's been so cold here lately. I can't stand it! I miss the warmth, like crazy. I really miss the beach and all the beautiful sunsets.  This week over at Nacho Average Challenge they have a color challenge. Now normally color challenges are so not my favorites, but this one inspired me and I couldn't wait to get too it.

Here's today's card-

Card featuring Scribbled-Spritzed Marker Technique


Here's the challenge-


I love this color combo! Yea! When I saw it, I was reminded of a recent sunset. It was so pretty I had to  take a picture-

You know I probably should have used "Like A Tree"
 but I didn't. I just went with another silhouette.
Here's a close-up-


I started with a base of Midnight Muse and added a layer of Raspberry Ripple. My focal point uses a base of Glossy White c/s. The image is stamped in Midnight Muse. It took me a few tries but I'm so happy with how it turned out.

Here's a look at the inside-


Both the image and sentiment are from the same set and are stamped in Midnight Muse.

What do you think? Didn't it turn out pretty? This was the first time I tried this technique, and I'm pretty sure I will try it again. I will say though it is not one for those of us with more than a little Stamping OCD. If you're not as OCD as I am, you may be able to let loose and just go with it. :) Oh and you have to wait for it to dry to get the full effect.

Here's what you'll need for this technique- Stampin Write Markers, an old plastic stamp case,  Glossy cardstock, coordinating colored c/s, the stamp set of your choice and a spray bottle filled with water. Although you could probably use just about any type of stamp, line or solid image I chose to use a solid silhouette.

Here's what you do- this is another easy technique, you won't believe how easy it is. I just tend to make things harder than they really are....darn OCD!!!
1- Choose your colors- take your colors and scribble them onto your plastic case. You want to make sure that you scribble enough to equal your card stock both height and width, then add a little extra.


***Tip*** - start with your lightest color and then add the darker ones. This way you won't get any dark colors in your light marker's tip.
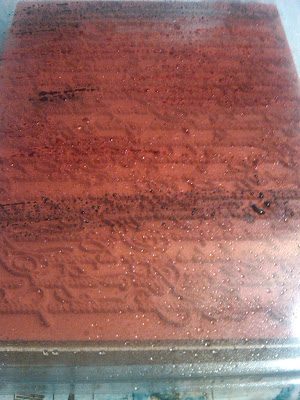
2- Lightly spritz the case with water. This is what it will look like. You can see the water droplets in my pic. :)


3- Take your Glossy c/s and lay it glossy side down onto the case, carefully. Take your Grid Paper and use it to rub the c/s onto the stamp so every surface is covered.
4- Lift it off the case carefully being sure to only touch the edge....unless of course you want a multicolored finger-print on your card.
5- Let this dry. You may have a line down one of your edges where the color poled as you lifted it off. If you just can't bear it, you can cut your paper down to avoid that. (That's what I did)
6- Once your paper is dry, stamp as you normally would. I used the floral image from "Just Believe" and stamped it twice.
7- Layer on your card or scrapbook page as desired.
8- Smile when you see your finished product. Smile even more when you think about the smile it will  bring to its recipients face. Boy, I love that part!

Here's another look-


See! I told you it was easy. Do you like it? I hope so and I hope the ladies over at NAC like it too. If you haven't joined them yet, why not hop on over as soon as you're done here. They are pretty darn fabulous...and their challenges are too! I hope this inspires you to try something new today, or whenever it is you're reading this. :D If you liked today's card or have questions about it, I hope you'll take a moment to leave me a message in the space below. I read all of my comments and they really do make my day!!!If you'd like to +1 or Pin today's card, I've put those buttons here on my blog for your convenience. Friends and Followers are always welcome too!

Thanks so much for taking time out of your busy day to stop by my little corner of the world. You are very appreciated! Till next time-

Remember- Life is often more about the storms than the peace they seek to overwhelm. It's not about waiting for the storms to pass, but Learning to dance in the resin.

Be Safe,
Shan
Pin It