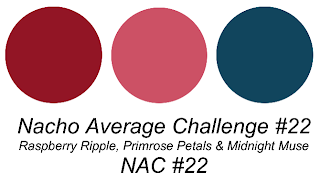
Hey y'all. I hope you're having a great week so far. It's been so cold here lately. I can't stand it! I miss the warmth, like crazy. I really miss the beach and all the beautiful sunsets. This week over at Nacho Average Challenge they have a color challenge. Now normally color challenges are so not my favorites, but this one inspired me and I couldn't wait to get too it.
Here's today's card-
 |
| Card featuring Scribbled-Spritzed Marker Technique |
 |
| You know I probably should have used "Like A Tree" but I didn't. I just went with another silhouette. |
I started with a base of Midnight Muse and added a layer of Raspberry Ripple. My focal point uses a base of Glossy White c/s. The image is stamped in Midnight Muse. It took me a few tries but I'm so happy with how it turned out.
Here's a look at the inside-
Both the image and sentiment are from the same set and are stamped in Midnight Muse.
What do you think? Didn't it turn out pretty? This was the first time I tried this technique, and I'm pretty sure I will try it again. I will say though it is not one for those of us with more than a little Stamping OCD. If you're not as OCD as I am, you may be able to let loose and just go with it. :) Oh and you have to wait for it to dry to get the full effect.
Here's what you'll need for this technique- Stampin Write Markers, an old plastic stamp case, Glossy cardstock, coordinating colored c/s, the stamp set of your choice and a spray bottle filled with water. Although you could probably use just about any type of stamp, line or solid image I chose to use a solid silhouette.
Here's what you do- this is another easy technique, you won't believe how easy it is. I just tend to make things harder than they really are....darn OCD!!!
1- Choose your colors- take your colors and scribble them onto your plastic case. You want to make sure that you scribble enough to equal your card stock both height and width, then add a little extra.
***Tip*** - start with your lightest color and then add the darker ones. This way you won't get any dark colors in your light marker's tip.
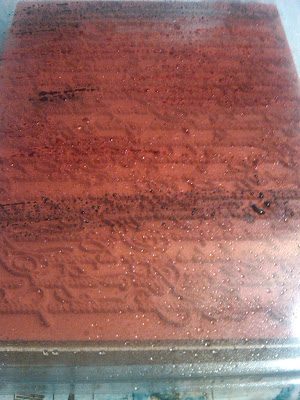
2- Lightly spritz the case with water. This is what it will look like. You can see the water droplets in my pic. :)
3- Take your Glossy c/s and lay it glossy side down onto the case, carefully. Take your Grid Paper and use it to rub the c/s onto the stamp so every surface is covered.
4- Lift it off the case carefully being sure to only touch the edge....unless of course you want a multicolored finger-print on your card.
5- Let this dry. You may have a line down one of your edges where the color poled as you lifted it off. If you just can't bear it, you can cut your paper down to avoid that. (That's what I did)
6- Once your paper is dry, stamp as you normally would. I used the floral image from "Just Believe" and stamped it twice.
7- Layer on your card or scrapbook page as desired.
8- Smile when you see your finished product. Smile even more when you think about the smile it will bring to its recipients face. Boy, I love that part!
Here's another look-
Thanks so much for taking time out of your busy day to stop by my little corner of the world. You are very appreciated! Till next time-
Remember- Life is often more about the storms than the peace they seek to overwhelm. It's not about waiting for the storms to pass, but Learning to dance in the resin.
Be Safe,
Shan


Gorgeous!! I am going to try this technique!!!
ReplyDelete