Tuesday, October 30, 2012

Wonderfall for 2 Challenges / NAC#18 & ISSC #39 /My Challenge #45

Pin It
Hey y'all. Happy Tuesday! I hope you are safe, and warm, and dry and not suffering any ill effects from Sandy. I was laid up, in bed, most of yesterday with a nasty migraine courtesy of that nasty FrankenSandy. Sorry I didn't get to post. I did get a few cards made today, late though it may be and hope you like what I have for you.

Tomorrow is my last day at my current job. I've been there a little more than a year and needed a card for a friend there. I didn't know exactly what I wanted to design so I decided to look for a challenge to help me out. This week's challenge over at Nacho Average Challenge is a color challenge. Color challenges are very difficult for me so I often try to combine them with a sketch challenge. I combined the color challenge over at NAC with the sketch challenge at I Spy to come up with today's card. Here's what I came up with-


Card featuring Waterfall Stamp Set and
Autumn Accents Bigz Die
I started with a base of Soft Suede and added a layer of Naturals White c/s. I stamped 3 of the images from the Wonderfall set, using the colors from the NAC Challenge. Here's what I was working with-


and here's the sketch challenge from I Spy-


 I've been thinking of making a fall wreath like the holiday one on the cover of the new Holiday Catalog. So I decided to try my hand by starting with a single leaf. I cut out 4 leaves with the Autumn Accents Bigz Die and then stamped the matching image from the Wonderfall set in Summer Starfruit.


I used my Simply Scored Tool to score down the center of each leaf. All leaves were sponged in Soft Suede around the edges and then the score-lines were re-enforced. I used Tombow to adhere all the leaves together creating the 3D leaf for my focal point. I tied a knot around my finger with the Summer Starfruit stitched ribbon and attached it to the card with SNAIL. I then snipped the ribbon to form the knot you see. This is such an easy way to create knots. I make mine while the ribbon is still on the spool to help save on ribbon. My leaf was attached to the card with Dimensionals. This will definitely need extra postage if you're planning on sending it through the mail.

Here's a look at the inside-


Inside of card featuring Wonderfall Stamp Set,
Autumn Accents Bigz Die and Friendly Phrases Stamp Set

I stamped the sentiment in Soft Suede and then stamped my leaf image twice. My acorn was cut out with the Bigz Die and then inked with the coordinating image. In order to get the two toned stamped image I inked my stamp and stamped it off once so that the top could be a lighter color. I then re-inked the bottom portion with my Classic Ink Pad, huffed on it and then stamped it giving me the two-toned look. I then sponged around the edges and adhered it to my c/s with Tombow.

Here's a look at the card and coordinating envelope-


Well, that's all I have for you today I hope you liked it and I hope the DT's over at NAC & ISpy liked it too. I love hearing from you so if you liked today's card or if you have questions about it, I hope you'll take a moment to leave me a message below. I read all of them and they really do make my day. If you'd like to +1 or Pin it, I've put those buttons on my blog for your convenience. Friends and Followers are always welcome too! :)

Thanks so much for taking time out of your busy day to stop by my little corner of the world. You are very appreciated! Till Next Time-

Remember- Life is often more about the storms than the peace they seek to overwhelm. It's not about Waiting for the storms to pass, but Learning to Dance in the rain.

Please also Remember that October is National Domestic Violence Awareness Month-
Love Does NOT Hurt!

Be Safe-
Shan


Pin It

Friday, October 26, 2012

Beautiful Butterflies for Domestic Violence Awareness / End of the Week Technique #53 Faux Torn Paper / NAC #17

Pin It
Hey y'all. Happy Friday! I hope you've had a great week and are looking forward to a good weekend. We are bracing for Hurricane Sandy to arrive in what forecasters are calling a Frankenstorm. Hopefully it will not be as bad as expected.

For those of you that follow me here regularly, just an update to let you know my daughter J and Princess Tooey (Baby 2.0) should be released from the hospital today following her emergency appendectomy Wednesday evening. Both are well and Princess Tooey seems to have suffered no ill-effects from the surgery. God is Good and has truly blessed my family this week! Thanks for all of your prayers and well wishes. You are appreciated more than you can imagine!

On to today's card. For those of you that know me IRL or have followed me for any length of time here, you know I H.A.T.E. tearing c/s or DSP to make cards and projects. It literally makes me anxious. In fact there's probably only 2-3, max, cards on this blog that feature that technique. It's really only worse for me than crumpling. *Shiver* Know what I don't mind tearing? Computer paper. Or Post-it notes. No problem with those at all. Know what you can do with torn regular paper? You can make it look like torn cardstock. Woo-Hoo!!! Love it! I was looking for a technique for this week and still needed to come up with an idea for this week's NAC challenge and I decided to combine the two into one and save myself a little effort. Here's what I came up with-


Card with Faux Torn Paper
Domestic Violence Awareness Month
Here's the sketch I was working with from the great ladies over at Nacho Average Challenge.


 Seeing as I was surprised Tammy didn't use snowflakes for this, that was my original plan. Then I decided to go in just a little different direction. I decided to flip the card for my interpretation. I just now realized I'm missing the sentiment. I hope the ladies aren't too upset with me about that.

I'm going to go a little bit off stamping for a moment so I hope you'll bear with me. If not, feel free to scroll down to the tutorial but, I think this is important and goes to the reason for the card.

Many people know that October is Breast Cancer Awareness Month. Very few know that it is also Domestic Violence Awareness Month, unless of course you read my blog and then you of course know about this. Domestic Violence is an Epidemic in not only our country, but the world. Unfortunately, it is a Silent Epidemic. Its silence allows it to invade homes and communities and wreak havoc on the lives of everyone it touches. The silence of its victims and the people who know about its occurrences, or suspect it allows it to further grow. Only the light of awareness and an un-willingness to allow it to continue can begin to stop it's devastation. I did a card a few weeks ago and received a comment from a very nice lady thanking me for taking the time to shed some light on this horrific crime. She was strong enough to leave her abuser, Thank God, but lost a loved one who was not so fortunate. I figured if she was strong enough to tell me her story, I would tell mine. (Very Briefly)

This epidemic doesn't just affect those of a lower socio-economic group. It doesn't just affect the under-educated. It crosses all races, genders, educations and socio-economic levels. I like to think I'm a pretty smart woman. I'm college educated, have a good job, a good support system and yet I was in not one but two abusive marriages. Yeah, bet you're thinking I'm not so smart now, aren't you? Before I was able to get out of the second one, I took a college course on Violence in Society. I thought it would be a good elective and it was. I didn't however need it to tell me about the situation I was in. I knew. I was an E.R. Nurse and took care of victims  surviors all the time. I just wasn't in a place to leave. For this course I did a paper on Domestic Violence and listed many of the s/s / behaviors of abusers. My then spouse read it and asked "Is this how you see me?" DUH! Everyone's situation is different though and not everyone can leave just because someone else thinks they need to leave or even if they think that themselves. More people die from Domestic Violence when they are preparing to and actually leaving than at any other time. 

If you suspect someone you know is being abused-
1- Please, please, PLEASE trust your gut.
2- Ask them and listen to not just their words but non-verbal clues too. Just because they say "No" doesn't mean it's not happening. Most are so ashamed, they will not admit to it.
3- If they should surprise you and tell you of their abuse, I beg of you to please believe them even if you have never seen any evidence to support this or had any clue. Abusers are Master Manipulators of anyone they come into contact with. My best friends and family didn't believe me when I first told them. How could that be happening? It couldn't possibly be happening to me. I was one of the strongest people they knew, and certainly one of the least likely to tolerate that kind of behavior. They ate dinner with us, we vacationed together, they had never seen or suspected anything was amiss. You know what? Victims are often Mater Illusionists. They survive because they make sure no one knows what's going on. If they didn't, things would be even worse.
4- Be supportive. Let them know that you are there for them in whatever way they need you to be. You can not force them to be on your timeline, no matter how much you wish them to be.

It took me many years to get away from my abuser(s). It is un-fortunate that I wasn't smart enough aware enough to avoid my second one. However- you live and you learn. Besides that, I got a wonderful daughter from that relationship, and would not trade her for anything. Also, we have been very active in promoting Awareness together.

 Real Love Does NOT Hurt!

Ok- now for today's technique. Here's what you will need-
Cardstock to do your technique on (I used Glossy White although you can use it on any type of paper), paper to tear (I used computer paper, although you could use sticky or post-it type notes), ink pads in your choice of colors and either sponges or daubers.

Here's what you do-
1- Tear your paper. I decided I wanted a "strip of color" so I tore two different pieces of paper to lay down either side. However, this technique works equally well with just one "torn" edge.
2-Adhere your torn piece of paper to your c/s. I used Dotto Temporary Adhesive, but you could use SNAIL and remove some of the tackiness by tapping your finger on it. If you use post-it type notes make sure to leave a sticky edge to your paper. Here's what it will look like-

Yeah, I realize now that I should have put this on darker c/s for demonstration purposes.
Sorry. :(
3- Pick your colors and sponge them on. You can use separate sections of color or you can layer them on. I started by sponging Wisteria Wonder over my exposed c/s and then added Perfect Plum below that in the middle and then Elegant Eggplant to the bottom. This created a different depth of color and allowed me to avoid any rough looking edges.


4- Once you have your colors layered and blended to your desired effect, remove your paper borders-


5- Finish your card by embellishing it in whichever way you choose. I chose to use Butterflies that I cut out of matching c/s with my Butterflies Embosslet and Big Shot.


6- Smile when you see what you see what you've created and smile even more when you think of the joy it will bring to it's recipient.

Here's how I completed the inside-


I didn't add a sentiment, because I'm not sure what I want to put there yet. I sponged the edges with W.W. ink and attached a few of my left over butterflies with Tombow. I love how this card turned out. It was quick and easy and I love the effect I got from the technique as well as the beautiful coloring and layering effect that was achieved by using two pieces instead of just one. What I love the most is that I didn't have to tear any of our fabulous c/s to create it!

I hope you liked today's card and technique and I hope it inspires you to try something new today. If you liked today's card or have questions, I hope you'll take just a moment to leave me a message below. I read them all and they really do make my day. If you'd like to +1 or Pin today's card, I've put those buttons on my blog for your convenience. Friends and Followers are always welcome too! :)

Thank you so much for taking time out of your busy day to stop by my little corner of the world. You are very appreciated! Till next time-

Remember- Life is often more about the storms than the peace they seek to overwhelm. it's not about Waiting for the storms to pass, but Learning to Dance in the rain.

Please also Remember that October is Domestic Violence Awareness Month-
Love Does NOT Hurt!

Be Safe,
Shan
Pin It

Thursday, October 25, 2012

Watercolored Halloween Treat Bag / The Great Pumpkin Blog Hop Week #13

Pin It
Hey y'all. Happy Thursday! Just one more day until the weekend. Woo-Hoo! Hope your week is an Amazing one.

First off let me say thanks for bearing with me yesterday as I missed posting and simply joined Tuesday's card up to a new post. I had already planned to do that, but I had also planned on giving you a new post. For those of you that follow me, I had a family emergency yesterday and just wanted to give you an update. My daughter is almost 5 months pregnant and started throwing up & having right lower abdominal pain Tuesday night. After spending 10 hours in the E.R. getting 2 Ultra-sounds and another 2 hours on the ward awaiting an MRI we found out 3 things. 1- We're really thankful that her husbands in the military and she is receiving Military Medical Care, 2- She's having a baby girl, Tooey (Baby 2.0) is now Princess Tooey, and 3- She had appendicitis. So, after a very long day, she went to surgery at 5pm and I am happy to announce both of my princesses are doing well. I'm forgiven for not posting, right? :)

Here's what I had planned on posting. It's also a Blog Hop so make sure to scroll all the way to the bottom of this post to see everyone's creations and to join in the fun-


Halloween Treat Bag featuring
Watercolored and Brayered Greeting Card Kids Stamp Set.
I did this project for my September Team Swap. The bag itself is like this one that I did earlier this season. The focal panel though is CASE'd from the Fantabulous (why yes, that really is a word and the correct usage of it) Michelle Zindorf. I changed mine just a little to make it my own, but here's the original.  I started with a base of Lucky Limeade and made my sweet little bag. It's just the right size for a small gift or treat for someone special. The panel was adhered with Dimensionals and I used a piece of Ruffled Limeade Ribbon to hold it closed.

Here's a closer look-


Oh! How precious is she!?! I used my Blender Pens and Classic Ink Pads on Watercolor Paper to design this little darling. I then fussy cut and adhered her to my brayered and sponged background.

I used the flourishes from Everything Eleanor like the inspiration piece but changed the position a little and then added 3-D pumpkins instead of stamped ones-


I love making punch-are pumpkins this time of year. They're just so easy and so sweet.

Well, that's all I have for you for this post. Don't forget to scroll to the bottom to see all of the fabulous entries in this week's Great Pumpkin Blog Hop. It's the last week, so why not join us too! You can join by clicking on the link at the bottom of my post. Terry at Goin' Over The Edge has hosted us for 13 weeks now and it's been a blast! There's still time to join in and guess what? Terry's giving away a $50.00 Stampin' Up gift certificate to one of the entries from the 13 weeks. How Amazing is she!?! Pretty Darn, is my answer to that question. Anyways- make sure to check out all the fun and be sure to come back often to see the new entries.

I hope you liked today's project. I love hearing from you, so if you liked it or have any questions, I hope you'll leave me a message below. I read all of your comments and they really do make my day! If you'd like to +1 or Pin today's project, I've put the buttons on my blog for your convenience. Friends and Followers are always welcome too!

Thanks so much for taking time out of your busy day to stop by my little corner of the world. You are very appreciated! Till Next Time-

Remember- Life is often more about the storms than the peace they seek to overwhelm. It's not about Waiting for the storms to pass, but Learning to Dance in the rain.

Please also Remember that October is National Domestic Violence Awareness Month-
Love Does NOT Hurt!

Be Safe,
Shan
Pin It

Tuesday, October 23, 2012

Another Googly Ghouls :) / My Challenge #44 / TSSC # 243

Pin It
*Edited 10/24/12*

Hey y'all Happy Wednesday. When I posted this yesterday, I planned on entering it into this weeks The Great Pumpkin Blog Hop. However I had also hoped on doing another post for today. However I've had a Family Emergency and am uncertain as to whether or not I will be able to make an additional post today. If you get a chance, it would be great if you could remember my family in your thoughts and prayers.
Don't forget to scroll down to the bottom to see all the entries in this weeks Blog Hop and Thanks to Terry for Hosting it!


Hey y'all. Happy Tuesday! I can't believe there's only a week left until Halloween and then I have to put my cute little Googly Ghouls away. How sad am I about that? They've been my favorite Halloween stamp E.V.E.R.! Well, I guess I'll just have to enjoy the next few days and make them last. :)

I was looking through my feeds yesterday and found a fun new sketch over at Mary Jo's Monday Lunchtime Sketch Challenge and thought it would be fun to play along with. This is a Blog Hop so make sure to scroll all the way to the bottom of this post to see all the entries or join in on the fun! Of course when I saw the sketch I knew my sweet little ghouls would fit perfectly so it was just a matter of who was going to get to play. Here's what I came up with-

Halloween Card featuring
Googly Ghouls Stamp Set
Know how you get an idea and it seems good, you know you like it at first and then you see it later and go Augh!?! I love all the different elements of today's card, but now I'm kinda thinking I should have cut my little friend out and had him hanging from my fabulous, sparkly web. I may have to see if I can salvage him when I get home. You know I tell it to you guys like it is. Right? Right!!! Don't get me wrong, I still like it, I'm just wondering if it could have better.


*Edited 10/24/12*

Hey y'all, I went home and tried hanging my little fella from the web and here's how it turned out. Be prepared for the bling because it actually captured Amazingly well-

Holy Moley at the Shine! He looks almost like he's part of the web. :)


Here's Mary Jo's great sketch-


Instead of the scalloped border I ruffled some of our new Striped Satin Ribbon. Before I adhered it, I added one of our cute little ribbon slides. Not sure why I felt the need to add the slide especially since it's almost hidden in the folds, but I thought it was something a little un-expected maybe. The ribbon is adhered to the back of the DSP Panel with a little SNAIL and to the front with a line of Sticky Strip.

Here's a closer look at the focal point-


First I took a piece of DSP from the Howlstooth and Scaringbone Collection and ran it through my Big Shot in my Spider Web E.F. I just love the effect you get by doing that. Next I lightly sanded it to bring out the white core and make the web even more dimensional. This was adhered to the base with some Tombow. Because, I don't always adhere to Coco Channel's wisdom about not having too much, I then let Tink have a little fun. :) I was trying for a "dark, spooky, night" background and sponged on layers of Basic Gray and Wisteria Wonder, but I'm not sure that really came across as well as I would have liked. My sweet little friend was stamped in Black Staz-On on a scrap piece of Naturals White c/s and colored with Sahara Sand and Basic Gray Classic Inks and my Blender Pens. I let Tink dress him up a little. Just because you're in rags doesn't mean you can't still be stylin'. The edges of this panel were sponged in Wisteria Wonder before being Tink'ed out. It was then adhered with Dimensionals and the front was done.

*Edited 10/24/12*

Here's a closer look at my little guy just "hanging out". I cut him out of the original panel and adhered him to the web. I like it much better this way-


Here's the inside-


I kept it very simple here. Both the sentiment and the image are from the same googly Ghouls set and are stamped in Black Staz-On. A little sponging around the edges in Wisteria Wonder and my card was finished. I'm really loving the combination of Basic Gray and Wisteria Wonder. Makes for a monochromatic card with just a little twist. :)

Well, that's all I have for you today. I hope you liked it and I hope Mary Jo does too. Don't forget to stop by and bookmark or RSS feed her site. It's a great spot for challenges and inspiration. This is a Blog Hop so make sure to come back to see who else has linked up. Better yet, have a little fun and join in. You can see everyone from the link below (just click on their picture) and you can even join in from there as well. Can't wait to see what you come up with! :) If you liked today's card or have questions, I hope you'll take a moment to leave me a comment below. I love hearing from you and your comments really do make my day! If you'd like to +1 or Pin today's card, I've put those buttons on my blog for your convenience. Friends and Followers are always welcome too!

Thanks so much for taking time out of your busy day to stop by my little corner of the world. You are very appreciated! Till Next Time-

Remember- Life is often more about the storms than the peace they seek to overwhelm. It's not about Waiting for the storms to pass, but Learning to Dance in the rain.

Please also Remember that October is National Domestic Violence Awareness Month-

Love Does NOT Hurt!

Be Safe,
Shan
Pin It

Monday, October 22, 2012

Salt Air and Flowers... / MDS Today

Pin It
Hey y'all. Happy Monday! I hope you had a fabulous weekend and are looking forward to an equally fabulous week.

Today's project is another 12 x 12 digital scrapbook page. I did this last month and am just now getting around to posting it. I wish I had a larger back-up reserve right now, because we are re-arranging my house to accommodate my daughter and new son-in-law moving in and I'm not getting much done since I don't really have a decent studio space at the moment. Hopefully this will get situated in the next few weeks. It's so frustrating to not be able to sit down and just create in my own little space.

Any-who, a few weeks back I went to a going-away party for my former manager. It was at a seafood restaurant in Annapolis and right on the bay. I can't tell you how much I wanted to just sit outside on the dock with my legs dangling off the end. However, my "boot" would have made that a little difficult and everyone was inside so I settled for just getting a few pics instead. It's days like that one, that make me realize just how much I miss living on the water. There's just nothing like it. I have to say I'm a little jealous because my honey is now living just 2 miles from the beach. Oh well, I guess that's what vacations are for...that and pictures of his view. Until then, I thought I'd share this with you-


I love how just looking at this page takes me down to the dock. I can almost taste the salt air and feel it tugging at my hair. How Beautiful are those flowers? The Hibiscus was so big and beautiful it didn't even look real. In the biggest picture you can see the flower boxes on the side of the dock. Love that! The roses were actually in beds in the parking lot, but even there the salt air was working it's magic.

 I used Well-Worn DSP for the background. I thought it matched perfectly. I took the idea for the photo layout from one of the pre-loaded ones and flipped it and changed it around a little to fit my needs. Love how easy it is to do that with MDS2.

Well, that's all I have for you today. I hope you liked it and I hope it inspires you to save a few memories. :) If you liked it or have questions about today's project I hope you'll take a moment to leave me a message. I read them all and they really do make my day. If you'd like to +1 or Pin it, I've put those buttons on my blog for your convenience. Friends and Followers are always welcome too!

Thanks so much for taking time out of your busy day to stop by my little corner of the world. You are very appreciated! Till Next Time-

Remember- Life is often more about the storms than the peace they seek to overwhelm. It's not about Waiting for the storms to pass, but Learning to Dance in the rain.

Also please Remember that October is National Domestic Violence Awareness Month-

Love Does NOT Hurt!

Be Safe,
Shan Pin It

Friday, October 19, 2012

End of the Week Technique # 52 / MDS Today- Creating Your Own Custom Business Cards

Pin It
Hey y'all. Happy Friday! I hope you're having a great day and that your week is ending on a high note. Mine is getting there, I think.

For those of you that follow me and read yesterday's post, that I wrote at the Orthopedic Dr.'s office, I ended up getting a cortisone shot in the arch of my right foot. And just in case you're wondering, Yes, that is as painful as it sounds. After about 15 minutes my foot went numb from the anesthetic mixed with the steroids and then about 2 hours later that wore off and it hurt like a %!#@$*! :( Then I got no sleep last night. No, literally, not just not much but NONE! So now I'm on 29 hours of no sleep. Know what that combined with 3 large coffee's and a banana makes?  A jittery Shan. :( Oh well 3 1/2 more hours till I'm off work and then I can go home, get stuff ready for the vendor fair tomorrow and try to get to sleep. There is some good news today. My sweetie just arrived safe and sound in Cali, along with my heart. He starts his new site on Monday and then my 1 year countdown will start. :) I think I'm gonna get me some frequent flier miles. :)

Today's project came out of necessity, I needed business cards to hand out especially with the vendor fairs coming up and we had recently discussed in our leadership meeting about ways to promote our businesses and make an impact. As many of you know, I've really been trying to become more proficient with MDS for myself and as a business tool. When I started looking at pre-designed business cards I knew I could come up with something that better reflected me, after all I am in the business of creating and designing. Right? So I opened up my MDS and here's what I ended up with.

Custom Business Card Created with MDS2

I have to say this came together pretty quickly and painlessly. First off, our custom-sizing feature made it easy for me to create a standard 2 1/2 x 3 format so my project would be the right size without trying to re-size after completion. And our fabulous new re-coloring tool made it so easy for me to really customize the card to fit me. As many of you know Island Indigo is my All-Time Favorite color. I started with the I.I. Textured Card Stock as my base. Next I knew I wanted to incorporate some layering with DSP and maybe a punch or some other type of decorative element. This DSP from the Twitterpated Collection was originally Blushing Bride Pink. It looks just like our Fancy Fan Embossing Folder so I felt like I was getting two design elements in one. I simply recolored it to I.I. and lightened the opacity. L.O.V.E. that feature.

*Tip*- Try this to keep your underlying designs or colors from showing through when you lighten the opacity of a layer. Copy and Paste your piece that you are going to lighten up. Change the color to Whisper White and then using the layer tool, move the W.W. layer behind the layer you want to lighten up. This will allow you to lighten as much as you want for your desired effect without getting any bleed-through from your lower layers. Works like a charm!

After I had my card base and layer like I wanted it all I had to do was add text-boxes, choose my font and color, and add my desired text. The text I used is called Note-Worthy.

Here's what the back of my card looks like-

Custom Business Card Created with MDS2

To get the back, I started by simply adding a "Duplicate Page". Next I added a square punch that I made into a rectangle and filled with W.W. c/s. I added one text-box and added my text. How easy is that!?! Of course you can add whatever text you would like or even no text at all. My upline has some cards with something similar to this on the back and I thought it would make life so much easier. I can fill in the type, date and time of the class, how much it costs and whether it's paid for or not. For the notes section I figure it will be good for noting bring a friend for free, 2 for 1, or other kinds of specials or promotions.

During a recent networking meeting, I learned about GotPrint.com. Most of us know about VistaPrint's 250 cards for $8.50. GotPrint.com will make 500 for $10.00. For 500 Double-sided, Full Color, Glossy Cards with UV Coating I was quoted $17.95 with a 5-day turn-around. And they make it simple to just upload your custom card to their site. Guess who I chose to use? Unfortunately I didn't have time to get them here in time for this weekend's fair so I went to Office Depot, who by the way is having a sale this week. I got 100 for $21.00. Although significantly more expensive than either of the .com sites it was also significantly cheaper than Fed-Ex/ Kinkos who would only start at 250 cards and even better than printing them at home with Avery Business cards, where I would surely have run through my ink and not had everything uniform in color. Although I will say that the Office Depot cards look nice they are not coated and feel a little on the thin side. However, for a rush job (and to be able to let you know an extra option) not too bad.

That's all I have for you today. I hope you liked today's project and that it inspires you to try using MDS for something new. It really is for more than just Cards and Scrapbook layouts. I love hearing from you so if you liked today's project or have any questions about it, I hope you'll leave me a message below. I read them all and they really do make my day! If you'd like to +1 or Pin today's project, I've put those buttons on my blog for your convenience. Friends and Followers are always welcome too! :)

Thanks so much for taking time out of your busy day to visit my little corner of the world. You are very appreciated! I hope you have a Fabulous weekend filled with lots of time for Family, Friends and of course Creativity! Till Next Time-

Remember - Life is often more about the storms than the peace they seek to overwhelm. It's not about Waiting for the storms to pass, but Learning to Dance in the rain.

Please also remember that October is National Domestic Violence Awareness Month-
Love Does NOT Hurt!

Be Safe,
Shan Pin It

Thursday, October 18, 2012

Everything Eleanor For 2 Challenges / NAC #16 / TSSC #242

Pin It
Hey y'all. I hope you're having a great week. Just one more day till the weekend. Woo-Hoo! I'm sitting in the Dr's office, waiting to find out what we're doing about my poor sad feet. They're still hurting and here's something I never thought I'd say... I miss running! AUGH!

You know I have no love for Color Challenges but I do have Mad Love for the Nachos, not the food (ok, you got me, I have mad love for those too) but the team and their challenges. Nacho Average Challenge is a great site and they have challenges every week, alternating between sketch & color. Well, this week it's a color challenge and I thought it wouldn't be too hard for me.

I was Wrong!

Since I haven't missed one of their challenges yet, I wasn't going to be deterred. Here's what I came up with-

Thank You card featuring
Everything Eleanor
I'm not sure what I think about my results on this card. My daughter really liked it and said she thought the flower looked like a brooch. You'll have to let me know what you think.

Here's what I was working with-


I had a couple ideas of what I wanted to do with the colors but not how I wanted to do it so I went in search of a sketch to help me out. I found this one over at Mary Jo's site Techno Stamper-
I stuck pretty close to it.  I think my problem is it's just hard for me to do a C&S type card and even though this card has multiple layers it still has lots of open space. I don't know about you but I find my self feeling the need to just add more. AUGH! I started with a base of Bravo Burgundy (standard size). This is actually a really pretty color but I think the only other time I've used it was with another NAC color challenge. I think I need to use it more. :)  Next came my Sahara Sand (another underused color) layer and a Very Vanilla layer stamped with my En Francais Background Stamp in Sahara Sand. I love the combination of these two colors. 

You know how I said I just have to add more? Well I felt like I didn't have enough Garden Green which is why the center panels have it layered with S.S and V.V. layers. I stamped the flourishes in Garden Green on V.V. c/s and get ready for it...I stamped it without the use of my Stamp-A-Ma-Jig. I know, it's hard to believe but I did it not once but twice. Yea me! The panel/medallion image was stamped in Sahara Sand and cut out by hand and adhered with Dimensionals. Because the panels were so high I used 2 stacked Dimensionals on the sides and 1 Dimensional at the Top and Bottom so the medallion is adhered evenly. Here's a closer image of the focal point-


See the flower. I stamped it in Bravo Burgundy twice and then fussy-cut it out. See the multiple colors on the flower? Are you thinking that I didn't stick to the color challenge when I colored the flower? I did. It's all done in shades of Bravo Burgundy Classic Ink and my Blender Pens. I really love the ability to get all the various shades from one color. I layered them with a Dimensional and let Tink add a little love and it was done. After I had completed the flowers I felt it needed just a little something extra so I went back and used my Bone Folder to curl the edges just slightly for even more dimension.

Here's a look at the inside-

Inside of Thank You Card featuring
Everything Eleanor and Blooming with Kindness Stamp Sets
Both the flower and the sentiment are stamped in B.B. The sentiment is from the Blooming with Kindness set and I love the font. Isn't it elegant and pretty? I let Tink add just a touch of Glitz to finish off the inside. I have to say I like the C&S inside of my card more than the outside.

So what do you think? I'd really love to know what you think of today's card. Is it too much? Well I hope you liked it and I hope the two D.T.'s like it too. 

Thanks so much for taking time out of your busy day to stop by my little corner of the world. You are very appreciated! Till Next Time-

Remember- Life is often more about the storms than the peace they seek to overwhelm. It's not about Waiting for the storms to pass, but Learning to Dance in the rain.

Please also Remember that October is National Domestic Violence Month-
Love Does NOT Hurt!

Be Safe,
Shan

Pin It

Wednesday, October 17, 2012

Not So Scary Boooo / The Great Pumpkin Blog Hop #12 / CAS(e)#1 / My Challenge #43

Pin It
Hey y'all. Happy Humpday! I hope you're having a great week so far. It's not been the best week for me, what with my honey moving cross-country, but I'm getting through. It's a good thing I have this blog and have to create or I fear I would be sitting on the couch or worse yet huddled under the covers. I did get some good news today though, I've been offered a new job and I accepted it. I start back in a Federal Position on November 1st. Yea! I also got confirmation about a Vendor Fair this Saturday. It's my first one so I'm very excited. I'm really trying to be my normal happy self. I figure I'll just Fake it till I Make it. I just hope it doesn't take a year to "make" it. :)

You know what else makes me happy today? It's Wednesday and that means it's time for another edition of The Great Pumpkin Blog Hop! Woo-Hoo! Next week is the last week, but that means there's still time for you to play along. Terry over at Going' Over The Edge is our Hostess with the Most-est (Boy that sounds a lot better than it looks in print!) and she is drawing one name for a $50.00 SU Gift Certificate at the end of the Hop. How Fabulous is that? Be sure to scroll all the way to the bottom of my blog for the Hop. You can see all the entries from there and you can even enter you're own creation there as well. Don't forget to check back throughout the week to see all the wonderful entries.

I found a new Challenge site this week as I was going through my RSS, and I thought I'd give it a try. It's CAS(e) This Sketch and since C&S is so hard for me I figured I can never have enough inspiration in that Department. :) I hope you'll check them out when you get a chance.

Here's what I came up with-

Halloween Card featuring
Googly Ghouls Stamp Set & Owl Punch

Wow! This is so far from my normal, it's really hard for me to believe I did it. Not sure what I think, how 'bout you? It's not my favorite of the season, but I think it's growing on me. I started with a base of basic Black c/s and added a layer of Basic Gray which I adhered with Tombow. My border was created with the Large Scallop Edgelet. My sentiment was stamped in VersaMark and then Heat Embossed with Iridescent Ice for a subtle but shimmery look. This strip was then also adhered with Tombow. I've seen these cute little ghosts for years and finally got my Owl Builder Punch so I thought I'd make one too. Sometimes I'm soooo late to the party, you know what I mean? I punched him out of Whisper White c/s, added a little Dazzling Details to make him Shimmer, added some googly eyes and he was finished. I think he's kinda cute, and not at all scary. I used two Dimensionals to make him float above the sentiment border.

Here's the sketch I was working with-


 I think it's pretty close. I hope the ladies over at CTS think so too. Here's a closer look at my sweet, little, non-scary, friend-


I'm pretty happy with how he's floating above the "boooo" and all the shimmer. Hard to go wrong with that.

Here's the inside-


I stamped Boooo across the bottom in VersaMark and embossed it again with Iridescent Ice. The Happy Halloween is from Teeny Tiny Wishes and is stamped in Black Staz-On. I kept it pretty simple to go with the overall theme of the card. What do you think? Do we like it?

That's all I have for you today. I hope you liked it and I hope Terry and the team over at CTS liked it too. I love hearing from you, so if you liked today's card or have questions about it, I hope you'll leave me a message below. I read all of them and they really do make my day! If you'd like to +1 or Pin today's card, I've put those buttons on my blog for your convenience. Friends and Followers are always welcome too! :) Don't forget to scroll all the way down to the Blog Hop.

Thanks so much for taking time out of your busy day to stop by my little corner of the world. You are very appreciated! Till Next Time-

Remember- Life is often more about the storms than the peace they seek to destroy. It's not about Waiting for the storm to pass, but Learning to Dance in the rain.

Please also Remember that October is National Domestic Violence Awareness Month-
Love Does Not Hurt! 

Be Safe,
Shan
Pin It

Tuesday, October 16, 2012

I Conquered The Wreath. Finally!!!

Pin It
Hey y'all. I hope you're having a great week so far. I'm sad to say I haven't stamped anything for myself since Friday night. I'm going to have to come up with something though or I won't have projects for the rest of the week. Nothing like a little pressure to make the mojo work. :) Today's project isn't something I stamped, but it makes me smile. It makes me smile because I finally conquered the blasted thing and now that it's done, I smile every time I walk into my kitchen and see it on the wall.

Here's today's project-


Fall Wreath featuring Spice Cake DSP
Why yes, I know you're surprised to see a project featuring retired product. I try to not do that very often. The truth is that when I started this project not only was the product not retired it was brand new! I know you're probably doing the math right now, yep this @*%#! wreath was a whole year in the making. *SMH* The truth is I got so frustrated during the class with trying to get the lolly's to adhere to the bases I just gave up. I seriously got a headache from doing it, I was soooo frustrated.

Fast-forward a year....We now have our amazing little silicone mats and after reading everyone else's blogs last year on how Hot Glue Guns made doing theirs so much easier I decided to give it one more try. The Catholic guilt in me just wouldn't allow me to trash the whole thing. So during our Columbus Day weekend 2 weeks ago, I sat down with all the pieces and started nearly from scratch. The lolly's were all removed from their bases, (I never thought Tombow would let me down) they all removed easily from the bases without any ripping or tearing. In its defense, there might have been enough Tombow that it was acting more like Temporary adhesive than permanent. Next, using my hot glue gun I applied it to the back of each lolly and stuck it back down to the base. WOW!!! What a difference the hot glue made. If I had known it would be that easy, I might even have completed this project last year. :) Once I had all of them done I started figuring out placement and discovered that I was short a small one. It would have been fine without it, everyone else in the class' was nice without an extra one, but I couldn't make myself do it. It just wasn't going to be symmetrical enough. So, surprising even myself, I went down to the studio, found some old Spice Cake DSP and made myself another lolly. *Gasp!* I know, it's still hard for me to believe. (It's the small blue one at the top right side) Once it was done I was ready to assemble & complete my project. I did make one other alteration from the original. My stamping buddy April had used a straw wreath to mount hers and I liked how it gave her wreath a little more dimension so I had purchased a 12' wreath myself, in the anticipation that I would one day complete mine. Instead of leaving it bare though, I took my remaining Crumb Cake Tulle and wrapped it around my wreath. I had just enough to wrap it completely. It was meant to be. I used my Hot Glue Gun to secure the edges to the wreath and then hot glued everything to the wreath. Finally, it was done! I found a nail to mount it with and then went in search of somewhere to mount it. Luckily, I found a bare section of wall in my kitchen that looked like it needed a little love and mounted it there. Now I see it every time I go into my kitchen. I think it was meant to be there. What do you think-

Sorry for the blurry pic

My kitchen is done in a warm gold Venetian Plaster (Yes, I watched way too many episodes of that darn house swapping/remodeling show a few years back and had to try it. Yes, it was a pain in the rear. I froze my shoulder finishing it up. No I don't recommend it to anyone. I sponged my living room in a similar color and it butts up to the edges of the kitchen and looks almost identical with much less work and no frozen shoulder. Any-who, I think it's the perfect compliment to the Spice Cake Colors used in my wreath.

Believe it or not, now that we have the Die to make these and the silicone mat, I'm almost thinking of trying my hand at another one....almost.

Well, that's all I have for you today. I hope you liked it and I hope you'll bear with me as I struggle through the next few days/weeks. I updated my FB yesterday to say my heart was headed to Cali without me and I'm hoping I won't feel this way too much longer, because it really SUCKS!!! I just have no desire to do anything and I'm already ready to be over that feeling, so I really do hope you'll bear with me as I transition through this. Thanks in advance for being so wonderful!

Thanks for taking time out of your busy day to stop by my little corner of the world. You are very appreciated! Till next time-

Remember- Life is often more about the storms than the peace they seek to overwhelm. It's not about Waiting for the storms to pass, but learning to Dance in the rain. 

Please also remember that October is National Domestic Violence Awareness Month-
Love Does NOT Hurt!

Be Safe-
Shan
Pin It

Monday, October 15, 2012

Heartfelt Congratulations

Pin It
Hey y'all. Happy Monday! I hope you had a fabulous weekend. Mine was jam-packed with activities. I didn't get to do much designing of my own, but I spent lots of time with some great friends and with the family. Hopefully I'll be able to do lots in the near future. I need to stay busy right now. My sweetie was supposed to be moving cross-country with his job for a year at the end of this month. We found out about this move at the beginning of October...he left this morning. :( Hopefully I can use this time to be creative and get lots done for my business, school-work, and getting my house sold. We'll see. It's hard to do too much when you can barely see though all the stoopid tears.

Ok. pity party done with, well at least for the next few minutes. :) I'm sharing a card with you today that I've had done since the end of July. I kept meaning to post it and somehow it kept getting pushed back. Hope you like it-

Congratulations card featuring Layered Labels and Comfort Cafe

It's a pretty C&S card. I started with a base of Cajun Craze. Next I layered on a piece of Comfort Cafe DSP that I cut out with my new Oval Accents Bigz Die. This was sponged with some Soft Suede. I have to say I really like how it almost looks like the Cajun Craze piece was cut with the Die and the DSP isbehind that layer. This DSP collection has such warm colors, perfect for fall, or masculine cards or anytime you need that comfy cozy feeling. The DSP layer is topped by a stamp from the Layered Labels set. I stamped it in Soft Suede on Very Vanilla c/s twice and formed the layers by cutting one with my Apothecary Accents Framelets and by hand-cutting the second. Both were then colored in lightly with a Blender Pen and more Soft Suede Classic Ink and then sponged with the same color.The layers were then adhered with Dimensionals and the front of my card was done. Told you it was pretty simple.

Here's a closer look at the focal point-


I really do love using my Blender Pens and Classic Ink Pads to color my images. Love the soft look of this.

Here's the inside-


I decided to carry the shaped theme to the inside. The sentiment is actually part of another stamp but I only wanted the sentiment and not the outlining shape. I simply inked the stamp with my Stampin' Write Marker and got just the image I wanted. Love my markers for giving me such versatility! The V.V. panel is sponged with Soft Suede and adhered to my card base with Tombow and my card was finished.

Well, that's all I have for you today. I hope you liked it. :) I love hearing from you so if you liked today's card or have questions about it, I hope you'll take a moment to leave me a message below. I read all of them and they really do make my day! If you'd like to +1 or Pin today's card, I've put the buttons on my blog for you. Friends and Followers are always welcome too! :)

Thanks so much for taking time out of your busy day to stop by my little corner of the world. You are very appreciated! Till next time-

Remember- Life is often more about the storms than the peace they seek to overwhelm. It's not about Waiting for the storms to pass, but Learning to Dance in the rain.

Be Safe & Remember October is National Domestic Violence Awareness Month
Love Does NOT Hurt!
Shan Pin It

Friday, October 12, 2012

Then & Now / MDS Scrapbook Page

Pin It
Hey y'all. Happy Friday! I hope you're having a great day and are preparing for an Amazing weekend. I'm having a get-together at my house tonight, a team meeting to go to tomorrow and then to my friend Brenda's house afterwards. Sunday is of course filled with football and more creativity. Sounds like a fun and busy weekend for me. :)

I've got a new scrapbook page for you today. I was fooling around with my MDS2 a week ago or so and made 2 separate pages in one sitting and haven't found the time to share either one until now. (Bad Shan!) As many of you know, my beautiful daughter got married a few weeks back. One of her Best Friends, Kendra, was a bridesmaid. These girls have been like two peas-in-a-pod since they met in high school on the first day of Field Hockey Practice. When I was loading all of my old pictures onto my new Macbook I found some of the two of them from J's birthday. It made me smile and I wanted to capture the moment. I thought it would be fun to show how they were then and how they are now. Here's today's project-


All of the layers are from the Summer Smooches Digital Collection. I chose the layers from the colors in the pictures. I really love how the drop shadow makes the paper layers look real. I used one of the alphabet punches that came with my MDS2 program for the words and filled them with a contrasting paper from the same collection and then outlined them in Gray for a little added depth and definition.
I think the text on the banner is a font called Noteworthy. The banner was easy to do with our Flag Punch. It's simply filled with Whisper White and outlined with Island Indigo. The Fabric Summer Smooches Brad ties all the colors together. For those of you that know me or have been following me for any length of time, you know mixing and matching patterns is not something I feel at all comfortable doing. I was really kind of nervous about trying all of these bright colors and patterns together but I think in the end it turned out really nice. The best part, it reflects the spirit and joy of the two beautiful girls it's showcasing.

I hope they love it and I hope you do to. I swear I'm going to figure out how to get the supply list to copy over to here. I'll try and figure that out this weekend. I love hearing from you so if you liked today's project or have questions about it, I hope you'll take a moment to leave me a message. I read them all and they really do make my day. If you'd like to +1 or Pin today's project, I've put those buttons on my blog for your convenience. Friends and Followers are always welcome too! :)

Thanks so much for taking time out of your busy day to stop by my little corner of the world. You are very appreciated! I hope you  have an Amazing weekend filled with lots of time for Family, Friends and of course Creativity! Till next time-

Remember- Life is often more about the storms than the peace they seek to overwhelm. It's not about Waiting for the storms to pass, but Learning to Dance in the rain.

Remember also- Love Does Not Hurt! October is Domestic Violence Awareness Month.

Be Safe,
Shan Pin It

Thursday, October 11, 2012

End of the Week Technique #51 - Easel Cards / Domestic Violence Awareness

Pin It
Hey y'all. Happy Thursday. I hope you're having an Amazing week and gearing up for the weekend. Just one more day, woo-hoo. :)

I'm a little disappointed in my self that we are 11 days into the month of October and I haven't done a "Purple Post" yet. Most of you know that October is Breast Cancer Awareness Month. Did you know though, that it is also Domestic Violence Awareness Month? I bet most of you will answer "No" to that question. It's unfortunate that two of the biggest health concerns for women fall on the same month. It's a tragedy that one gets all the attention and the other very little. Football players wear pink, the White House gets bathed in pink lights, there are Nationally known walks and runs all in pink, but none of this happens in purple. One reason Domestic Violence is such an epidemic in not only our country but world-wide is that more people don't talk about it. The silence of it's victims and of the communities it's victims live in only contributes to the strength of this scourge. It's time to remember that Love Does Not Hurt! Please keep this in mind not only this month but throughout the year. We can only stop this epidemic of pain and suffering by shining a light on it. If you know someone that is in an abusive relationship, be it physical, emotional, financial or any other type, please let them know you care and are not willing to let them continue on alone.

Ok, off my soap-box-, although I can't promise that you won't hear it again. :) Today's card is an easel card. I did one of these way back when I first began my blog, just in a different shape, so it's been a while. I thought it was time to do another one and to do one in a shape I thought went well with the month. Here's today's card-


I used the Bigz Butterflies Die and my Big Shot to make this and it came together so quickly. Although this particular style easel card will stay open on it's own (the butterfly wings catch on the notched section) I chose to add a stop as well. I had wanted to add a purple ribbon, but the stamp I have would have been too big. :(

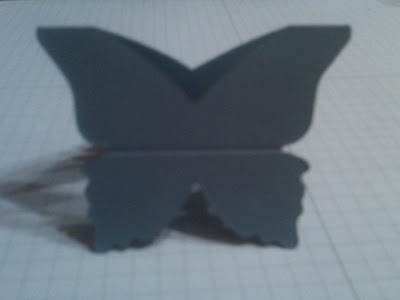
Here's a little bit different angle-

Sorry for the "huge" picture I wanted to show some of the detail.
I used Wisteria Wonder and Whisper White c/s and Wisteria Wonder Classic ink to sponge the edges of the c/s and Elegant Eggplant ink to stamp the sentiment. The sentiment was cut out with the Word Window Punch, sponged with Wisteria Wonder and then edged with a little love from Tink in the form of Dazzling Diamonds. It was then adhered with Dimensionals to make a lovely sentiment and an additional stand. The butterfly wasn't originally sparkly, but I felt it needed just a little something extra so Tink gave it a little love as well and I think that was just the right touch. Since the c/s is so light, an additional greeting could be written on the back of the base piece.

For today's technique you will need the following- Embossing tool (I used my Big Shot), Butterflies Die, scoring tool (I used my Simply Scored Tool) Embellishments as desired (I used the Perfect Polka Dots E.F., Word Window Punch, Dimensionals, Two-Way Glue Pen, Dazzling Diamonds and a sentiment from Teeny Tiny Wishes).

Although you can make an easel card in any shape and without the aid of a die, I chose the butterfly die, because of the symbolism of butterflies. To me the change they go through is similar to the change/rebirth someone emerging from an abusive relationship goes through.

Here's what you will do-
1- Cut and score your c/s in the size you will need for your particular shape. Mine c/s was approximately 8 x 3 1/2 scored to form a 4 x 3 1/2 piece of c/s. I placed this over my butterfly die with the folded edge just below the top of the wings so that when I ran it through my Big Shot I ended up with 1 cut out piece of c/s instead of 2. Next you will need to decide where to score your top piece. I simply scored across the center where there was already a notch in the design.

Ooooh, sorry that's blurry!
2- Fold and re-enforce your score line down-wards.
3- Cut out another piece of c/s using the same design but this time cut out the entire image.
4- Adhere your new cut-out image to the bottom portion of your scored c/s. I used Tombow to adhere my two pieces together. 
*Tip* apply the adhesive to your scored piece of c/s and not your top cut-out image. If you apply adhesive to the top image and you apply extra it could later get stuck to the area above the score line and then your card will not function correctly.
5- If needed by your design add an element to the base of your card to act as a "stop" to keep your card open.
6- Optional - Embellish as desired. You will likely want to do this before doing your final adhering. I ran my top piece of c/s through the Perfect Polka Dots E.F. for a little added texture and also did my sponging after the fact. (You live and You learn and then you embellish just a little more!)
7- Smile when you see your finished project and smile even more when you think about the smile that it will bring to it's recipients face. (This really is the best part)

That's all I have for you today. I hope you liked today' technique and card and I hope it inspires you to try something new today. There are many different types of easel cards and I will be trying more including some that don't include dies, but to be honest, I've been so busy with different issues this past week I didn't have the time to figure out a design from scratch. Hopefully I will be able to do this soon. I love hearing from you, so if you liked today's card or technique or have questions, I hope you'll leave me a message below. I read them all and they really do make my day! If you'd like to +1 or Pin today's card, I've put the buttons on my blog for your convenience. Friends and Followers are always welcome and thoroughly appreciated! :)

Thanks so much for taking time out of your busy day to stop by my little corner of the world. You are very appreciated! Till next time-

Remember- Life is often more about the storms than the peace they seek to overwhelm. It's not about Waiting for the storms to pass, but Learning to Dance in the rain.

Please also remember that Love Does Not Hurt-

Be Safe,
Shan

Pin It

Wednesday, October 10, 2012

Spooky Shades of Gray / NAC #15 / My Challenge #42 / The Great Pumpkin Blog Hop # 11

Pin It
Hey y'all. Happy Humpday! I hope you're having a great week so far. Sorry I've been MIA the alst 2 days. I enjoyed my Monday off and yesterday was crazy hectic. I may try and post again today if time allows. Anywho, I hope you had a safe and restful long weekend and the good news is ... there's just 2 more days until the next one! I love short weeks!!!

Know what else I'm loving? The Great Pumpkin Blog Hop. Yep, it's week 11 already, just 2 more weeks to go. My blog-pal Terry over at Goin' Over The Edge is hosting this fun Hop. Make sure you read all the way to the end of today's post. All of the entries will be listed below my name and you can check them all out from there. Not only that, but you can even enter your creation from there too. Thanks Terry! :) Terry's even giving a $50.00 SU gift certificate to one of the entrants at the end of the 13 week hop. Come on and join in the fun with us.

Know what else I'm loving and I'm sad will be leaving us soon? My friends the Googly Ghouls. Today's card features them. I know you're surprised that I chose to use them, right? Lol. They're just sooo darn cute. Love 'em! Here's today's card-

Halloween Card featuring
Googly Ghouls, Howlstooth & Scaringbone DSP and
Wicked Web E.F.
Can I just say, I love this card. It reminds me of an old Black & White film. I don't know how but my stoopid B.B. even made me happy with the picture. Some how it ended up giving the pics a soft, muted, feel almost like you're seeing it through some fog or something. YEA!!! :) I used my new web e.f. for the first time and embossed a piece of the Herringbone DSP from the Howlstooth and Scaringbone DSP Collection. I then lightly sanded over the top to expose the white core of the paper and make it look like the white web was in front of the paper. My sweet little friends were stamped in Black Staz-On onto Naturals White c/s. This paper pick came about not as a intended design element, but because it's what I had out and I didn't feel like going back down to the studio to get something else. Love how that works out sometimes.Those images were then punched out with my 1 1/4 square punch and sponged with Wisteria Wonder. W.W. paired with Basic Gray is one of my new favorite combinations. These were adhered with Dimensionals to pieces of Basic Black c/s that I punched out with my Scalloped Square punch, and then Tombowed down to the DSP layer. A piece of our new striped ribbon threaded through our new ribbon slides and the front of my card was almost done. I debated using my googly eyes, they're just so much fun. In the end I simply used two for the sentiment. I simply couldn't not use them.

I used this sketch from Nacho Average Challenge's weekly challenge as my inspiration for today's layout-


I changed it up just a little. I hope the ladies don't mind. If you haven't checked the Nacho's site out yet, it's a must see. They are my new favorite challenge site and I haven't missed a challenge since they started. Make sure to swing by, just after you're finished here.

Here's the inside of today's card-


 I kept it simple here. Just the sentiment and the sweet little spider (how often do you hear that?) stamped in Black Staz-On and some W.W. sponging and my card was done. I think Tink is feeling a little neglected lately but I love how this card felt without all the bling. (how often do you hear that?)

That's all I have for you today. I hope you liked it and I hope my friends Terry and the DT over at NAC liked it too. Don't forget to check out the Blog Hop below. If you liked today's card or have questions I hope you'll leave me a message below. I love hearing from you and I read all of them. They really do make my day! If you'd like to +1 or Pin today's card, I've put those buttons on my blog for your convenience. Friends and Followers are always welcome too! :)

Thanks so much for taking time out of your busy day to stop by my little corner of the world. you are very appreciated! Till next time-

Remember- Life is often more about the storms than the peace they seek to overwhelm. It's not about Waiting for the storms to pass, but Learning to Dance in the rain.

Be Safe,
Shan
Pin It

Friday, October 5, 2012

Kindness Matters Shadow-Box Card / NAC #14

Pin It
Hey y'all. Happy Friday! Are you ready for the Long Holiday Weekend? I know I am. Gonna get some stamping done for some upcoming Craft Fairs. I haven't done any before, so I'm excited. :)

Today's card is one I did for Nacho Average Challenge. Have you been to their site yet? You should definitely check them out, but after you finish here. They have weekly challenges and alternate between Color Challenges and Sketch Challenges. You know I love the sketch challenges but the color challenges are definitely not my favorite. Not that they pick bad combo's, no it's totally that I just get so overwhelmed with all the possibilities  This one came to me pretty quick though and I'm very happy with how it turned out.

Here's today's card-

Shadow-Box Card featuring
Kindness Matters Stamp Set
This was the first time I made this type of card and it was so quick and easy. One of the best parts...It lies flat and will fit in a standard envelope. Score!

Here's the challenge I was working with-


Such a pretty combination, don't you think?

Here's a closer look at my card-


I used Early Espresso and Very Vanilla for my base. I used my Simply Scored Tool to create my score lines first and re-enforced all the lines. Next I centered my framelet from the Apothecary Accents Framelet set in the middle of my E.E. c/s and ran it through my Big Shot with the Fancy Fan E.F. I did it in this order for two reasons. 1- So I wouldn't flattened out the embossed design when I did my scoring and 2- So I could align the center of the embossing folder with the center of my cut-out. You can see how nicely that turned out in this picture. I lined up my two pieces of c/s and lightly marked the middle and center of the V.V. c/s by drawing small tic-marks through the E.E. cut-out. I was able to then use these marks as a guideline to stamp my image. No, I didn't use my SAMJ and yes, I realize I should have because it's just slightly above center. However, it's so slight I don't think many people would notice or care. But the OCD in me will ensure it doesn't happen again. :)
The image is stamped in E.E. and then I used my Blender Pen to color in the butterflies using So Saffron and Pretty in Pink Classic Ink Pads. A little Two-Way Glue Pen and some love from Tink and I have some beautiful, sparkly, friends. The shadow-box is closed with two strips of Sticky-Strip. I wanted to add a sentiment so I stamped one from the same set in E.E. on a scrap of V.V. c/s and then used my Bitty Banners Framelets to cut it out. It's adhered with 2 Mini-Glue Dots on the left hand portion. This allows it to "flow" off the card when it's opened up. You can use the back of the V.V. c/s to hand-write your note.

I took the first two pictures at an angle on an easel so I thought I would try one more sitting flat, like it would be on a desk or shelf-


This really did come together so quickly that I'm thinking of making some more, maybe a little taller and trying different framelets to make the windows.

That's all I have for you today. I hope you liked it and I hope those Fabulous ladies over at NAC like it too. Love, Love, L.O.V.E. playing along with them each week. If you liked today's card or have questions about it, I hope you'll leave me a message below. I love hearing from you and read them all. They really do make my day. If you'd like to +1 or Pin today's card I've put the  buttons on my blog for your convenience. Friends and Followers are always welcome too! :)

Thanks so much for taking time out of your busy day to stop by my little corner of the world. You are very appreciated! I hope you have an Safe and Fun Holiday weekend filled with lots of time for Family, friends and of course time for Creativity. Come back and see me soon, won't you please? Till next time-

Remember- Life is often more about the storms than the peace they seek to overwhelm. It's not about waiting for the storms to pass, but Learning to Dance in the rain. 

Be Safe,
Shan
Pin It