Showing posts with label End of the Week Technique. Show all posts

Tuesday, September 24, 2013

A Bubble-y Happy Birthday / Nacho #56

Pin It
Hey y'all. I hope you're having a great week and I'm so glad you came by today. It's Tuesday and you know what that means, Yep- it's time for another Nacho Challenge! :) It's a color challenge this week. Many of you know by now, these terrify me! Soooo many options, but I have to say I'm soooo excited with how it turned out!!! Let's see what you think. Here's my card for this week's color challenge-

Happy Dance!!!!!

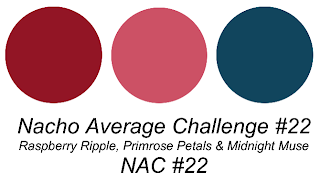
Here's the Color Palette we were working with for this week's challenge. Can you guess them from the card?


So, I have to say I wasn't too sure about this combo at first, but once I started looking at it, I got a fall kind-of feeling. I didn't want to be predictable though, go figure, so I had to find something else to do with these colors. It's been a while since I did a "New" technique on here so I figured it was time to throw a new one in. Remember a few weeks back when I couldn't find my brayer in all the packing chaos? Good News/Bad News- Good News I found my brayer/Bad News I couldn't find the dauber case that I needed for this week's technique. Luckily I found some extra sponge wedges and was able to continue on.

Can you tell what the technique is? I gave you a hint in the post-title. It's Bubble Wrap! Something I have plenty of. Luckily I was able to find some with the small bubbles. :) I randomly sponged the 3 colors on my piece of bubble wrap and then used it like it was a background stamp. I laid my Very Vanilla c/s on top of it and used my grid paper to smooth the back of the c/s into the bubble wrap. Here's what it looked like when I was done-


Do you see that area 4 bubbles from the left? Yep- Imperfection! ACK!!! Almost flipped it over and started again. I couldn't put something out there in Blog-landia that was that glaringly "messed-up"!!! Oh-No-Sirree.  However, I know that a lot of these techniques are not suppose to be pure perfection, so here's a surprise- I just went with it. As you can tell, I took some Early Espresso Bakers Twine and wrapped it around 3 times and it was just enough to cover my little oops. WHEW!!!!  My sentiment is from Label Love and our new coordinating label punch has an indention in the middle that was just right for mounting over this. Hmmm, this came together almost like it was supposed to be an oops. :)

You know I like pretty insides, so here you go-


The little present is from the Best of Birthday's set and the greeting is from Really Good Greetings, LOVE that set! I really am so excited with how this card turned out. It's a good thing no-one could hear the shrieking in my house or they might have wondered what was going on.

Well, that's all I have for you today, I hope you enjoyed today's card and I really hope it inspired you to try this fun new technique and to join us in this week's color challenge.  I can't wait to see what you come up with! If you have questions or comments about today's card, don't forget to leave me a message below so I can get back to you. Your comments make my day. :)

Thanks so much for taking time out your busy day to stop by my little corner of the world. You are very appreciated! Till Next Time-

Remember- Life is often more about the storms than the peace they seek to overwhelm. It's not about Waiting for the storms to pass but Learning to Dance in the Rain.

Be Safe-
Shan

Pin It

Wednesday, January 30, 2013

A.O.K. / End of the Week Technique #62- Coloring with Bleach / NAC #31/ My Challenge #58

Pin It
Hey y'all. Happy Wednesday! I'm sitting here doing this post on pain meds, so bear with me if I seem a little more off than normal. :)

Here's a quick update for you- 1st let me say Thanks! to Everyone who has sent me so much Love and Support over the past week. I am doing much better, however I think I over-did it yesterday (Big Shock to those of you that know me) and ended up with some severe pain today so I'm taking the next 2 days off from work and am back taking pain meds. :( I guess the good news is that maybe I can get some stamping done. Glass Half-full and all that. :)

Two Questions for you today- 1) Do people ever just surprise you and 2) Do you ever just surprise yourself?

1) It seems that people rarely surprise me. Ok...that's not totally true. People rarely surprise me in a good way. 2) It doesn't happen very often, but there are those times when I really just surprise myself. Today's card is a product of both of those things. Oh and are you wondering about today's title? Instead of R.A.K or Random Acts of Kindness it's just A.O.K. Act of Kindness, because I think the person that inspired today's card probably does little A.O.K.'s more than just randomly.

1) One of my Stamping Friends sent me a get well card after my little emergency trip to the O.R. last week and it just really touched me. Years ago, before the internet, it was hard to imagine being friends with someone you had never met. Now-a-days it's a little bit easier, but still sometimes hard to imagine. Then every-once-in-a-while you meet someone and you become friends and you just know that when you actually meet it's going to be like seeing an old friend and you're going to just laugh yourself silly. Know what I mean? Well, I have a couple of Blog-landia friends like that and one inspired today's card. (Hi Tams!) So I sat down to make today's card to let her know how much her A.O.K. meant to me and when I was done I had one of the #2 moments and just looked at my card and thought "Wow! I made this." It's not my normal style card with lots of layers and lots of color but I just thought it was so pretty and I really hope my friend likes it too. Of course I hope the ladies over at NAC like it and I hope you like it too! So without further ado, here's today's card-

Card with Pretty Poppies Stamp Set and Bleach Technique
What do you think? Oh, I really hope it's not just the pain meds telling me it's pretty. I have to say this is really one of my favorite cards in a very long time...you know one of those you almost want to just stick up on your own board instead of sending. I actually think I may make some boxed sets with this...that is if it's not just me and the pain meds. :) 

Here's the sketch I was using-


Wide open for interpretation. This is from the fabulous Tammy Fite over at Nacho Average Challenge. Love her and her fabulous team members. This is an awesome site for not only challenges but inspiration and support. There's still plenty of time to play along, so make sure you drop by and check them out, but after you finish here. :) At first I was going to use my Doily background set and then I thought of my Pretty Poppies set which I love but haven't used nearly as much as I thought I would. So many fabulous stamp sets and so little time. Darn It! I had also been wanting to try out the Coloring with Bleach technique and I thought this would be the perfect opportunity. Ooooohhhhh, so glad I did!

Here's a closer look-


The bleach turned my Crumb Cake c/s a pretty pale, pale, yellow. I started with a base of Early Espresso c/s cut at 4 1/4 x 11 and scored at 5 1/2 to make a tent style card. I inked up my stamp with VersaMark and stamped it onto a piece of Crumb Cake c/s cut at 4 x 5 1/4 and then covered it with Early Espresso Embossing Powder. (Oh yeah, I used my Embossing Buddy first to make sure I didn't get any stray embossing marks. This is Key.) I then colored in my flowers using my Aqua Painter filled with Bleach instead of water. The raised embossing contains the bleach. I sponged the edges with some Early Espresso and adhered this layer with Tombow. The embossing and bleaching makes this layer a little heavier than normal so I recommend either Tombow or Dimensionals instead of SNAIL here. I wanted the sentiment to make a statement but not really be a focal point so I stamped it in Early Espresso ink on a scrap of Crumb Cake c/s and punched it out with my Modern Label Punch.  A little sponging and 2 Dimensionals and my card front was done. I don't remember when I had so little on a card front and had such an impact. I actually tried to "sponge" the sentiment layer with more bleach a few other times but the bristles kept giving me stray marks so I had to give up on that idea. :( I have to say as much as I love how this turned out, this is not a good technique for those of you that are control freaks like I am. You have no control over how this is going to turn out. There are slight variations in the coloring and once the c/s absorbs the bleach you can't really go back and even areas out. Once the bleaching is done, it's done... it won't absorb more. You just kind of get what you get. Oh, the sentiment is from the Language of Friendship set. It's a nice set and pretty in-expensive but I really think it gets overlooked a lot.

You know I like to pretty up the inside so here you go-


The sentiment is from the Kindness Matters set and I just re-inked my stamp with Versamark and stamped a portion onto the bottom of my card and repeated the process from the front. Here's a closer look-


So what do you think? I hope you like it and I hope it inspires you to try something new, especially this technique. If you do, I'd love to see what you come up with! For those of you that have never done this before here's today's tutorial-

Coloring with Bleach.
Here's what you'll need- Aqua Painter, Liquid Bleach, Stamp set and Card stock of your choice, VersaMark pad, Embossing Buddy,Embossing Powder and Heat Tool.

Here's what you do-
1) Choose your c/s and rub your Embossing Buddy all over it to get rid of any static. This will ensure you don't get stray embossed areas.
2) Ink your stamp with VersaMark and stamp. If you use a really juicy ink pad like our new ones you might be able to just emboss without the VersaMark but you would have to work really quickly. Cover your image with Embossing Powder, I used Early Espresso. Flick off and/or brush off any excess powder that may be lingering.
3) Heat set your Embossing Powder. Make sure to thoroughly emboss your image. If you don't get it completely set, you could smear it or your bleach might not be completely contained.
4) Very carefully color in your image with your bleach filled Aqua Painter.  Here's another close-up look-


***Tip*** Here's a few for you-
a) Wear old clothes when you fill your Aqua Painter with bleach, just in case. You wouldn't want to splash/spill any on your good clothes.
b) Make sure to designate one Aqua Painter as your "Bleach" Painter. I used a sharpie and wrote a "B" on mine. You wouldn't want to use this one to do your regular water-coloring with. *OOOOPS!* Thankfully this was not an "Ask me how I know" moment.
c) Be careful not to "squeeze" your Bleach Painter while it's on/over your project. This could result in an unhappy bleach "spillage" moment. :( Use a scrap piece of post-it note or c/s to ensure you have plenty of bleach in your brush tip.
d) Try "Bleaching"scraps of c/s before you actually do your project to make sure you get the look you are going for. I got lucky and had an end result that went with my color theme with my first try. In fact I plan on "bleaching" lots of scraps so I know in advance what to expect, because this is definitely a technique that I will try again.
5) Be sure to secure your bleached layer well. Like I mentioned above, the addition of not only the embossing but the bleach makes for a heavier than normal layer. It would be very sad if your layer fell off because you didn't adhere it well enough. :'(
6) Smile when you see your finished product and smile even more when you think about the smile it will bring it's recipient. (Unless of course you're me and then smile even as you hope it's not just the pain meds making you like it so much, lol)

Well, that's all I have for you today. I really do hope you like it and I hope you will give this technique a try. I already have some ideas for some masculine cards using this same technique so I hope you'll stay tuned for more projects. Don't forget to get your project completed before Saturday night at midnight so you can play along with me over at the Nacho's. (Love that name!) If you liked today's card or technique, or have questions about it, I hope you'll take just a moment to leave me a message below. I love hearing from you and your comments really do make my day! If you'd like to +1 or Pin today's project I've put those buttons on my blog for your convenience. Friends and Followers are always welcome too! :)

Thanks so much for taking time out of your busy day to stop by my little corner of the world. You are very appreciated! Till Next Time-

Remember- Life is often more about the storms than the peace they seek to overwhelm. It's not about Waiting for the storms to pass, but Learning to Dance in the rain.

Be Safe,
Shan
Pin It

Saturday, January 12, 2013

Cracked Glass - End of the week Technique # 61 / NAC #28 / My Challenge #55

Pin It
Hey y'all! Happy Saturday! I hope you're having a great weekend so far. I've got a new technique for you tonight. Ok, so not a "new" technique but new for me and this blog. Many of you know I haven't been able to post 5+ times a week since I started my new job. This has impacted my ability to do a lot of my specialty posts. I will still be doing my "End of the Week Techniques", I just will likely not be doing one each week. To be honest I had planned on decreasing the weekly techniques anyways, not because there are not enough techniques but because I was finding it stressful to try and find one to do each week that fit in with the kind of cards I was doing for the week. One of my goals for last year was to do one technique a week and I surpassed that so I feel very good about that. I hope you have enjoyed them and hopefully found some inspiration with them. I hope you will continue to find inspiration with the ones that I post this year. I will continue to do tutorials whenever I do a new one here and will try and remember to link back to old ones when I repeat a technique. That being said, I've been wanting to try this one for almost a year and finally I've managed to get it done. Here's this week's technique card-


What do you think? If you know me or have followed me for any time you are probably checking to make sure you're really looking at my blog, or rubbing your eyes to see if you're seeing correctly. This is so not my style. Not only is it Vintage-y but there's torn and crumpled c/s. Will miracles never cease? I kinda took my inspiration from the technique & the rest kinda followed. I still can't believe I did this card. I'm not sure it's gonna make the All-Time favorite list but it definitely makes the list for making me step out of my comfort zone.

This card is for this week's Nacho Average Challenge. Love those ladies! I try not to look at the DT creations before I make my card, because I don't want to be influenced by them but this week I was going through my regular reader feed and came across Tammy's card and was really glad I accidentally saw it. When I first saw the challenge, Elements of Style came to mind and that's what she used. So I had a double challenge, one for the color challenge (you know those are soooo hard for me) and one to use something besides Elements of style. I really don't know why Tammy couldn't have just made some Lucky Limeade Snowflakes. If anyone could get away with it she could. (If you know her, you'll understand that comment. Hi Tammy!) Here's what I was working with this week-


I started with a base of Island Indigo c/s. To this I added a piece of Whisper White c/s that I stamped my En-Francais Background stamp in Marina Mist. You know I wouldn't normally age c/s like I did but a crisp clean image just didn't seem to go with my focal point. Also even though my focal point was done on a piece of W.W. c/s it no longer looked white after my technique, but it didn't quite look Very Vanilla either. I originally stamped the background stamp full strength but it was too dark so I tried again, stamping off once and liked that much better. I crumpled my c/s (ooooooooohhhhhh you know I hated that right?) then I sponged Crumb Cake over it to make the crinkles show up more. It still seemed like it needed something else so I did the almost un-think-able and tore my c/s. *Shudder* Yes, I said I tore it. But only because there wasn't any of my stamping friends nearby to do it for me. My stamping buddies will totally get that. (shout out to the Fabulous Michelle Suit and April Sinclair) Once those two things were done I sponged the edges with Soft Suede and  Tombowed this layer down. I finally felt like I had a nice background for my focal point. Here's a closer look at this weeks technique and today's focal point-


I used the floral Image from the You are Loved set. I used the three challenge colors to color my stamp and then rotating the image kept stamping it until I had my c/s filled. I roughed up the edges before doing my technique and then mounted it on a strip of Island Indigo that I embossed one edge with my Fancy Fan E.F.-


I thought the scalloped image mimicked the scalloped edges of the petals. The floral strip was adhered to the I.I. piece with multiple Dimensionals since it was so heavy. This entire panel was adhered to the card base with Tombow. The sentiment was stamped in I.I. on W.W., punched with my Oval Punch and then adhered to a scrap of I.I. that I punched with my Scalloped Oval Punch. I stacked two Dimensionals under the Right edge to raise it up and make it level and my card front was done. Whew! It was a lot but in the end I think it was worth it.

Here's the inside-


The sentiment is from the same set and is stamped in I.I. Since the front was so involved, I tried to keep the inside a little less..., I don't know, just less. Of course you know that doesn't mean it shouldn't be pretty so here's a closer look at my little bit of pretty-


I wish you could see how pretty and sparkly this is in person. It just sparkles and shines. Sooooo pretty! So what do you think? I hope you like it and I really hope those fabulous ladies over at NAC like it too.

Now for this week's technique-

Here's what you need for the Cracked Glass Technique-
Cardstock, (I think Whisper White or Very Vanilla would probably work the best but who knows maybe a light color would work too), Stamped Image of your choice, VersaMark Pad, Clear Embossing Powder, Heat Tool, and a brown color to "Antique" your image and enhance the cracked areas (I used Soft Suede).

Here's how you do it-
1- Stamp your image onto your c/s.
2- Take your VersaMark Pad and "stamp" it all over your stamped piece of c/s until it is completely covered.
3- Apply your Clear Embossing Powder over entire surface and using your Heat Tool, heat the entire c/s until all of your embossing powder is heated and glossy. Allow this to cool.
4- Reapply VersaMark to the entire embossed surface and cover once more in Clear Embossing Powder. Heat again and allow to cool completely.
5- Repeat step 4 at least once more. You could even repeat it 2 times more if you wanted. Make sure to allow it to cool completely in between applications. This is a good time to work on the rest of your card.
6- Allow your piece to cool completely. If you're impatient you could put it in the freezer for just a few minutes.
7- Bend your embossed c/s in multiple places and going in multiple directions. This bending action will cause the glass like coating to crack. Continue doing this until you get the desired look.
8- Take a brown color of your choice, I used Soft Suede but a darker color like Early Espresso or Chocolate Chip would probably work well too, and sponge it over the entire surface using a circular motion. This will help to get the color into the cracked areas. You can even bend the c/s slightly and sponge to really get in the cracked areas.
9- Take a paper towel or old cloth and wipe over the surface. This will remove the color from the surface and will just leave it in the cracked areas. Such a cool effect! Here's another look-

 10- Smile when you see what you have created and smile even more when you think about the smile that it will bring to it's recipient. I really do love that part!

Well, that's all I have for you tonight. I hope you liked the techniques and the card. I really hope it inspires you to try something new! If you liked today's card/technique or have questions about it, I hope you'll leave me a comment below. I love hearing from you and your comments really do make my day! If you'd like to +1 or Pin it, I've put those buttons on my blog for your convenience. Friends and Followers are always welcome too! :)

Thanks so much for taking time out of your busy day to stop by my little corner of the world. You are very appreciated! Till Next Time-

Remember- Life is often more about the storms than the peace they seek to overwhelm. It's not about Waiting for the storms to pass, but Learning to Dance in the rain.

Be Safe,
Shan

Pin It

Tuesday, December 18, 2012

End of the Week Technique #60 - Crimped Paper Treat Holder

Pin It
Hey y'all. Happy Tuesday! I hope you're having a great week so far. :) So I know it's not the end of the week yet but I had a few minutes and I wanted to share this with you while I could. This is another of my 12 Days of Christmas/Secret Santa gifts for one of my co-workers. This is the first one I made and I made it as a "Thank-You" for one of the Military Staff Members in our clinic. She always makes me smile and I wanted to give her a little something extra to say "Thanks" for always making me smile. I'm showing you hers because it was the first one I made and I took pictures as I made it.

Here's today's project-


Crimped Paper Treat Holder

Isn't it cute? I can promise you this is one package they won't be getting a sneak peek of. It's seriously sturdy and secure. I started with a piece of Raspberry Ripple c/s large enough to wrap around my treat which, in this case, was a pack of Juicy Fruit. I had seen my friend snacking on this last week and thought it was sure to be liked. :) I added a square of DSP that I cut out from one of our sheets. I think there's 16 different squares per sheet. I adhered it with Tombow and then added some Dazzling Diamonds to "Bling it Up" just a little bit. Here's a closer look-


Did you notice the ends of the package? I bet you're thinking I used the Paper Crimper to do that. Wrong. How excited am I to tell you I came up with this idea all on my own? I really do love being able to tell you I had an original idea and even more that it worked! I have a Paper Crimper that I've only used a few times, but since SU retired it earlier this year I didn't want to use it. I wanted to see if I could get the same effect without it, and I'm happy to say I was able to! Here's a closer look-


Pretty Cool, Huh!?! Yep, I was doing a little Happy Dance over this one. Oh, and I let Tink have a little fun too, just because.

Wanna know how I did it? It's so easy you're not gonna believe it...

What you need for this week's technique- Cardstock in the color of your choice, Adhesive (Sticky Strip is preferred however, I was out when I made this and used my favorite Tombow and am happy to say it held just fine) and your Simply Scored tool.

Here's how you do it-
1- Cut a piece of c/s large enough to wrap around your treat and long enough to "crimp" the edges. About 1 1/2 inches on each end should be good.
2- Center your treat and then apply adhesive down the edge so you can "seal" the edges together. This will be centered on the underside of your treat. Gently fold your c.s over and press down on the seam until it's secured. Then you can slide your treat back in.
3- Seal both ends, one at a time in the same manner.
4- Sure your treat is secured now but, let's make it look really nice. (No pictures of this next step, because I simply don't have enough hands. Sorry. I know you'll get the idea though.) Take one end and line it up against the top corner of your Simply Scored and using your stylus score down the edge. I scored in each score channel and I did 4 on each side. You have to score carefully because the c.s is double thick so it's hard to stay in the channels. Here's another look at the scoring-
Not only is this decorative, but I think it actually helped the edges to stay sealed when it was just the Tombow. Here's one last look at the finished product-


5- Smile when you see what you've created and smile even bigger when you think of the smile it will bring it's recipient- I really do just L.O.V.E. that part!

Well, that's all I have for you today. It's quick and easy and easily customizable to the size of your treat.  Oh and by quick I mean about 15 minutes start to finish. It took me far longer to write this than it did to make today's project. I really hope you liked today's project and I hope it inspires you to try something new. Oh and btw- my friend really liked her surprise. Sometimes it really is the small things in life that make us happy. If you liked today's project or have any questions about it, I hope you'll take a moment to leave me a message below. I read them all and they really do make my day! If you'd like to +1 or Pin it, I've put the buttons on my blog for your convenience. Friends and Followers are always welcome too! :)

Thanks so much for taking time out of your busy day to stop by my little corner of the world. You are very appreciated! Till Next Time-

Remember- Life is often more about the storms than the peace they seek to overwhelm. It's not about Waiting for the storms to pass, but Learning to Dance in the rain.

Be Safe,
Shan Pin It

Sunday, December 16, 2012

Snowman Tic-Tac Holders / Secret Santa Ideas End of the Week Technique # 59

Pin It
Hey y'all. Just a quick post tonight. I'm a week behind on my EWT's so I'm throwing an extra one in. These Tic-Tac Holders are all over the place but of course when I went to look up directions I saw a few different ones that I liked, with different measurements & different decorations so I just kind combined to make my own.

We're doing a 12 Days of Christmas/Secret Santa gift exchange at my work and I though this would be a nice little stocking stuffer. I'm happy to say I've also done a few other projects that I will be posting soon with  tutorials too.

Here's today's project-


Ok, so I'm a little disappointed that the picture came out so washed out, but you can get the idea and unfortunately, I'm too tired to get back up and take some more. :( Sorry.

Here's what you need for this project- Cardstock in your choice of colors. I used Bashful Blue and Whisper White, Ribbon- I used our stitched ribbon in White. Circle Punches in the following sizes- 1 1/4, 1, and 3/4. Corner Rounder Punch, Perfect Polka Dots E. F., Big Shot, Stamp Set of your choice for the background, Pumpkin Pie Stampin Write Marker, Pearls and Black Sharpie Marker. Oh and of course a pack of Tic-Tacs. :)

Here's how you make your project-
1- I Started with a base of Bashful Blue Cardstock cut to 3 x 4 7/16 and rounded the edges. I know this is an odd measurement but I took one that was from another blog and when I scored it, the front & back weren't even (so you know the OCD in me made me change it). Score this at 1 15/16 & 2 13/16.
2- Cut your Whisper White c/s at 1 3/4 x 2 13/16 and round two edges.
3- Stamp your background. I chose to use the smallest snowflake from the Snowflake Soiree set. I stamped it in Marina Mist 3 times full strength and 3 times stamping off once.
4- Adhere the ribbon to your base. I did this 2 different ways, once under my W.W. piece and once over it (simply because I had already adhered my W.W. c/s to my base. Adhering it under your W.W. piece is much easier.
5- Adhere your W.W. c/s and then using your 1 1/4 Circle punch, punch your circle near the bottom of your W.W. piece.
6- Punch a 1" circle from a scrap piece of c W.W. c/s and run it through your Big Shot in your Perfect Polka Dot E.F. Adhere this to your c/s, slightly overlapping your punched c.s base. Add 3 medium pearls to this for buttons. You can color them with a black Sharpie while they are still on the adhesive page.
7- Punch a 3/4" W.W. Circle from scrap c/s. Color the small pearls that are attached in a row for the eyes and mouth and once they are dry, attach them to this piece. Using your Pumpkin Pie Marker draw a little triangle for the carrot nose. This piece gets attached with a Dimensional.
8- Apply a line of Sticky Strip in the middle of your two score lines and use this to attach the c/s to your Tic-Tac container. and tie your ribbon in a bow or knot.
9- Smile when you see your finished product and smile even bigger when you think of the joy it will bring it's recipient. :) That part just never gets old!

That's all I have for you tonight. I hope you like it and I hope it inspires you to try something new. This is a quick and easy project that is sure to bring a smile to someone's face. It's also quick to make and you could easily make a large batch for your office friends in no time at all. If you like today's project or have questions about it, I hope you'll take a moment to leave me a comment in the space below. I love hearing from you and your comments really do make my day! If you'd like to +1 or Pin it, I've put those buttons on my b log for your convenience. Friends and Followers are always welcome too! :)

Thanks so much for taking time out of your busy day to stop by my little corner of the world. You are very appreciated! Till Next Time-

Remember- Life is often more about the Storms than the peace they seek to overwhelm. It's not about Waiting for the storms to pass, but Learning to Dance in the rain.

Be Safe,
Shan

Pin It

Saturday, December 15, 2012

Glitter Window Ornament - End of the Week Technique #58 / NAC #24 / My Challenge #51

Pin It
Hey y'all. I hope you're having a great weekend. I've got a pretty new card and a new EWT for you today. (And an "Ask me how I know") I don't know about you, but I still find one of my biggest problems with making cards is that I over-think things. Sometimes the simplest concepts seem to take me the longest to actually make happen. That's what happened with tonight's card. I had the concept and thought it would just "happen"....yeah, that happened. NOT! But at any rate, here's my card-


 I did today's card for the weekly challenge over at Nacho Average Challenge. Please make sure you go by and check them out. They have great challenges each week. This week is a color challenge. Normally, color challenges really give me grief, but this concept actually came to me pretty quick. :) Here's the color challenge for this week-


I used Silver instead of gray and combined it with a new technique. I'll tell you about that further down in the post. Here's the inside of my card-

I couldn't find my stand..sorry about the attractive bone folder in the picture
I used my Keepsake Ornaments stamp set and Holiday Ornaments Framelets to make this card along with Greeting of the Season for the sentiment. I also used the Lacey Brocade E.F. to add a little interest to the front of my card.

What do you think? I hope you like it and I hope the fabulous ladies over at NAC do too! Now for this week's End of the Week Technique, The Glitter Window. I haven't done any of these before and of course I had to make it a little more complicated than it needed to be, But I'll give you the down dirty and easier version of it. Lol.

Here's what you need- Stamp Set of your choice (I used Keepsake Ornaments), I also used the Ornaments framelets however depending on your choice of stamps and designs you could also use a favorite punch, and some Glitter Paper ( I used SU Silver), and Mini-Glue Dots.

Here's what you do-
1- Stamp your image and then cut it out with either your punch or framelet.
2- Cut out the image on the front of your card using your coordinating framelet or punch. The framelets make this really easy because you're not limited in where you want to place your image.
***TIP*** If you want to have the front of your card embossed, like mine is, don't emboss it before cutting out your shape. If you use framelets you will flattened out (un-evenly too) your embossing. Ask me how I know. Yep, I did it and since I keep it honest with you guys, here's what it looked like-

3- Now for the glitter part- Cut out some glitter paper to accent your cut out image. I used my Scalloped Ribbon Punch to cut out mine. You're actually getting 2 Tutorials because I'm going to show you how I did this. I wanted to make sure the glitter paper followed the curved outline of the stamp so here's what I did. 
3a- I stamped the image on the back of my glitter paper-

This way I could see the curve to trim it instead of just having a straight edge (You know I couldn't just keep it simple, right?)
3-b I attached this to a piece of a Post-It note so I could slide it into my punch-

3-c  I just punched it out like normal-

4- Attach your Glittered Cut out image to your stamped image with Some Mini-Glue Dots. Glue Dots are really important to make sure the Glitter Paper sticks to your stamped image.
I also cut a piece of Glitter Paper with my framelet for the "cap" for my ornament. :)
5- Take your stamped image and attach it to the inside of your card by placing it through the cut image you made in step #2 above. Here's another look at the finished product-


That's all you need to do for this week's technique. I hope you liked my card and I hope it inspires you to try something new. I love hearing from you, so if you liked today's card or have questions about it, I hope you'll take just a moment to leave me a comment in the space below. I read all of your comments and they really do make my day! If you'd like to +1 or Pin today's card, I've put those buttons on my blog for your convenience as well. Friends and Followers are always welcome too!

Thanks so much for taking time out of your busy day to stop by my little corner of the world. You are very appreciated! Till Next Time-

Remember- Life is often more about the storms than the peace they seek to overwhelm. It's not about Waiting for the storms to pass, But Learning to Dance in the rain.

Be Safe,
Shan

Pin It

Thursday, November 29, 2012

End of the Week #57 - Scribbled-Spritzed Markers / NAC # 23 / My Challenge #49

Pin It
Hey y'all. I hope you're having a great week so far. It's been so cold here lately. I can't stand it! I miss the warmth, like crazy. I really miss the beach and all the beautiful sunsets.  This week over at Nacho Average Challenge they have a color challenge. Now normally color challenges are so not my favorites, but this one inspired me and I couldn't wait to get too it.

Here's today's card-

Card featuring Scribbled-Spritzed Marker Technique


Here's the challenge-


I love this color combo! Yea! When I saw it, I was reminded of a recent sunset. It was so pretty I had to  take a picture-

You know I probably should have used "Like A Tree"
 but I didn't. I just went with another silhouette.
Here's a close-up-


I started with a base of Midnight Muse and added a layer of Raspberry Ripple. My focal point uses a base of Glossy White c/s. The image is stamped in Midnight Muse. It took me a few tries but I'm so happy with how it turned out.

Here's a look at the inside-


Both the image and sentiment are from the same set and are stamped in Midnight Muse.

What do you think? Didn't it turn out pretty? This was the first time I tried this technique, and I'm pretty sure I will try it again. I will say though it is not one for those of us with more than a little Stamping OCD. If you're not as OCD as I am, you may be able to let loose and just go with it. :) Oh and you have to wait for it to dry to get the full effect.

Here's what you'll need for this technique- Stampin Write Markers, an old plastic stamp case,  Glossy cardstock, coordinating colored c/s, the stamp set of your choice and a spray bottle filled with water. Although you could probably use just about any type of stamp, line or solid image I chose to use a solid silhouette.

Here's what you do- this is another easy technique, you won't believe how easy it is. I just tend to make things harder than they really are....darn OCD!!!
1- Choose your colors- take your colors and scribble them onto your plastic case. You want to make sure that you scribble enough to equal your card stock both height and width, then add a little extra.


***Tip*** - start with your lightest color and then add the darker ones. This way you won't get any dark colors in your light marker's tip.
2- Lightly spritz the case with water. This is what it will look like. You can see the water droplets in my pic. :)


3- Take your Glossy c/s and lay it glossy side down onto the case, carefully. Take your Grid Paper and use it to rub the c/s onto the stamp so every surface is covered.
4- Lift it off the case carefully being sure to only touch the edge....unless of course you want a multicolored finger-print on your card.
5- Let this dry. You may have a line down one of your edges where the color poled as you lifted it off. If you just can't bear it, you can cut your paper down to avoid that. (That's what I did)
6- Once your paper is dry, stamp as you normally would. I used the floral image from "Just Believe" and stamped it twice.
7- Layer on your card or scrapbook page as desired.
8- Smile when you see your finished product. Smile even more when you think about the smile it will  bring to its recipients face. Boy, I love that part!

Here's another look-


See! I told you it was easy. Do you like it? I hope so and I hope the ladies over at NAC like it too. If you haven't joined them yet, why not hop on over as soon as you're done here. They are pretty darn fabulous...and their challenges are too! I hope this inspires you to try something new today, or whenever it is you're reading this. :D If you liked today's card or have questions about it, I hope you'll take a moment to leave me a message in the space below. I read all of my comments and they really do make my day!!!If you'd like to +1 or Pin today's card, I've put those buttons here on my blog for your convenience. Friends and Followers are always welcome too!

Thanks so much for taking time out of your busy day to stop by my little corner of the world. You are very appreciated! Till next time-

Remember- Life is often more about the storms than the peace they seek to overwhelm. It's not about waiting for the storms to pass, but Learning to dance in the resin.

Be Safe,
Shan
Pin It

Sunday, November 25, 2012

End of the Week Technique #56 - Mother of Pearl

Pin It
Hey y'all. Happy Sunday/Monday! I'm starting this at 11:30pm so some of you might actually get to read it on Sunday, but most likely you will get it Monday, so this way I've got all of you covered. :)

*Edited* I'm also entering this in Nacho Average Challenges Color Challenge for this week. It has a little Lucky Limeade in it as well, but the 3 main colors are from the challenge.

Elements of Style has been on my wishlist for some time. I finally got it a few weeks back and have been waiting for just the right card to use it on. I think I found it. I have to say I think it was pretty when I first stamped it and it was even prettier after I finished it off with a new technique, Ok, so it's just new to me, but it's still pretty cool. It's late and I'm pretty tired so I'm gonna try and make this quick, but there are lots of pictures. Hopefully, you'll think it's worth it. Here's what I came up with-


Card featuring Elements of Style and
Mother of Pearl Technique.
I wish you could see just how pretty this is in person. I just couldn't capture the shimmery beauty of it. Here's a closer look-


The card base is Midnight Muse. This is topped with a layer of Raspberry Ripple and the technique is done on Glossy White c/s. I inked my floral image with my Stampin Write Markers in Raspberry Ripple, Primrose Petals, Lucky Limeade and the little hummingbird in Midnight Muse. Here's what it looked like before I started the technique.


See what I mean? So pretty. I may have to make another card that looks like this. :)

Here's the inside-


The sentiment is from the same stamp set and is stamped in Raspberry Ripple onto a piece of Naturals White c/s. I'm really loving that paper lately. My floral image is inked the same way as the front. I stamped off once to lighten the image and then stamped it again. A little love from Tink added a little shine and shimmer to the inside too.


So what do you think? Isn't it pretty? Are you ready to make your own with this technique?
Here's what you'll need- Glossy White c/s, Shimmer Paint (I used Frost White), Cling Wrap (I used Saran, because that's what I had on hand, but you could use any kind), and a plastic stamp case.

Here's how you do it-
1- Stamp your image onto Glossy White c/s
2- Shake your paint until it's mixed thoroughly and then pour a small amount onto the closed top of your stamp case.

3- Wad up (That's a real technical term "Wad") your cling wrap then dab it into your paint. Dab this off (another technical term "Dab") onto your case so it doesn't just glob (Wow! So technical tonight) in one spot.

4- Dab the paint onto your c/s until it's covered. Let it dry and then mount on your c/s base or layer. Here's another look at the finished technique-

Two things of note-
1- This is the first time I've done this technique so I'm gonna have to check some other sites because I don't remember this being mentioned. As I started to dab with the paint some of the ink picked up from my stamped image and mixed with the frost paint. At first I was pretty upset that the colors were mixing and blending, but I kept on and it worked out ok. I grew up near the ocean and real Mother of Pearl has lots of variations in coloring and the colors mix and swirl throughout, pretty much like this. I'm glad I didn't stop when I first saw this happening. Stick with it.

2- The extra paint makes the Glossy c/s a little heavy so I recommend using Dimensionals to adhere it to your c/s. I used 3 down each side and 1 in the center. I wanted to make sure it wasn't going to pull away from the c/s layer.

Well, that's all I have for you today. I hope you like it and I hope it inspires you to try something new, this technique or even something else. Remember the goal of this blog is to encourage you to "Just Try". If you liked today's project or have questions about it, I hope you'll take a moment to leave me a comment in the space below. I love hearing from you and read all of your comments. They really do make my day. If you'd like to +1 or Pin it, I've put the buttons on my blog for your convenience. Friends and Followers are always welcome too! :)

Thanks so much for time out of your busy day to stop by my little corner of the world. You are very appreciated! Till Next Time-

Remember- Life is often more about the storms than the peace they seek to overwhelm. It's not about Waiting for the storms to pass, but Learning to Dance in the rain.

Be Safe,
Shan
Pin It

Monday, November 19, 2012

End of the Week Technique # 55 Quilting with Diagonal Score Plate

Pin It
Hey y'all. Happy Monday! I hope your week is starting off fabulously and that you had a great weekend! I had this planned for last night, but I finished up too late. I've already got at least 2 items planned for this week. :) I'm still trying to figure out my time-management in order to get back to my 5 days/week posting. I really appreciate all of you for hanging in with me during this transition! Hugs to you all!!!!

Here's last week's End of the Week Technique, I hope you like it-

Quilted Card
I love the effect I got with this technique, almost like those quilted purses that so many of us would love to have. I used one of my new favorite colors, Midnight Muse, as the base. It's a one -layer card that is anything but simple. :) Hey April, Lookie! One Layer!!! Lol!

After making the quilted design with my Simply Scored Diagonal Plate I added Midnight use ink using the Direct to Paper technique. Here's a closer view-

Quilted Card featuring Direct to Paper Technique
You can see the variations in color that were obtained by using this technique. I lightly rubbed the ink pad directly onto the c/s (hence the name). This was the first time I had tried this technique and I have to say it is definitely Technique Driven. It took me two cards and 5 sides of paper to get it to where I was halfway happy. The trick, I think, is to lightly touch the paper and to not have any noticeable "start & stop" areas

I'm not quite sure that either of the techniques used on today's cards are really good techniques for someone as OCD as I am, especially the D-to-P. But, at least I tried them. You can try them and see how they work for you.

After my ink had dried I used the smallest pearls in our pack and applied them one at a time to the overlapping areas. My daughter said "You're Nuts!" I'm not sure she was too off on that one. :)

Here's the inside-

Inside of Card featuring
Blooming with Kindness set

Both the sentiment and image are from the same set, Blooming with Kindness. The floral image is also now available as a single stamp. I love the font used for the sentiments. It's so elegant.

Here's a close-up of the flower-


I inked my stamp first with Baja Breeze. To get the two-toned effect I used the Rock-n-Roll technique and rolled the edges of the stamp in Midnight Muse. Next, I took my Midnight Muse Stampin Write Marker and tapped the color randomly onto the center of the stamp. I used my Blender Pen to remove the color from the stem and used my Wild Wasabi Marker to color it in. I think this technique gives such a pretty effect. What do you think?

So for today's technique it's pretty easy (mostly). Here's what you'll need- Cardstock in the color of your choice, Simply Scored with the Diagonal Plate and color to add if desired. Sorry no pictures for this one. It's pretty self explanatory.

Here's what you'll do- Using your Simply Scored Tool with the Diagonal Plate score at your desired interval. I chose every inch. Once you've covered your c/s turn it 1/4 turn and score again. That's all. Easy-Peasy. Just make sure to hold your c/s securely so it doesn't move and make sure to be firm with your stylus so it doesn't jump the track on you. That happened to me a couple of times. I have to say the card looked pretty good just with the embossing. However if you want to step it up a notch add some color either by D-to-P or by sponging the color on. It will really make the embossed lines stand out even more. If you want to be really over the top, go ahead and add some embellishments too. It's your card, why not? Make it fab!
That's all I have for you today. I hope you liked it and I hope to see you back here soon. I can't wait to show you what I've been working on. If you liked today's card or have questions I hope you'll take a moment to leave me message below. I love hearing from you and read all of your comments, and they really do make my day! If you'd like to +1 or Pin today's card, I've put those buttons on my boo for your convenience. Friends and Followers are always welcome too! :)

Thanks so much for taking time out of your busy day to stop by my little corner of the world. You are very appreciated! Till Next Time-

Remember- Life is often more about the storms than the peace they seek to overwhelm. It's not about Waiting for the storms to pass, but Learning to Dance in the rain.

Be Safe,
Shan


Pin It