Showing posts with label Friendly Phrases. Show all posts

Tuesday, May 27, 2014

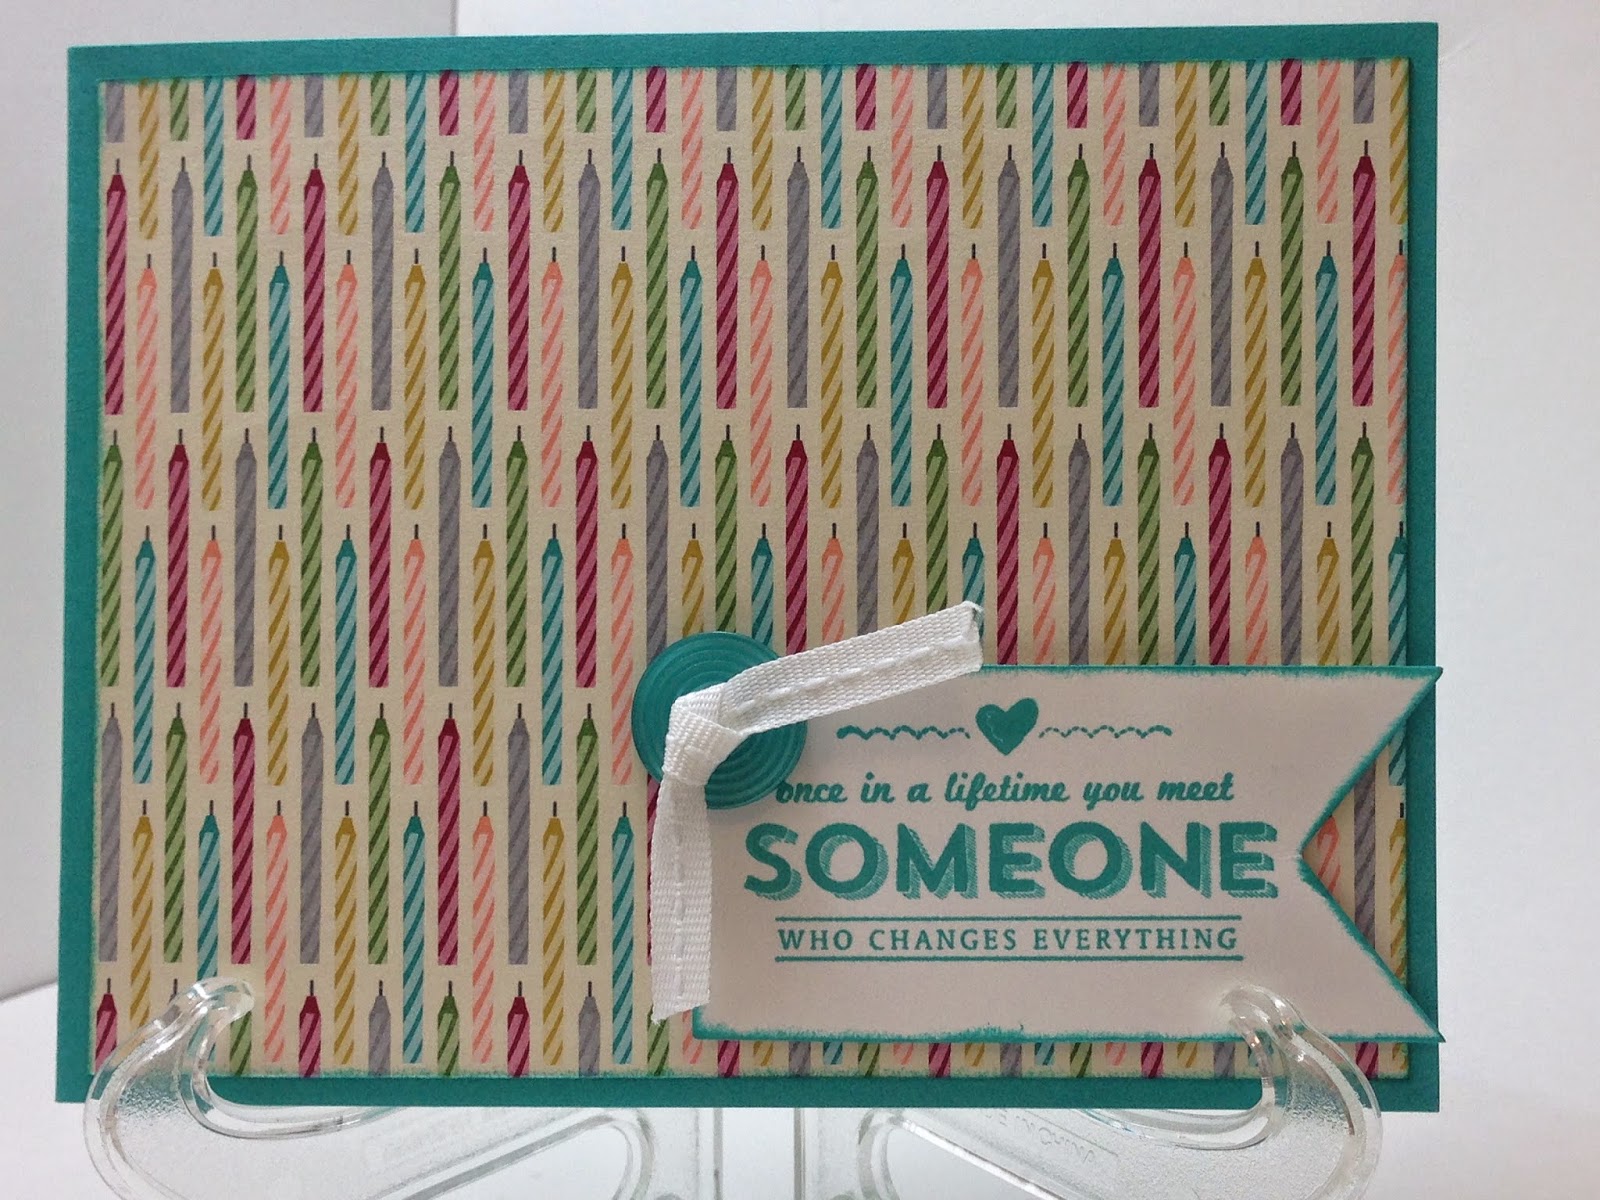
Special Someone /NAC #91

Pin It
Hey y'all. Happy Tuesday. I hope you had a safe and happy Memorial Day spent with family and friends and didn't end up with a sunburn. :) Sorry this is late. These 3 day weekends really throw off my schedules. The Nacho's have a Sketch Challenge for you this week, and I have a confession to make. When I looked at it on line, I thought the base was just a background. So mine, looks  a little different from everyone else's. On the upside, I used DSP as a background which I rarely do. :)

I needed a card for my upline- Robin's birthday.  So it needed to either be Vintage, something I rarely do, and just didn't have time or the energy to stress over (since my PTSD has been stressing me enough) or something outside my comfort zone- I chose the latter. Here's what I came up with-


So....

1- It's pretty Clean and Simple
2- DSP as a Background
3- Embellishments. 2 of them!
I know it sounds pretty simple, put the only way she would have been more surprise would have been  1- Vintage, 2- A 1-Layer card, 3- A card that was Crumpled & Torn.

Remember how I said I didn't quite get the sketch right? Here's this week's sketch-

I got part of it right it you flip it on it's side. :)


 I was trying to figure out how to get the words lined up evenly (even with the SAMJ) when it hit me that if I just off-set them I wouldn't need to worry. *Lightbulb Moment* Then, I stamped the inside with the pretty little present from sketched birthday and added dazzling diamonds to it but then I wrote my message before I took my pictures. *headdesk*

Love this font!

Well, that's all I have for you today. I hope you liked today's card, and I hope you decide to play along with us. I can't wait to see what you come up with!. As always, if you have any questions, please leave me a comment so I can be sure to answer them.

Thanks so much for taking time out of your busy day to stop by my little corner of the world. You are very appreciated. Till Next time.

Remember- Life is often more about the storms than the peace they seek to overwhelm. It's not about 
Waiting for the Storms to pass, but Learning to Dance in the rain.

Be Safe-
Shan


Pin It

Friday, August 24, 2012

A Confetti Card, A 3-D Project and A Challenge / NAC #8

Pin It
Hey y'all! Happy Friday! Woo-Hoo!!! I've got lots to do this weekend so I can hardly wait. I hope you have lots of fun planned too.

Do you Pin? I do. (You can check out my boards by searching for me ShanAngel or by clicking on the Follow Me button on my sidebar) I love wasting  spending valuable research time getting inspired or finding things that I love and would like to share with others. And just in case you're wondering before you click on over, Yes the boards are a little OCD just like me. : D HAHAHAHA! Any-who, I've been meaning to actually do something with the things that I pin and have been trying to do that a little more. In fact just last week I made cupcakes that I found that were Ah-Mazing (and low cal/points too!) and I'm finally taking inspiration from a card I saw and putting it to use. I'm pretty happy with how my card turned out. The original card was so unique I didn't even look it up when I made my card. I looked it up just prior to starting this post and it turns out I even used one of the same sentiments, just in a different way. Great Minds and all that. Swing on by my boards when you get a chance (but finish here first, kay) and see what you can find. If you Pin too, leave me a comment with your Pin name. I'd love to swing by and check out the Fabulous things I know you've got pinned too.

Here's today's card-

Confetti Card featuring
Friendly Phrases
How fun is this? Well, I think it's fun. :) I was really stumped trying to think up something to make with this week's challenge Over at Nacho Average Challenge. It's a color challenge and y'all know how much I absolutely adore those! NOT!!! I was actually afraid I wasn't going to be able to enter for the first time. :( Since I was limited to 3 colors this doesn't have quite the same impact as the card I took my inspiration from, but I think it's still easy to gather that it's confetti. It is easy to see that, right? Oh, please say yes!!!

In case you can't tell the colors-


I was hoping for a one layer C&S card with this, but no-go. I started with a base of Whisper White and using a pencil eraser made the "confetti" by inking up the eraser and "stamping" it onto my c/s. The colors, unfortunately, were visible on the other side of the c/s. So I cut my W.W. card into two pieces and layered them onto a Tempting Turquoise base and problem solved. My sentiment is from the set Friendly Phrases and I simply inked up the word WOW with my SU Marker instead of inking up the whole sentiment. I love that this set lends itself to this kind of separation, because it really increases the set's versatility.

Here's the inside-

Inside of Confetti Card featuring
Friendly Phrases.
I'm really happy with how it turned out. It's just so bright and happy.

Because I wasn't sure how "kosher" it would be to case someonelse's work for a challenge even though I changed it up I decided to add something else for the challenge. It's been a hot-minute since I had a 3-D item on here so I decided to add one as a bonus to this challenge. I've been thinking about adding this type project to my upcoming Christmas Class, so I just changed it up a little.

3-D Treat Holder featuring
Two-Tags Die, Boho Blossoms Punch and
Bitty Banners Framelets and Matching Stamp Set 
I love this idea. I know it's out there everywhere, but it's cute and quick and makes an impression on it's recipients and your class participants. I simply cut out two of the larger tags in T.T., creased them on the score line, added a little Tombow to the bottom to secure them and then decorated. See, Easy! I closed the treat holder with a small piece of Pumpkin Pie Ribbon tied in a simple bow. Multiple flowers were punched out from each of the colors plus W.W. and then sponged the edges and set about assembling them. The layers were all adhered with Tombow and the flowers were then secured with Mini Glue Dots. Once I had them all secured, they seemed to still be needing "just a little something extra" so I got out my White Gel Pen and added a little extra detail and I think that's just what they needed. I stamped the sentiment and then cut it with my Bitty Banners Framelet. Using my Bone Folder I curved it to give it some movement and then secured it as well with Mini Glue Dots. This will hold 3-4 Mini Reeces' Cups, Nuggets, Kisses (or similar sized item) or a snack sized candy.

So what do you think of my projects? I hope you liked them and I  hope the ladies over at NAC like them too. Like I said I went back this morning and looked for the original Pin and found it. Turns out the Pinner lives in my town. I'm sending her a message to let her know I CASE'd her and who knows maybe one day we'll get to meet. Always fun to meet other SU peeps. Don't you think? :) Here's the Original Pin and the link to her blog post-


Well, that's all I have for you today. I hope it inspires you to try something new, a challenge or maybe just actually doing something with one of the things you Pinned. I love hearing from you so if you have comments or questions about today's card &/or project, please feel free to leave me a comment. I read all of my messages and they really do make my day! If you'd like to +1 or Pin either, I've put the buttons on my blog for your convenience. Friends and Followers are always welcome too! :)

Thanks so much for taking time out of your busy day to stop by my little corner of the world. You are very appreciated! I hope you have a great rest of the day and that you have a Fabulous weekend filled with lots of time for Family, Friends and of course Creativity! Till next time-

Remember- Life is often more about the storms than the peace they seek to overwhelm. It's not about Waiting for the storms to pass, but Learning to Dance in the rain.

Be Safe,
Shan

Pin It

Tuesday, July 10, 2012

End of the Week Technique #40 Nestled Layers - SSC #263

Pin It
Hey y'all. I hope you're having a great day! We've finally broken our All-Time Heat Wave here in the DMV and how happy are we!?! Soooo Happy. :) I'm doing this week's EWT a little early this week since it's a challenge card and I'd like to go ahead and post my card. Hope you don't mind. You don't? That's why you're the B.E.S.T.!

I've seen a couple of this type of card before done with the Labels Framelets, but I haven't seen any done with the Hearts. Yeah, yeah, this Scaredy Cat's a trailblazer all right! HAHAHAHAHA. I don't recall anyone ever really giving it a name so I'm calling it "Nested Layers" since the two layers are kind nested together. If you think of a better name let me know, kay? Kay. I'd been wanting to do this with the Labels Framelets, in fact that had been my plan for this week's EWT. Then I saw this weeks sketch over at 411 and decided to change it up just a wee bit.

Here's today's card, the tutorial will follow-

Nestled Layers Card featuring
Hearts Framelets, Bordering on Romance and Twitterpated DSP
Can you see how it's nestled? Here, let me show you-


How cool is that! Why yes, I did do the *Happy Dance* when I tried it and it worked. So exciting when that happens. Yea Shan!

Here's the sketch it was based on-


Another great sketch by the Stamping 411 ladies! I stuck pretty close to the sketch just making it a "gate-fold" card instead of a standard "flat-front" card so I could do my technique. I stepped a little out of my zone for this one. Luckily, that's coming a little easier nowadays than it used to. Gee, I guess challenging myself to a  challenge a week is paying off! : D For those of you that are new here, I'm a pretty visual person, but I'm also a pretty literal person. When I see a sketch, it really is a little hard for me to change shapes. There was a day when I would have seen this sketch and not done it because I didn't have a big "floral"/circular centerpiece. I don't have too many issues with changing the orientation, but I mostly keep all the elements of the sketch on my card, usually in pretty much the same layout. However, when I saw this sketch I thought of a big heart instead of flowers and just went with it.

I used Blushing Bride as my cardstock but only because I still had so much left and it matched the DSP I was planning on using. I began with Blushing Bride for my base and my large heart and added pieces of Twitterpated DSP to the front panels. The smaller heart is cut from Whisper White c/s. I stamped my image from Bordering on Romance twice in Black Staz-On so it wouldn't bleed when I colored it in. Surprise, Surprise, I got this right the first time. After stamping I centered my images in the heart framelet, cut it out and colored the images with Pretty in Pink, Regal Rose, Melon Mambo, Certainly Celery and Wild Wasabi Stampin Write Markers and my blender pens. I sponged the edges of both hearts, inside and outside edges, with Blushing Bride Classic Ink. I carefully adhered the outer half of the larger heart to the left panel and the outer edge of the smaller heart to the right panel with Dimensionals. Getting the inner heart positioned just right was the hardest part of the whole card and even that wasn't too bad.

Because you know I love the inside of the card to be as pretty as the outside, here it is-

Card Inside featuring
Bordering on Romance and Friendly Phrases
The sentiment is from Friendly Phrases and is stamped in Blushing Bride. I stamped a couple of the images from the Bordering on Romance set in Black Staz-On and colored them in with the same colors listed above. I then let Tink have her way  to sparkle it up a little. So pretty in real life. You can actually see a little of the sparkle here. What do you think? I'm so happy with how this card turned out. 

So for today's EWT- Here's what you're going to need-
A framelet set of your choice. I used hearts and I know it works great with the labels too. Will have to try it out with some of the newer sets once I get them home.
Dimensionals
Stamp set of your choice
Accessories as desired to decorate the rest of your card

This is a super simple technique, one I'm sure you're going to want to play with. Here's what you do-

1- Pick two adjoining framelet sizes. I think mine were #'s 3 and 4. Lay them on your piece of c/s and secure it down with either a post-it note or some painters tape so they won't move around.


Run it through your Big Shot. This will give you one thin heart piece (the Blushing Bride one on my card) and a smaller heart. Don't get rid of the inner heart you can use it in another project. (Sorry I just realized I should have taken a picture after I ran it through) :(

2- Stamp your image/s and center it within the smaller heart framelet. Run it through the Big Shot and color, decorate it however you wish.


Ok...So while I remembered to stamp with Staz-On the first time instead of classic ink, I however did not remember to stamp my images before I ran the above piece of c/s through my Big Shot. *headdesk* I now have a nice white heart though, begging to be used in some project. Hey, you know I tell and show the good as well as the bad.


3- Place Dimensionals on the outer halves of your cut pieces. I adhered my bigger heart first. However, I think it would probably be easier to mount the smaller one first and then the larger one. As you can see in the second picture below, I used the edge of the c/s to center my layers. The center point of each heart is aligned with the panel's edge. When the card is closed they will lay one inside the other and keep the card closed-


4- When you go to open the card they will separate from each other-


5- Smile when you see your finished card and smile even bigger when you think of the joy it will bring someone. Wouldn't you love getting a card like this and knowing someone took the time to make this special card for you? I know I would.


Well, that's all I have for you today. I hope you liked today's card and this week's EWT. Hopefully it will inspire you to try something new today and to make a special gift for someone who would be thrilled by a little hand-stamped love. As always, if you use this technique to create a card/project, I'd love to see it and post it for others to see as well. I love hearing from you and read all my comments and try to respond to them all as well. If you liked today's card and have a moment to drop me a line, it would totally make my day. If you'd like to +1 or Pin it, I've put the buttons here on my blog for your convenience. Friends and Followers are always welcome too! :)


Thanks so much for taking the time out of your busy day to stop by. I hope you'll come back soon. I have another challenge card for you tomorrow. Wow! 3 in one week. Lol! I also have a new Scrapbook page for you still to come this week. 


Till next time-


Remember- Life is often more about the storms than the peace they seek to overwhelm. It's not about Waiting for the storms to pass, but Learning to Dance in the rain.


Be Safe,
Shan
Pin It

Friday, July 6, 2012

End of the Week Technique #39 - Using Framelets to Alter Layers

Pin It
Hey y'all. Happy Friday! I hope you've had an Amazing week and are looking forward to an equally Amazing weekend. My week is ending on a high note since I found out I was chosen as an Operator's Pick over at Stamping 411. How exciting!?! I love playing along with them, if you haven't checked them out, make sure you do...just after you're done here. Kay?

Today's card is one I made for a recent team swap. I'd been wanting to do this technique for a while and I think it ended up working just fine for this card. Here's today's card-

Any Occasion Card featuring
Betsy's Blossoms and Friendly Phrases and Labels Framelet
I was so happy this card turned out, because I ended up doing 14 of them in one evening! Nothing like a last minute save. I can't remember what was going on that week, but I try not to let swaps come down to the last minute, because augh, you know I hate that added pressure! :) Actually they were card fronts so I did everything except the So Saffron card-base, but still a lot of work.

First I decided which size Labels Framelet I wanted to use. I think this is the third largest one. Once I decided just where I wanted it in the framelet (how wide, how narrow, how many "bumps" etc.) I cut out all of my pieces. The tutorial for this is later on in the post.

After I had all my W.W. c/s pieces cut out, it was time for the fun stuff. I started off trying to brayer the color on for the sky. Yeah, that was so Not happening! After about the 5th try I gave up on that idea for fear I wouldn't have enough Whisper White c/s left to do the swaps at all. I then decided to just sponge the sky, so out came the sponges and the blues and the Large Scalloped Circle Punch (to make the clouds) and I got busy. I used Bashful Blue and some Marina Mist and sponged until I got the effect I liked. Then I sponged the edge with Baja Breeze for a little depth and contrast. I also lightly sponged over the whole piece in a circular motion to give a more "blended appearance" instead of the more defined "clouds" appearance.  I stamped all my sentiments in Midnight Muse at the bottom of the layer so I had a better idea of where to place my sun. I then inked up my "sun" with the largest flower in the Betsy's Blossom set. I know you're probably tired of seeing cards with this set but it's just so versatile and so darn sweet! I inked it up with my Daffodil Delight Classic Ink Pad then "rolled" the edge of the stamp on my Tangerine Tango pad. This gave a two-toned look and added depth to the image. Between this and my sky, everyone was ensured a "one of a kind" swap. The only thing I wish I'd done differently would have been to stamp the sun a little higher so the branch/leaves wouldn't be behind the ribbon.

Next came my sweet little bird, and a surprise design find! My original plan was to stamp the bird twice and then cut out the wings and pop them up on Dimensionals. Well, let me tell you what happened instead. I stamped that sweet little bird down in front of the sun and lookie at what a pretty design effect it made when the pattern/colors from the sun mixed with the colors and patterns on the wing. *Score!!!* Serendipity, I tell you, what a happy little finding. Why yes, since you asked...I did do a little *happy dance* : D

All that was left then was to stamp my branch/leaves (Gumball Green) under her and attach my Daffodil Delight ribbon. Instead of wrapping the ribbon around the layer I used my Stampin Mist Bottle to tie a knot near the end of a length of ribbon ( I think it was about 8"), snip the loop at an angle and then SNAIL the ends under my layer. I often do this instead of wrapping the whole layer. That's extra ribbon I can use on another project that would simply be hidden otherwise. I don't know about you but anything that conserves my supplies and still gives me a pretty look is A-OK with me.

This whole layer was secured to a base of Bashful Blue c/s with Dimensionals. I later added this layer to my So Saffron base with Dimensionals after I ran my base through my Big Shot with the Perfect Polka-Dots Embossing Folder.

Here's the inside-

Inside of Card with
Betsy's Blossoms "Sun" and Bird

For the inside I stamped another sentiment from Friendly Phrases in Midnight Muse. I really do love how you can mix and match the sentiments to convey different thoughts. I used the same technique on the inside as I did on the outside. I simply stamped everything off once to get a lighter image. O.K., look I don't know who Betsy is but I'm tired of calling the sweet little bird "her" so from now on she's Betsy! LOL.Well, at any rate, Betsy looked a little pale after stamping off, but would have been too intense against the muted sun so I had to figure out a way to make her shine. Get it?!? Make her shine. So I got out my thinking hat...Think, Think, Think....Come on- you know you're saying it with me in your best Pooh-Bear voice.  ( I really love him and his cuddly, all stuffed with fluff self!) Tink to the rescue. She made Betsy shine so pretty and for once, you can even see the shine. Woo-Hoo! Do you Love it? I do.  :)

Now for a quick little tutorial on today's technique. I'm sure you could do this with just about any framelet but I chose the Labels one for today's card. I can't wait to try it with some others too.

Here's what you're going to need- Framelet of your choosing in the size of your choosing, cardstock, Big Shot, platform and cutting pads and a post it note or piece of painters tape.

Here's the quick and easy way to use your framelets to completely customize your layers-
1- Figure out how wide you want your layer to be and choose a framelet thats' inside width is your desired width. 
2- Cut a strip of c/s to the desired length. Cut the width so that it will fit inside of your framelet. I chose to lay my framelet on my grid paper to measure the inside width and then cut my paper to that measurement. (But that could just be the OCD in me!)
3- Slide your c/s inside your framelet from the top so that the edge you want to cut is under the blade. Position it, while it's on the platform with both tabs closed and cutting pad, so that you are happy with how it sits and it has even borders on the side, like this- 


4- Once you're satisfied with the positioning use a post-it note or a piece of painters tape to secure the framelet to your c/s and cutting pad. Strictly speaking you could omit this step but I wouldn't. The chances that you will move the framelet or your c/s when applying the top cutting pad is high. Using either of these will help ensure everything stays in place and will not tear or damage your c/s. It will look like this-


5- Run your framelet through your Big Shot but only until you pass the portion you wish to cut. Then back it out. If you run it all the way through, the top portion of your c/s will have an embossed edge. Remove your top cutting pad and the post-it note/painters tape and you have a new and exciting edge to your layer.

Pretty Cool Right!?!
6- Smile when you see your cool new layer and decorate it however you'd like.
7- Smile when you finish your card/project and smile even more when you think about the joy it's going to bring to someone and the smile it will bring to their face.

This is a pretty cool way to add a new and different kind of layer to your cards/projects. I especially like that you can make them not only in the sizes of the framelets but even then you can adjust your sizes. I chose to only have the center curve and the two curves to either side. I could have taken it over just an 1/8" or so more to each side and added that curve as well. This is totally customizable to you and your design desires. Play around with it and see what you come up with.

That's all I have for you today. I hope you liked today's card and End of the Week Technique. I know I sure had fun making it. I really hope it inspires you to try something new today. Don't be a Scaredy Cat! You know the motto here- Just try! Have fun! What's the worst that could happen? You end up with a few new scraps of cardstock to use for another project. :) As always, if you create something with this technique, I'd love to see it. I love hearing from you and I read all of my comments. So, if you liked today's card/technique and have a moment to drop me a line, it would make my day. If you'd like to +1 or pin today's card I've put the buttons on my side-bar for your convenience. Friends and Followers are always welcome too! :)

Thanks so much for taking time out of your busy day to stop by my little bit of stamping happiness here. I really do appreciate all of you! {(hugs)} I hope you have an Amazing weekend filled with lots of time for Family, Friends and of course creativity! Till next time-

Remember- Life is often more about the storms than the peace they seek to overwhelm. It's not about Waiting for the storms to pass, but learning to Dance in the rain. 

Be Safe,
Shan


Pin It

Thursday, June 28, 2012

End of the Week Technique # 38 - Herringbone Technique

Pin It
Hey y'all. Happy Thursday! I hope you're having a Fabulous day and counting down to the weekend. :) Today is my Friday as I will be heading to Hershey to see DMB with my sis tomorrow. Yep, we're getting away for a whole day. :) I'll likely not be posting tomorrow so today seemed like a good time for this weeks EWT.

I'm doing another card that utilizes scraps of cardstock. I don't know about you, but at the end of the catalog year I always have lots of scraps and lots of paper from the previous year that I'm looking to use. Well, this year is no different. So, here's my first attempt at this kind of card. Although it's not any harder than last weeks technique I felt it might be a little cumbersome to try and write it out, so I'm giving you a video to help show you how it's done. The video is from Dawn Olchefsky, check her out when you get a chance. She has lots of great video tutorials on her You-Tube channel.

Here's today's card-

Any-Occasion Card featuring
Herringbone Technique, Friendly Phrase and Domestic Goddess DSP

I just love these colors, so bright and cheery! I was trying to figure out what to put on the front, I actually had some flowers that I was going to put in the center, but I really wanted you to be able to see the pattern so I decided on a little tag instead. I was going to just put the sentiment straight in the middle and then as I was putting the punch into position it somehow got a little wonky and the sentiment ended up positioned at an angle like that & I was so glad it did. It's a little unexpected and it just-so-happens to mirror the DSP in that section of the card so it worked out great.

I did want to "step it up a little" though so I sponged the edges with a little Calypso Coral and then let Tink have her way with it before attaching it to the card with a little C.C. Bakers Twine. Here's a closer look-


Sometimes it's the small things, right? Love how this turned out and that it actually showed up in the picture. Yea me!

Here's the inside-


I kept it real simple here, well truth be told I did it cuz, I couldn't think of anything to put on the inside. :( I used another sentiment from Friendly Phrases. (Love how you can mix & match them!) Then I decided I could put a strip of coordinating DSP here for a little something-something. While that probably would have been enough, There was just not enough Tink-Time to this card so I added just a little more to make the inside sparkly and pretty too. How fun is that!?!

So, here's what you're going to need for this week's EWT- Coordinating DSP, adhesive ( I used Glue Stick for this, but Dawn uses an adhesive sheet in the video. I really need to get me some of that), paper cutter and then anything you might want to further decorate your card with.

So gather your supplies and get ready to try a new technique and make a beautiful card.
Here's the video-


Once your'e done don't forget my last step in my techniques instructions- Smile when you look at the great new card/project you've created and smile even bigger when you think about the smile it's going to bring to its recipient's face.

Well, I hope you liked today's card and that it inspires you to try something new. I love hearing from you, it always makes my day when I get your comments and I read every one of them. So, if you liked today's card I hope you'll take just a moment to drop me a quick line. Friends and Followers are always welcome too! :)

I hope you have a great weekend full of plenty of time for Family, Friends and of course for Creativity!

Thanks so much for taking time out of your day and stopping by. I hope you'll come back soon for more creative ideas, or just to smile as you follow me trying to work with my Scaredy Cat tendencies and my stamping OCD! LOL :)

Till next time-

Remember- Life is often more about the storms than the peace they seek to overwhelm. It's not about Waiting for the storms to pass, but Learning to Dance in the rain.

Be Safe,
Shan


Pin It
Friday, June 22, 2012

An Unlikely Inspiration & a C&S Card

Pin It
Hey y'all. Happy Friday!!! :) How's your day going? Mine started off Amazing before I even left home, then I got to work and found out I had made the Stamping Showcase over at Stamping 411. Wow! Great way to end the week. Now if I can just get those 13 swaps made tonight, then life will be really fab! Lol :)

Question for you... Where do you find your inspiration? Some people like my stamping buddy Michelle Suit has said she'll see something when she's out and be inspired to go home and try and re-create it. My upline team-leader Robin Merriman sometimes takes cards from magazines and re-creates them with all SU product (Hey Robin, btw's...we all miss seeing these every week), some others say "it just came to me" (boy, I wish I was one of those people!). I try to stay open minded and see what presents its-self, but I'm afraid it doesn't happen as often as I'd like. I do however think it's funny, that I now see colors and think of them in comparison to SU colors. That's happened with today's card. I initially thought I'd find something to do with the color combination and then my new favorite stamp set came out and "BAM!", (why yes, I did just do an Emeril) I knew just what I needed to do.

Here's today's card-

C&S Betsy's Blossom Card
I know, I know....Another Betsy's Blossom card. But this set is just so stinking easy and pretty and fun. Plus when you see the inspiration, you'll know why I had to use it! Here's a first, two actually- This is the first time I've done a card with Melon Mambo. I don't mean a card-base, I mean the first time I've cut the paper at all. It's also the first time the stamp pad had ever been used. If you look closely you'll see I did a little tone-on-tone stamping with Melon Mambo ink on the c/s. Why, have I resisted this color? So pretty! I also used Rich RazzleBerry, Regal Rose and Rose Red for my large blossoms and Pretty in Pink and Pink Pirouette for the smaller flowers.WOW! Is this a Pink card or what!?! I inked up part of the sentiment from Friendly Phrase is Melon Mambo with my Stampin Write Marker and stamped it on a scrap of Whisper White c/s. I punched it out with my oval punch, sponged the edges and then mounted it on a piece of Melon Mambo c/s, punched with my Scalloped Oval Punch. This was elevated with Dimensionals.

Are you ready for the inspiration piece? Wait for it....Wait for it.... You're not going to believe it...


That's right! It's my over-the-door ironing board cover. Can you believe it. Tell me those don't look like Betsy's Big Blossom and I'll tell you  that you need an eye exam! And just look at the colors...How could I not make today's card? LOL! It took me so long to make it because, I hate ironing so I don't see the inspiration very often. HAHAHA! I'm kind of a wash and wear kind of girl.

Here's a closeup of the flower-


Ok, so it's probably more of a "Quick and Easy" kind of card than a C&S, but tomatoes, tomatoes. Not really a way to make that saying look like you want it to sound without spelling one of the wrong. *SMH* So I used my Large Scallop Circle Punch to punch a piece of Melon Mambo out and then cut each one of the scallops so it would  flare a little more. I then inked up my stamp with Pretty in Pink and "tap-danced" my Melon Mambo marker all over it and stamped on a scrap of Whisper White c/s. Isn't that a pretty effect? I did this twice. I then punched one out with my Large Scallop Circle Punch, and one with my smaller Scallop Circle Punch. I curled the edges of all 3 layer with my bone-folder for depth. All three flowers were adhered to each other with Tombow. I decided it needed just a little something extra so I added a Rich RazzleBerry button to the center with a Mini-Glue Dot. It's not the same color as the flower, but I thought it looked pretty anyways. I got 2 whole containers of these Bright Buttons for FREE, during Sale-A-Bration.

Here's the inside-


I stamped the rest of the sentiment from the front and then added my two flowers. Do you ever split your sentiments like that? I do it a lot. I think it's an easy way to get a little more bang for your buck. I inked up just the center portion of the medium flower with my Stampin Write Marker and stamped it in the center of the big blossom for a different look.

So what do you think? I love it! (Even though it's so pink) I think it's bright and cheery and I think it will bring a smile to someone's face one of these days. It doesn't get much better than that. I hope you like it and I hope it inspires you to take something ordinary as your inspiration and turn it in to something that makes you, and hopefully others, smile.

Thanks so much for stopping by today. I love hearing from you. Your comments always make my day so feel free to let me know what you think. If you'd like to +1 or Pin this, I've put the buttons on my side-bar for your convenience. Friends and Followers are always welcome as well.

I hope you have an Amazing weekend, filled with lots of time for Family, Friends and of course Creativity. Till next time-

Remember- Life is often more about the storms than the peace they seek to overwhelm. It's not about Waiting for the storms to pass, but Learning to Dance in the rain.

Be Safe,
Shan
Pin It

Wednesday, June 20, 2012

Just Try, Try, Again.... SSC #260- Part Deux

Pin It
Hey y'all. Happy Humpday! I hope you're having a great week so far. :) It's a scorcher here in the DMV today, 90's, close to 100 with the humidity and heat index. Lucky for me, I'm getting my walking & running done inside. You know what I 'd love to reward myself with....ok, besides a refreshing beverage, a nice cupcake. However that would pretty much use up my all the activity points I just earned so how about I share a calorie/points free version? Ok, so you can't taste it, but I hope it makes you smile anyways, and just think everytime you smile you're using up calories. I like burning calories! According to this article quoting a plastic surgeon, it takes one more muscle to smile than to frown. Just one more reason to smile today. :D Anyways, hopefully this card will make you smile.

Oh, and before I forget- to all those people that let me rant yesterday about my frustrations over the card I made, thanks for not telling me to "Be Quiet" and to "Just Deal". To those of you that took the time to message me or leave nice comments, Thanks so much!!!! You made my day and really made me glad I had persevered and pushed on instead of giving up. Bear Hugs to you, "Grrrrrrrrr". :)

So, I decided to give the Stamping 411 challenge another try. Here's what I came up with-

Celebrate Card featuring
2012-2014 In Colors, Patio Party DSP , Friendly Phrases & Cupcake  Builder Stamp Set & Punch

Here's the sketch-


I stuck to sketch, just turning the orientation. I decided since this was my second attempt, I would challenge myself just a little extra. First- I used one of new In-Colors, Summer Starfruit, for my base and a mat. In case you haven't read it here before, I think this is the "Peach Parfait" of the new In-Colors. Still not sure I like it, but I'm determined to give it a shot. I think it looks best with really saturated colors and of course, our DSP's make it look pretty good...maybe it'll grow on me. Second, see that Baja Breeze seam binding.... OMGoodness! Do you know how many times I pulled that up and then stuck it back down? Soooo many! I'm sure it's hard for those of you that don't know me IRL to imagine the absolute "fits" it gave me to not have nice neat ruffles and folds. The OCD was in high gear let me just tell you! I kid you not, I spent at least 15 minutes laying that ribbon down. LOL!, Silly I know. Are you smiling yet? Boy-Howdy do I wish SU had kept the pleated ribbons. No muss, no fuss, no fits.  Oh well, I like how it turned out in the end.

If you're not smiling yet, look at this-


Yep, that's my studio assistant, Bitty Kitty, looking down at me from her perch at the top of my stamping area. Of course in her mind, she's not my assistant, I'm hers. She's just making sure I get my cards done to help pay for her mortgage. Those of you with cats will totally get that. Those without...just imagine what she's thinking of me and my meltdown over ribbon, that should make you smile!

I should have taken a closer picture of my little cupcake, but I was tired and forgot to. But if you look real close, you can see the added details. I first thought about getting out my paper crimper, but since it just retired I wanted to see what I could do to get the same look without it. I punched my cupcake base out of Crumbcake c/s, using my Cupcake Builder Punch, and then using my Simply Scored Tool, made score lines ever 1/8th inch. when I flipped the c/s over it looked like a cupcake wrapper. Score! I then swiped a sponge with some left over Soft Suede on it, over the ridges to make them stand out more. The "frosting" was stamped with Primrose Petals. I stamped off three times then stamped onto Very Vanilla c/s and punched it out with my Cupcake Builder Punch as well. I then outlined it with Tombow and then put swirls of Tombow in the center for "frosting swirls" and dipped it in a mixture of Vanilla embossing powder and Dazzling Diamonds. I can't find the blog link to it but I think it was Selene Kempton's blog that had a project using this combination and called it Frosting. Works great like this, but also with heat embossing. I popped the frosting portion up with Dimensionals.

Here's the inside-


I inked up my new set Friendly Phrases in Midnight Muse and stamped onto a piece of Very Vanilla c/s. I then stamped my cupcake using Crumb Cake and Primrose Petal, both of which were stamped off first. Next, I let Tink have her way with the frosting. No dimensional frosting here like the front of the card, just enough to make it shine (and smell good).

Well, that's all I have for you today. I hope you liked today's card and I really hope it inspires you to re-try something you wish you had done a little more to your liking before. I'd love to hear what you think. Your comments always make my day. Friends and Followers are always welcome too! :)

Thanks so much for stopping by. I hope you have an Amazing day filled with lots of smiles. Till next time-

Remember- Life is often more about the storms, than the peace they seek to overwhelm. It's not about Waiting for the storms to pass, but Learning to Dance in the rain.

Be Safe,
Shan
Pin It